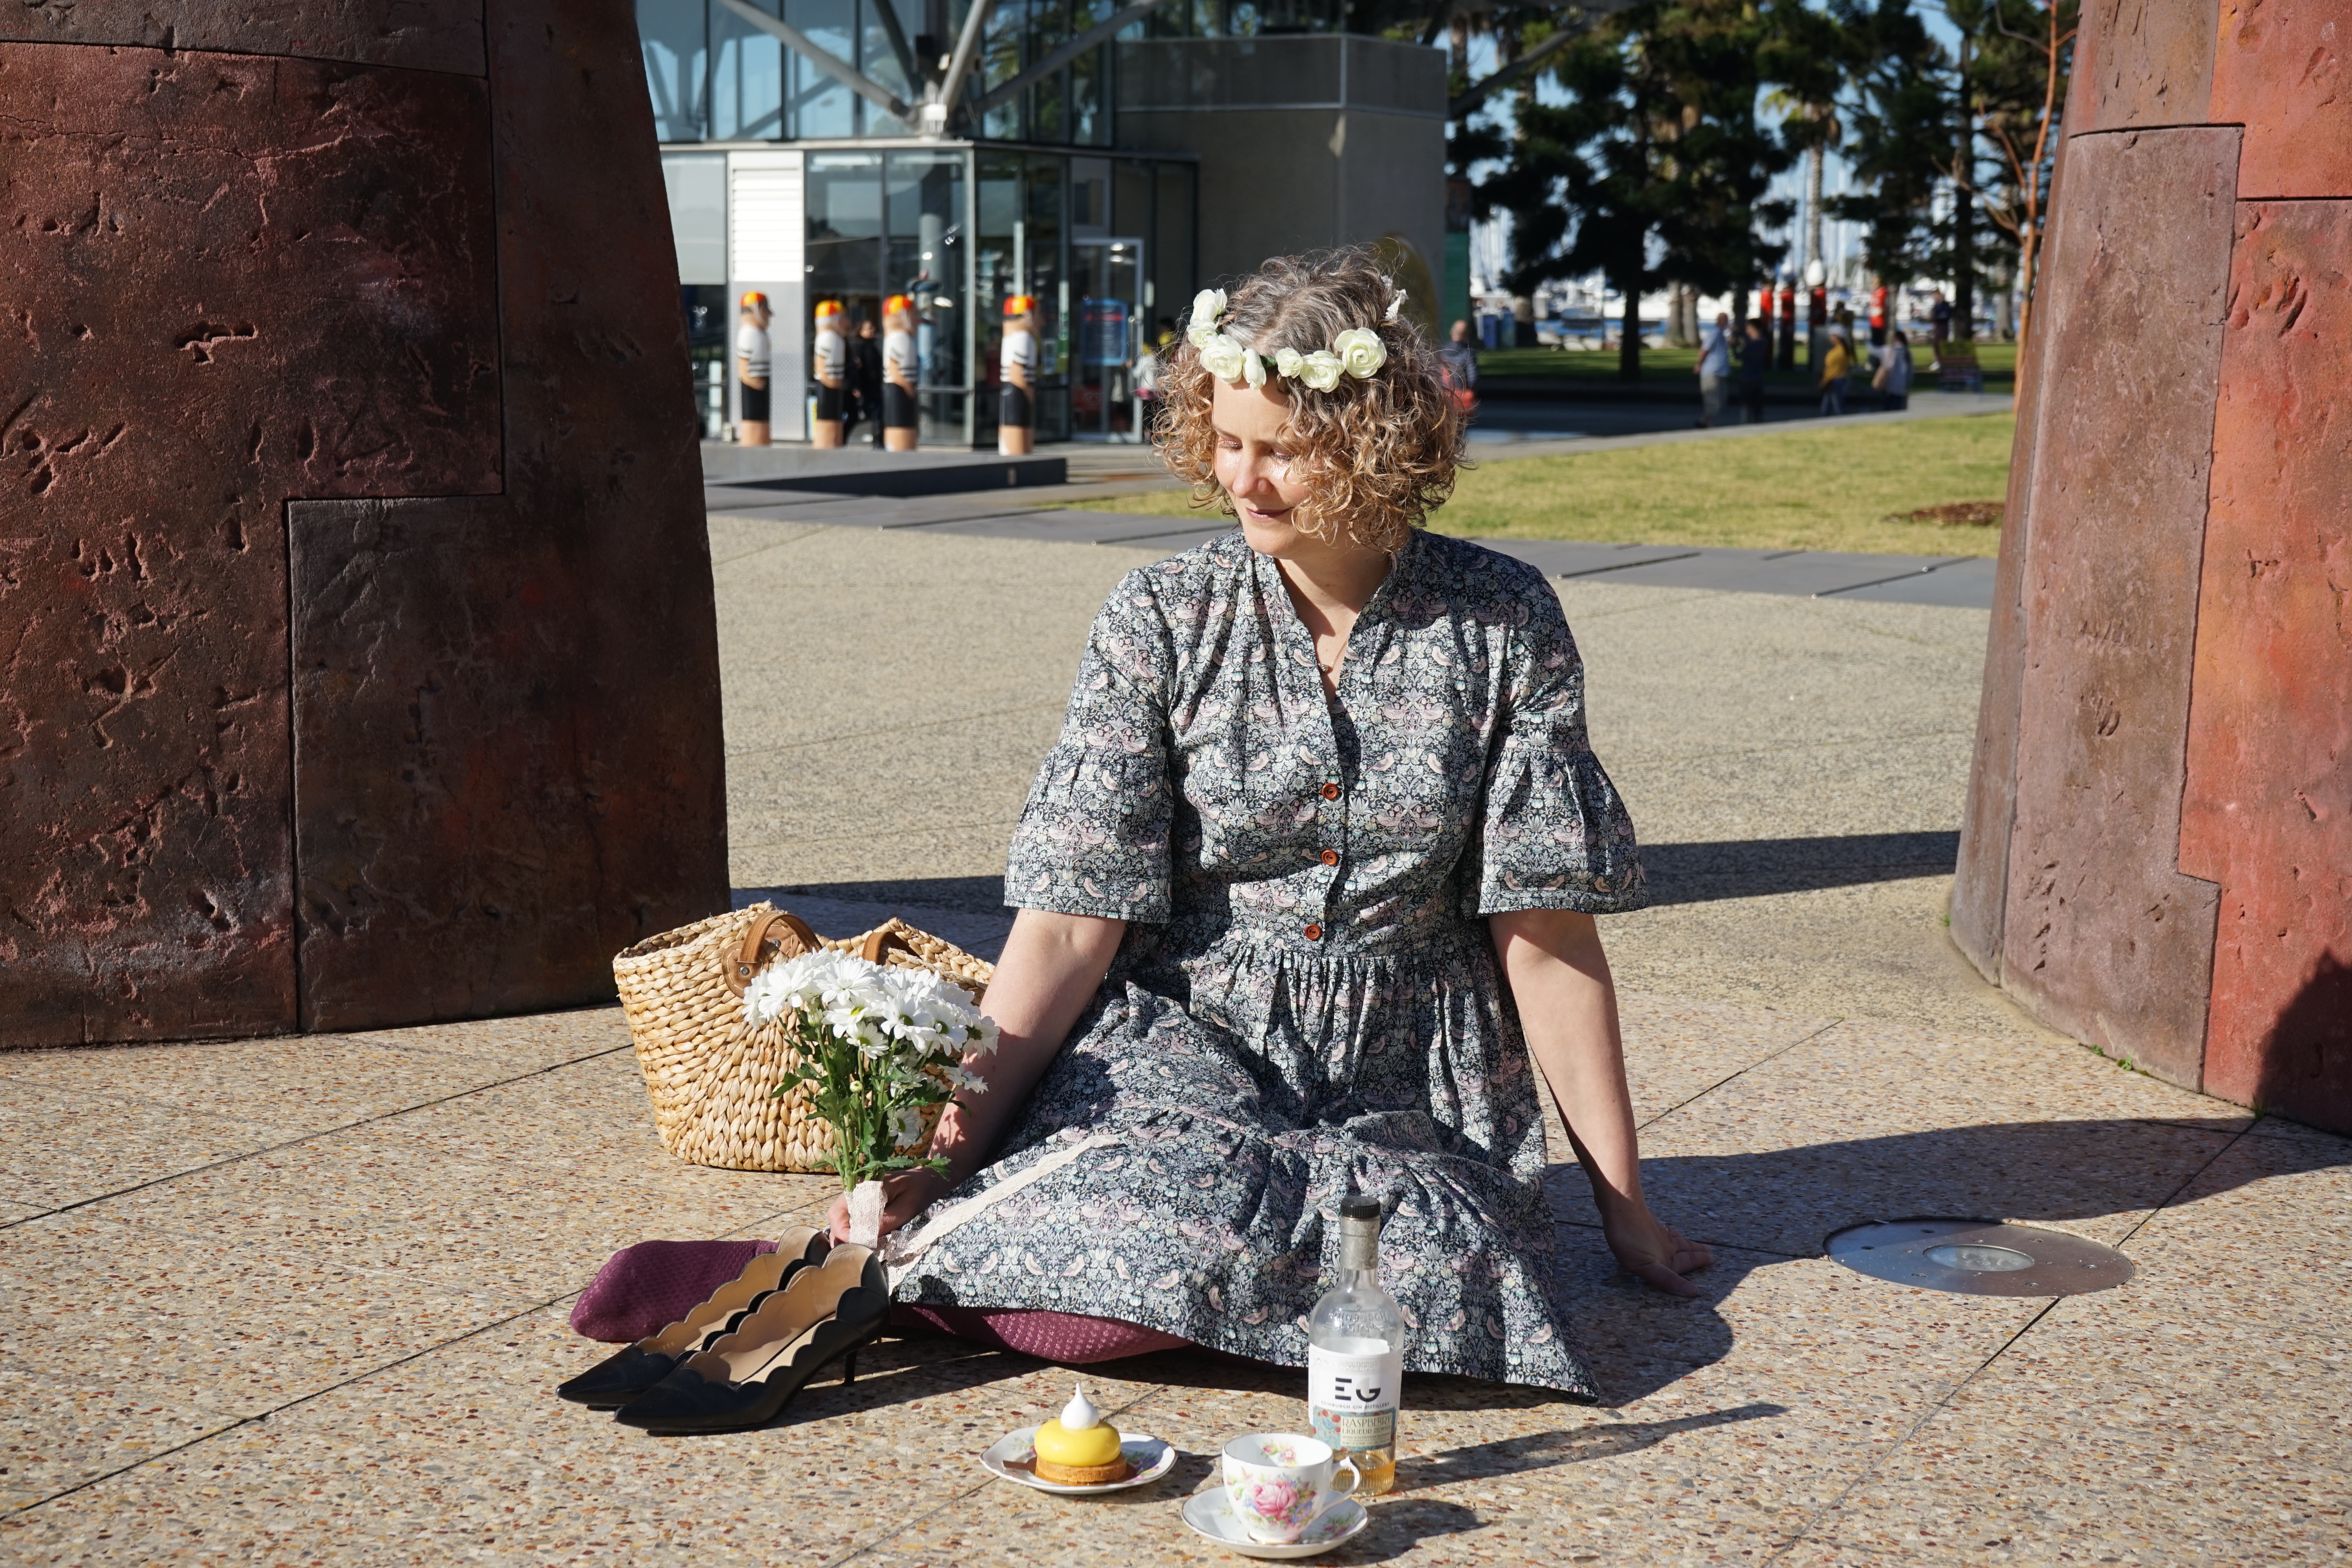
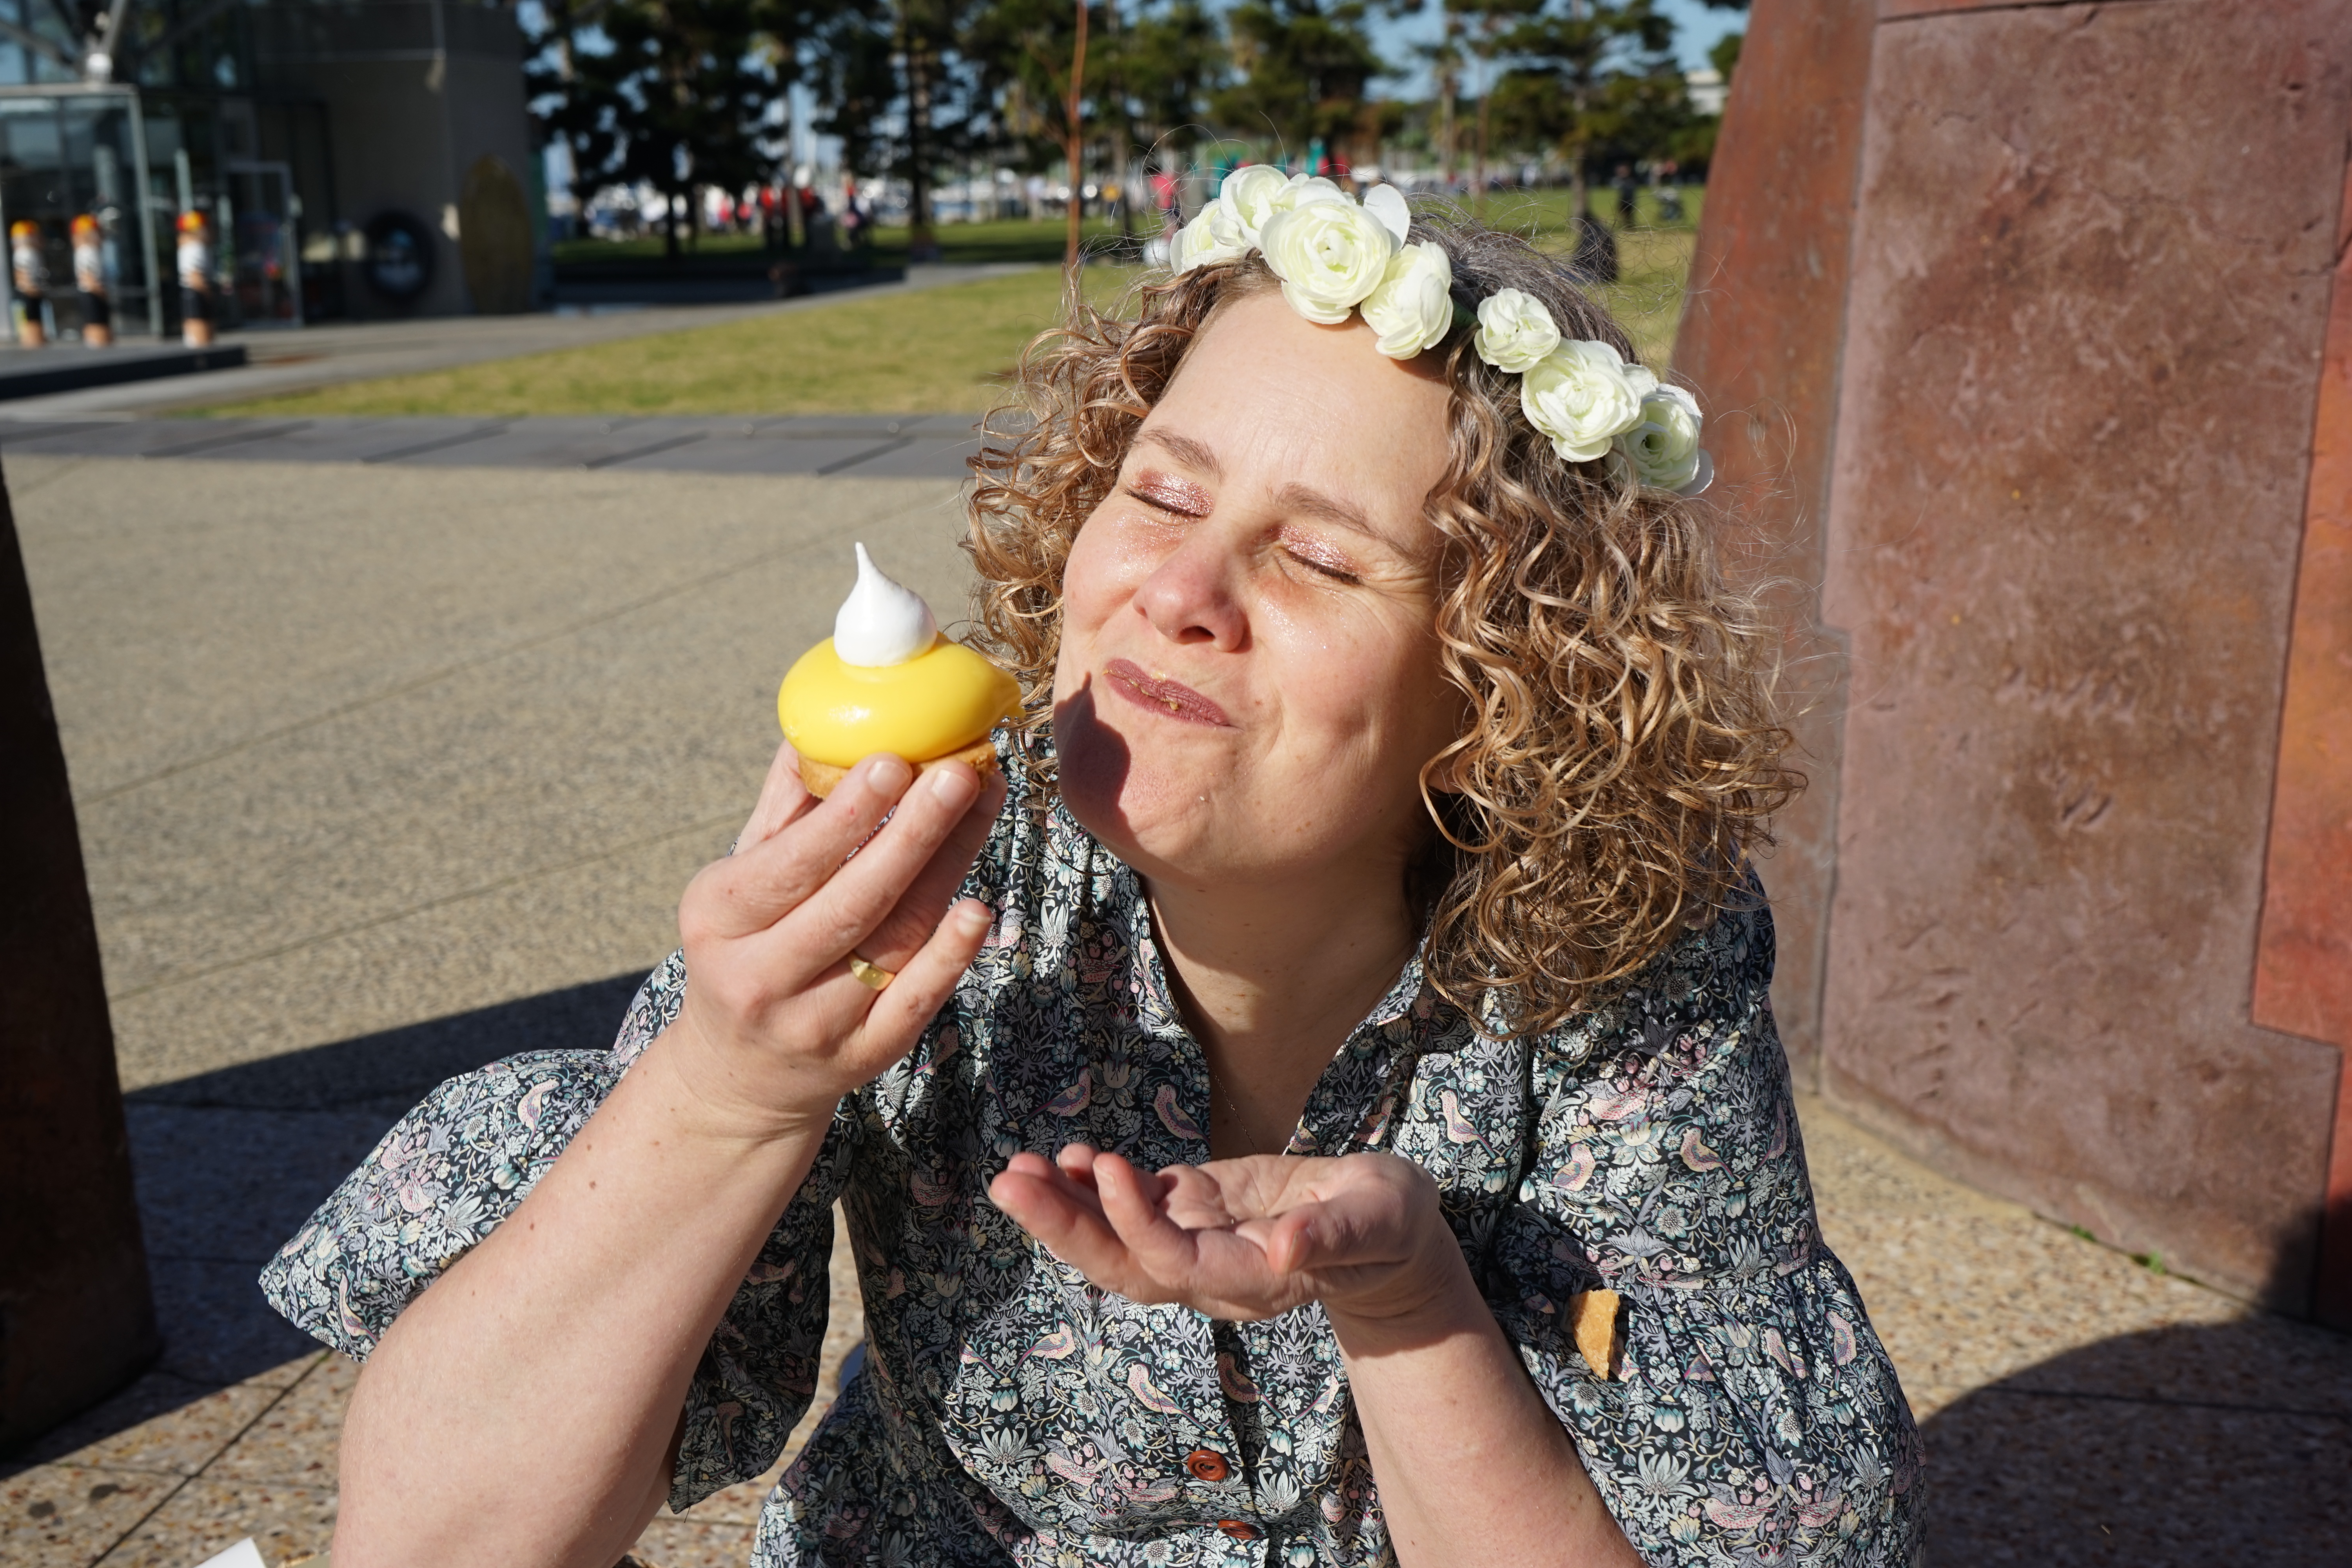
Today I attended the Sew Melbourne Garden Party, held at the beautiful Studley Park Boathouse in Kew. This year’s event had a slightly different feel—instead of the usual picnic in the botanical gardens, we were treated to catering and even had access to a bar, which, in my opinion, was a wonderful touch.
The day began with birthday drinks and cake with Nicole and friends, which was such a lovely way to ease into the festivities. From there, we made our way to the event, and it was an absolute joy to see so many familiar faces alongside plenty of new ones. As always, the frocks were nothing short of fabulous—there’s something so special about being surrounded by people who truly understand the magic of a handmade wardrobe.
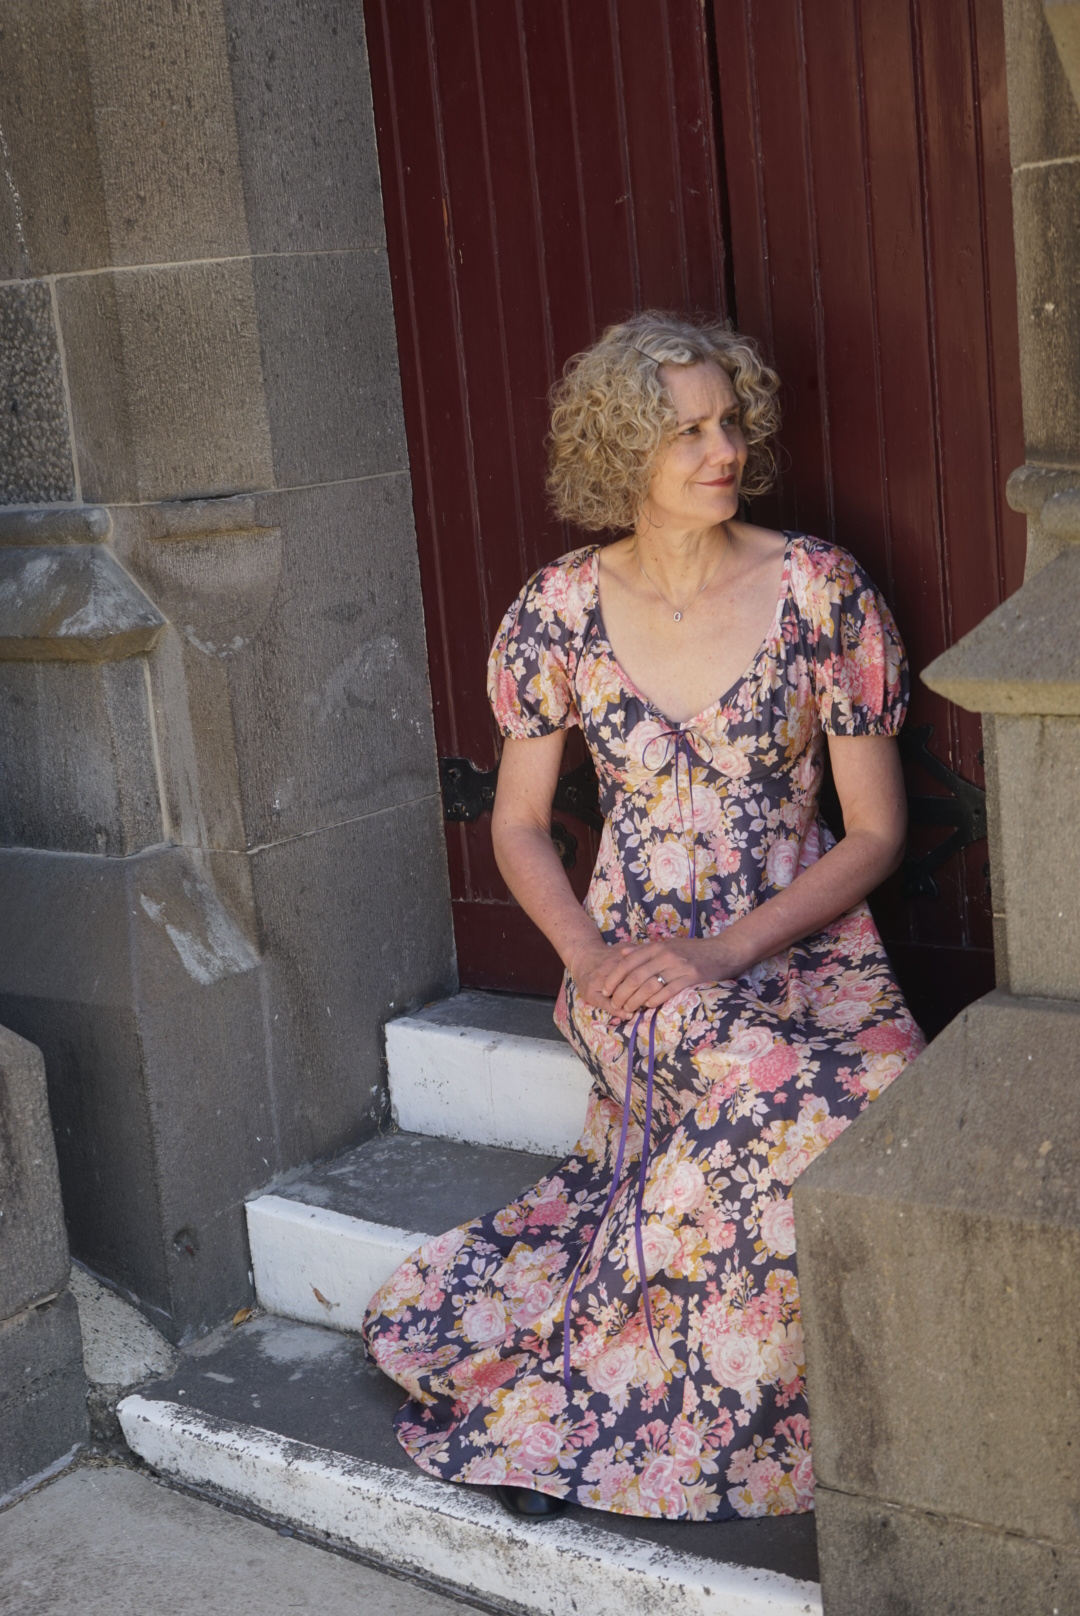
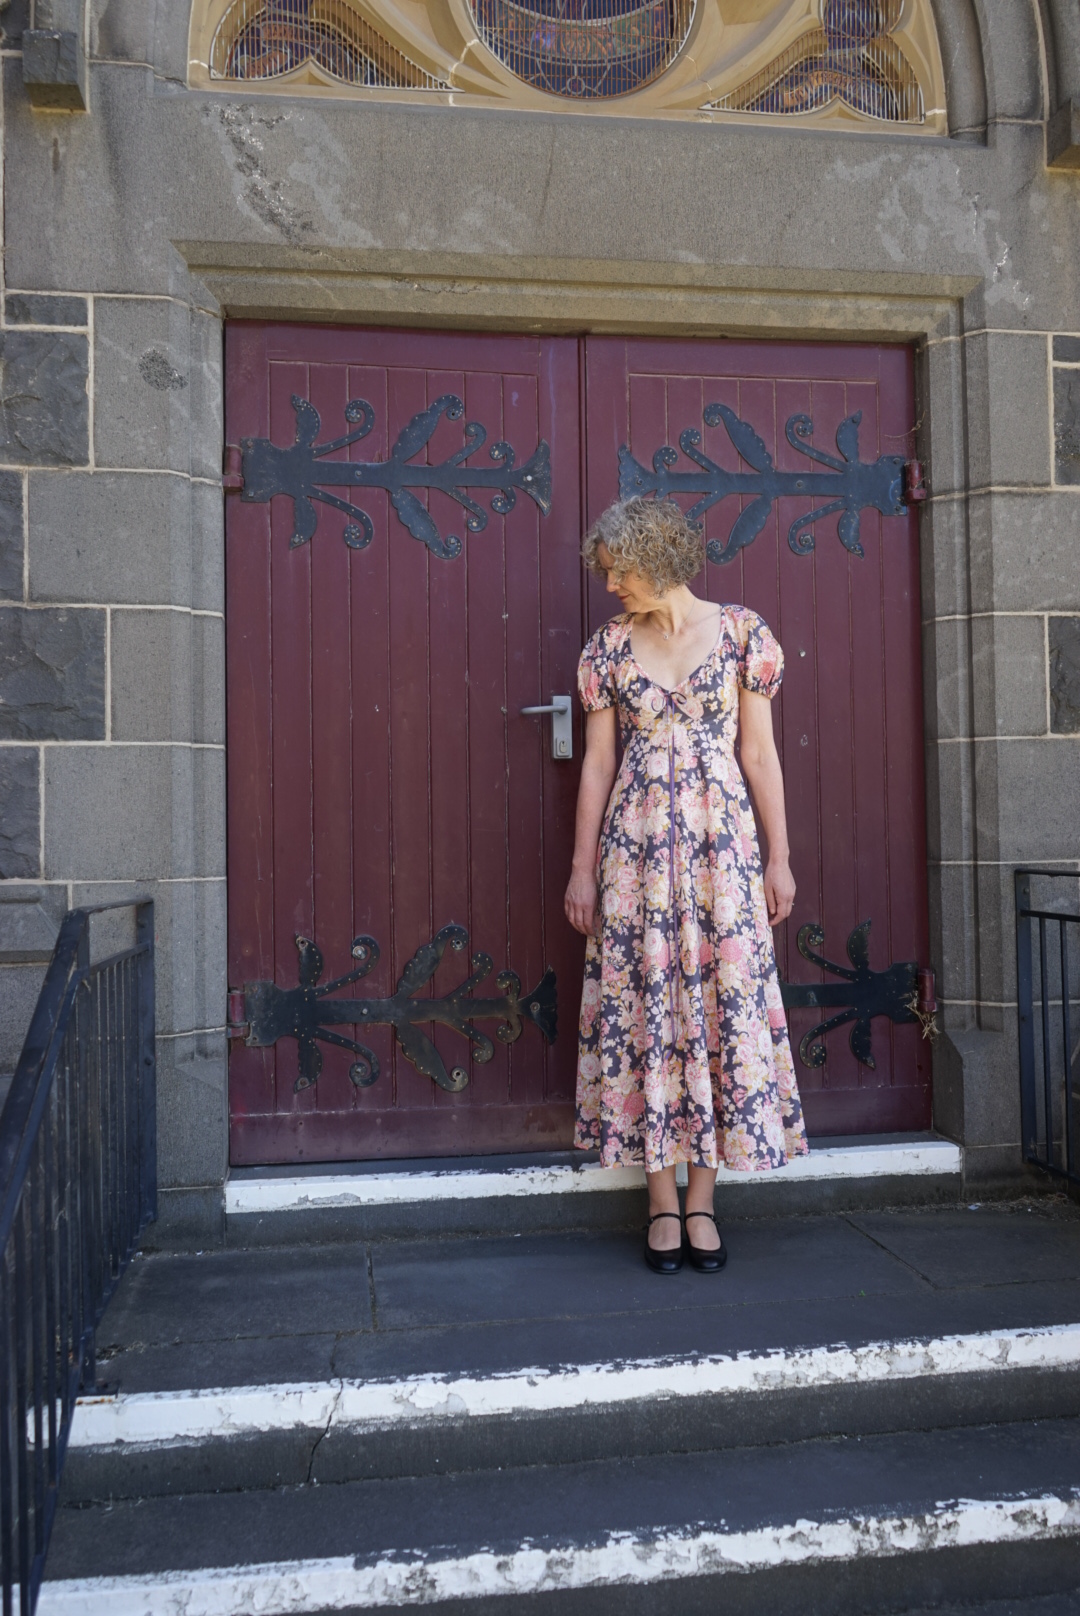
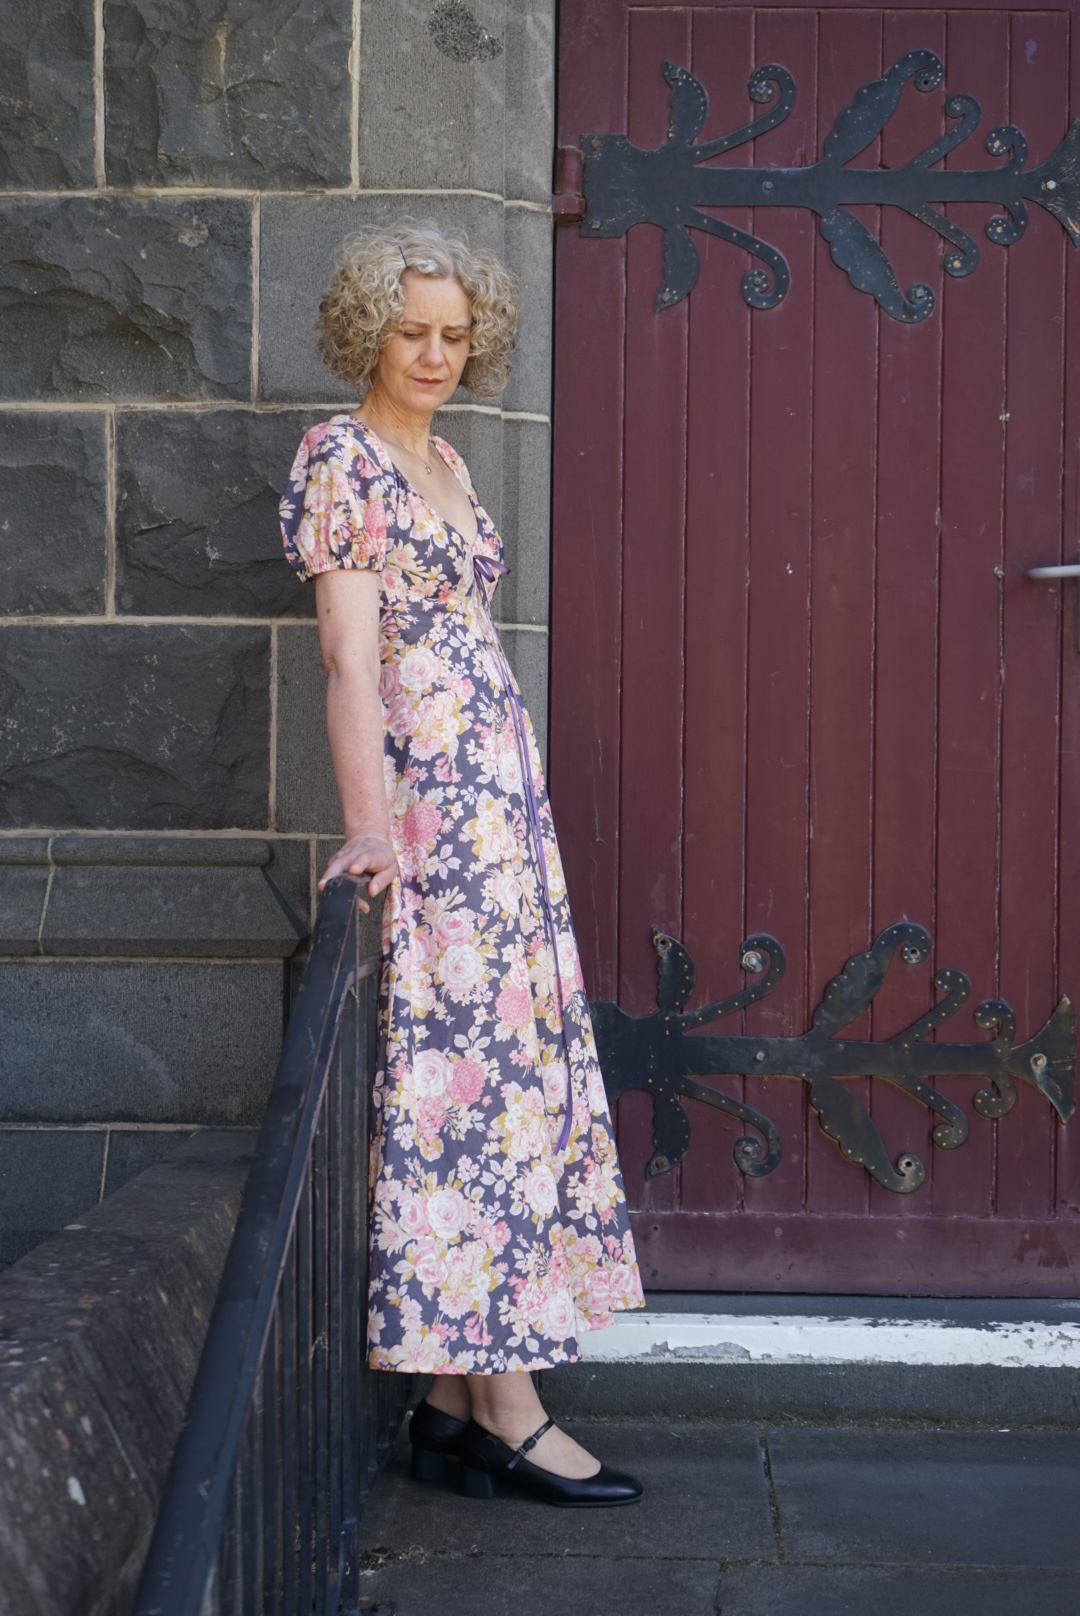
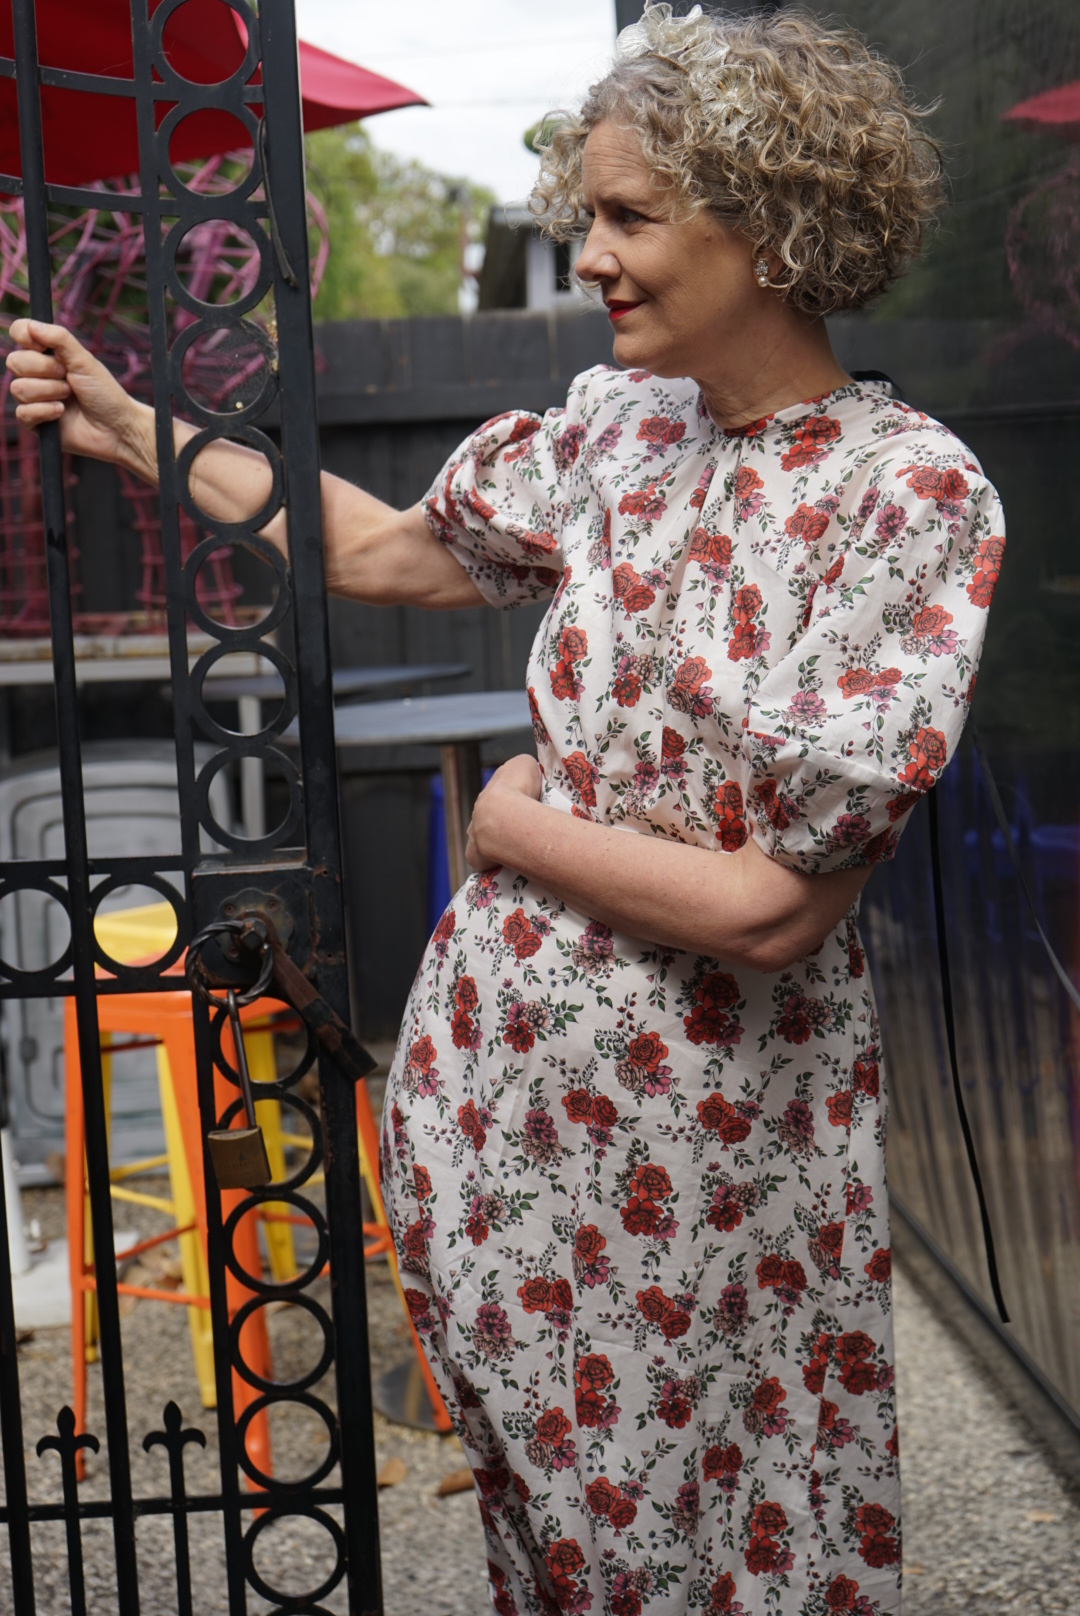
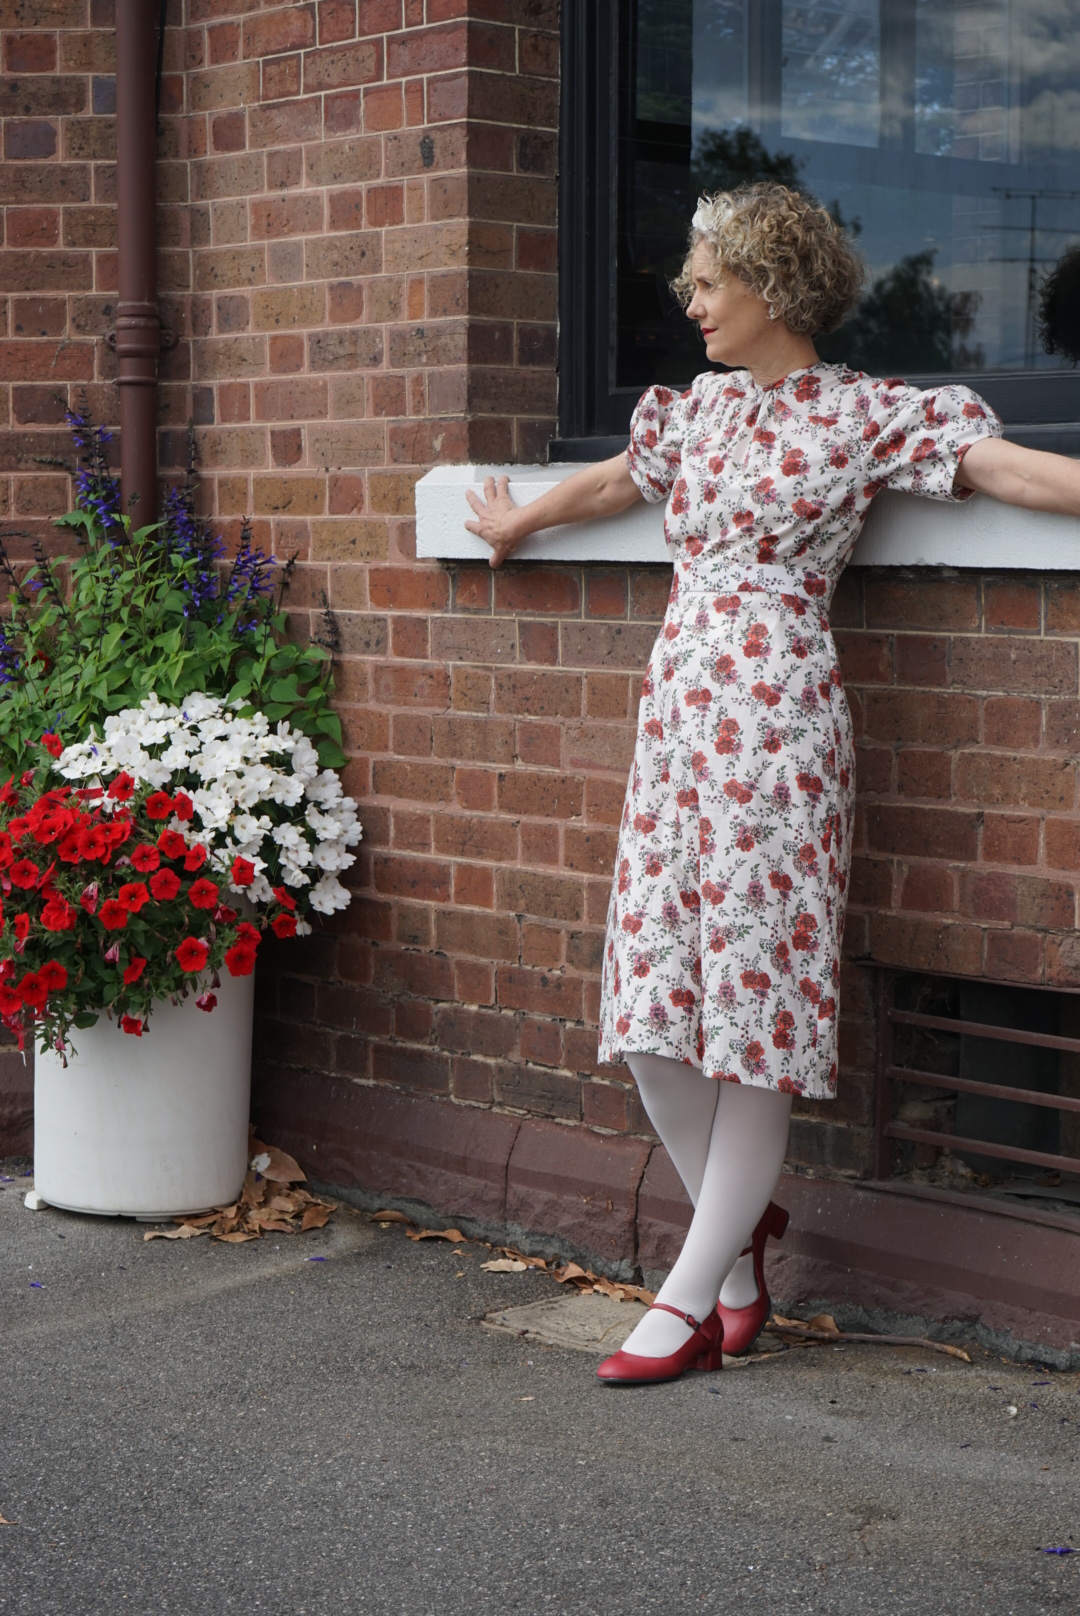
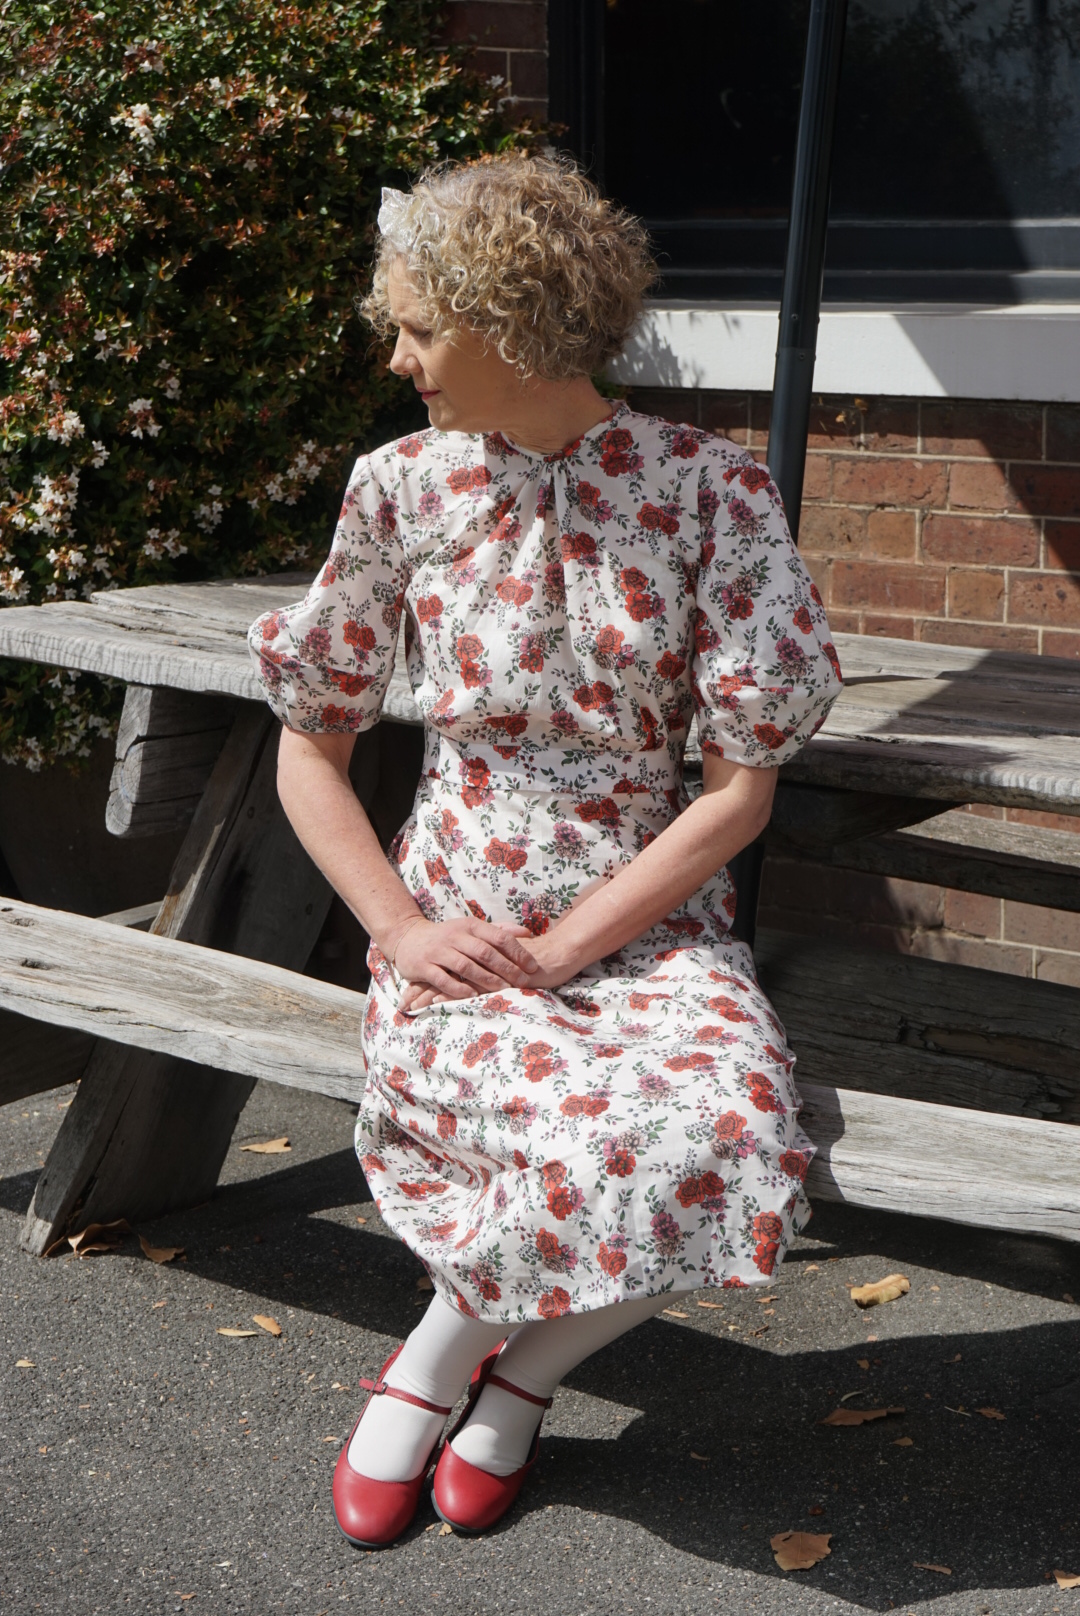
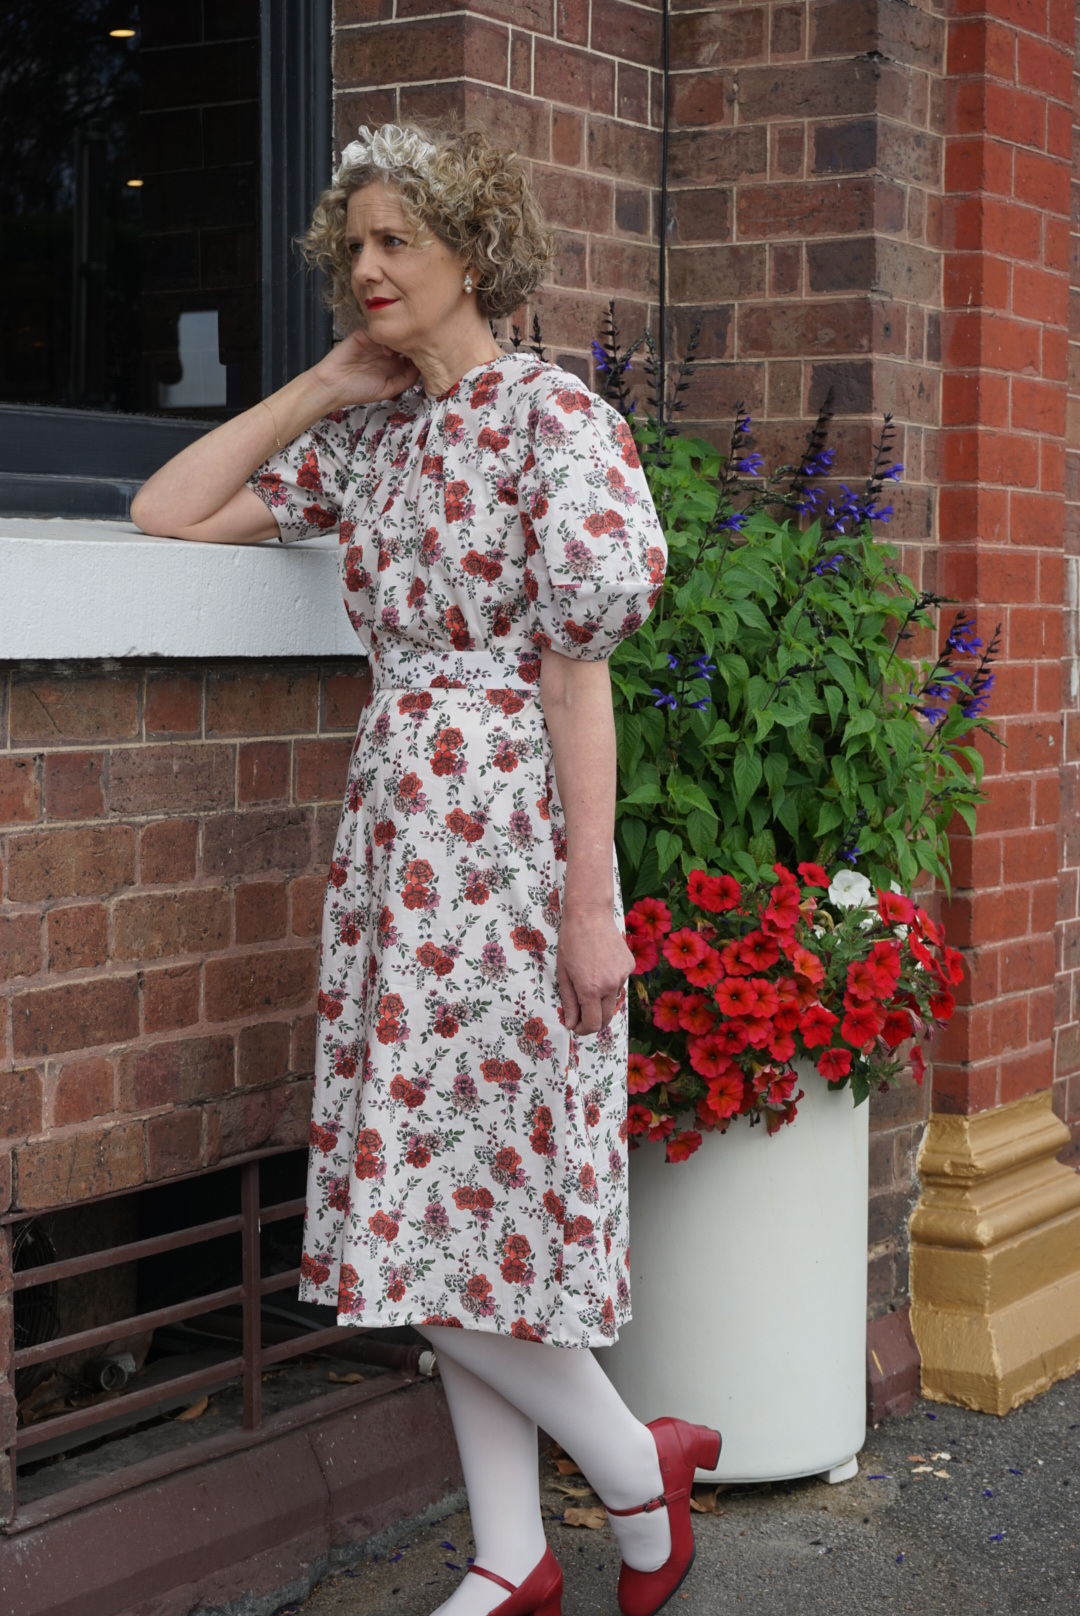
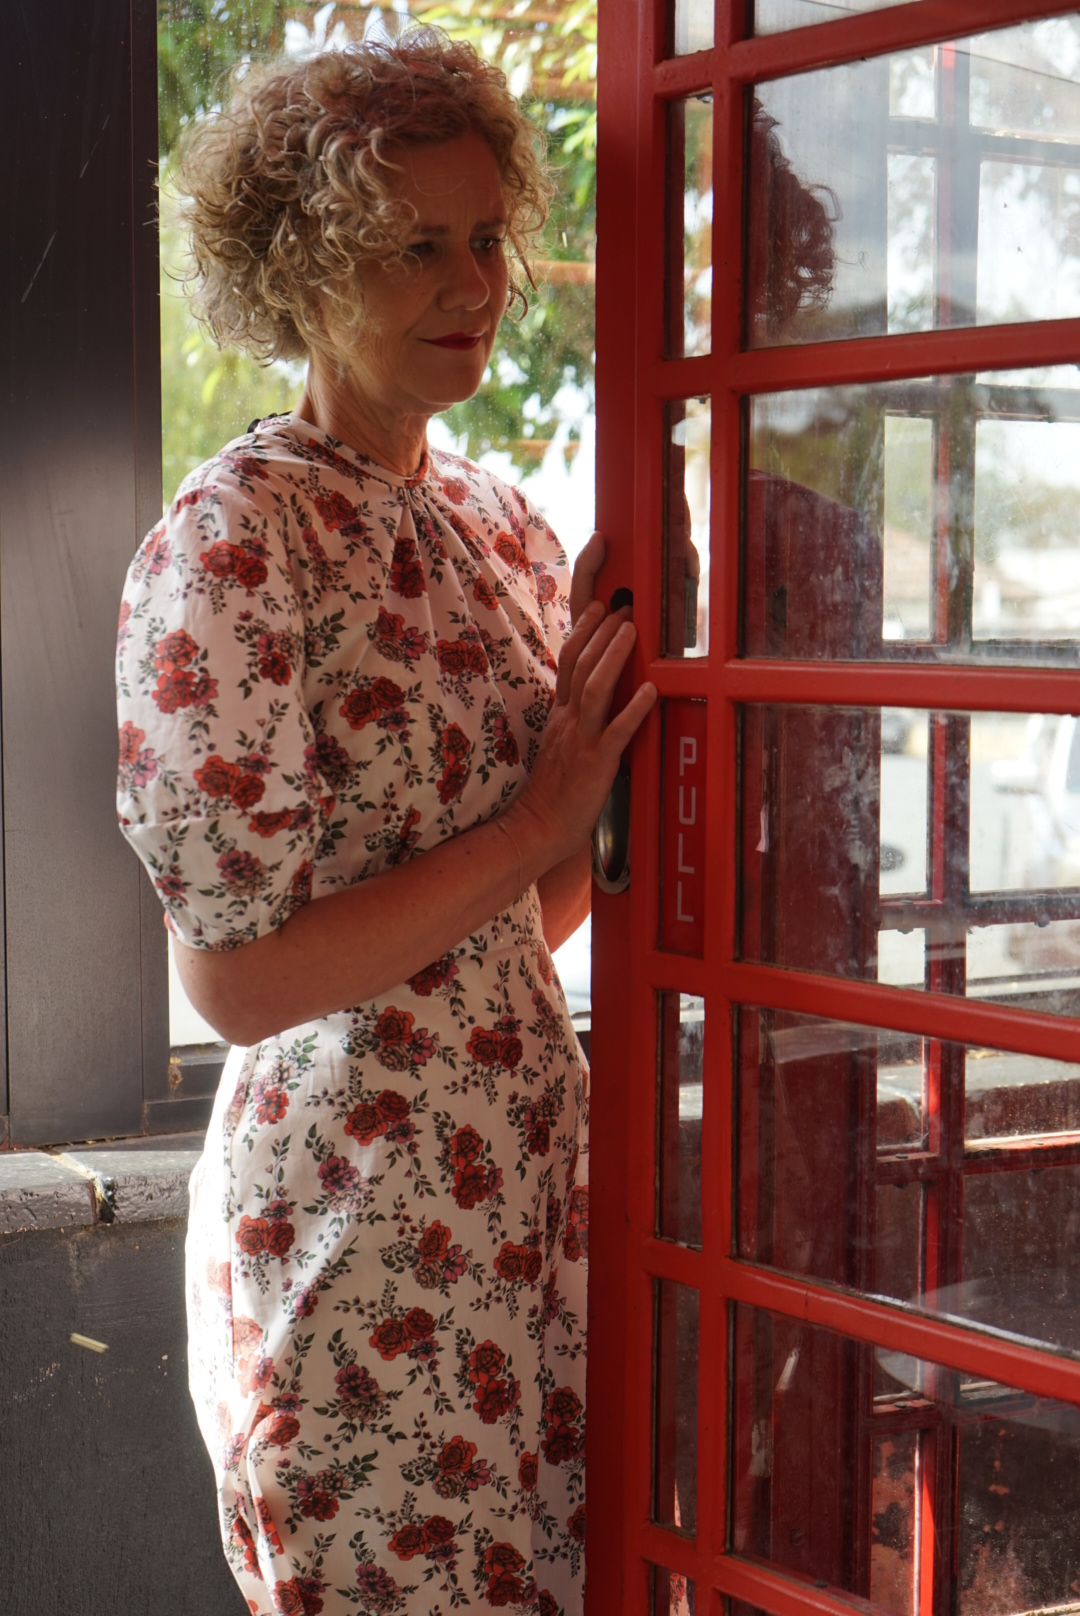
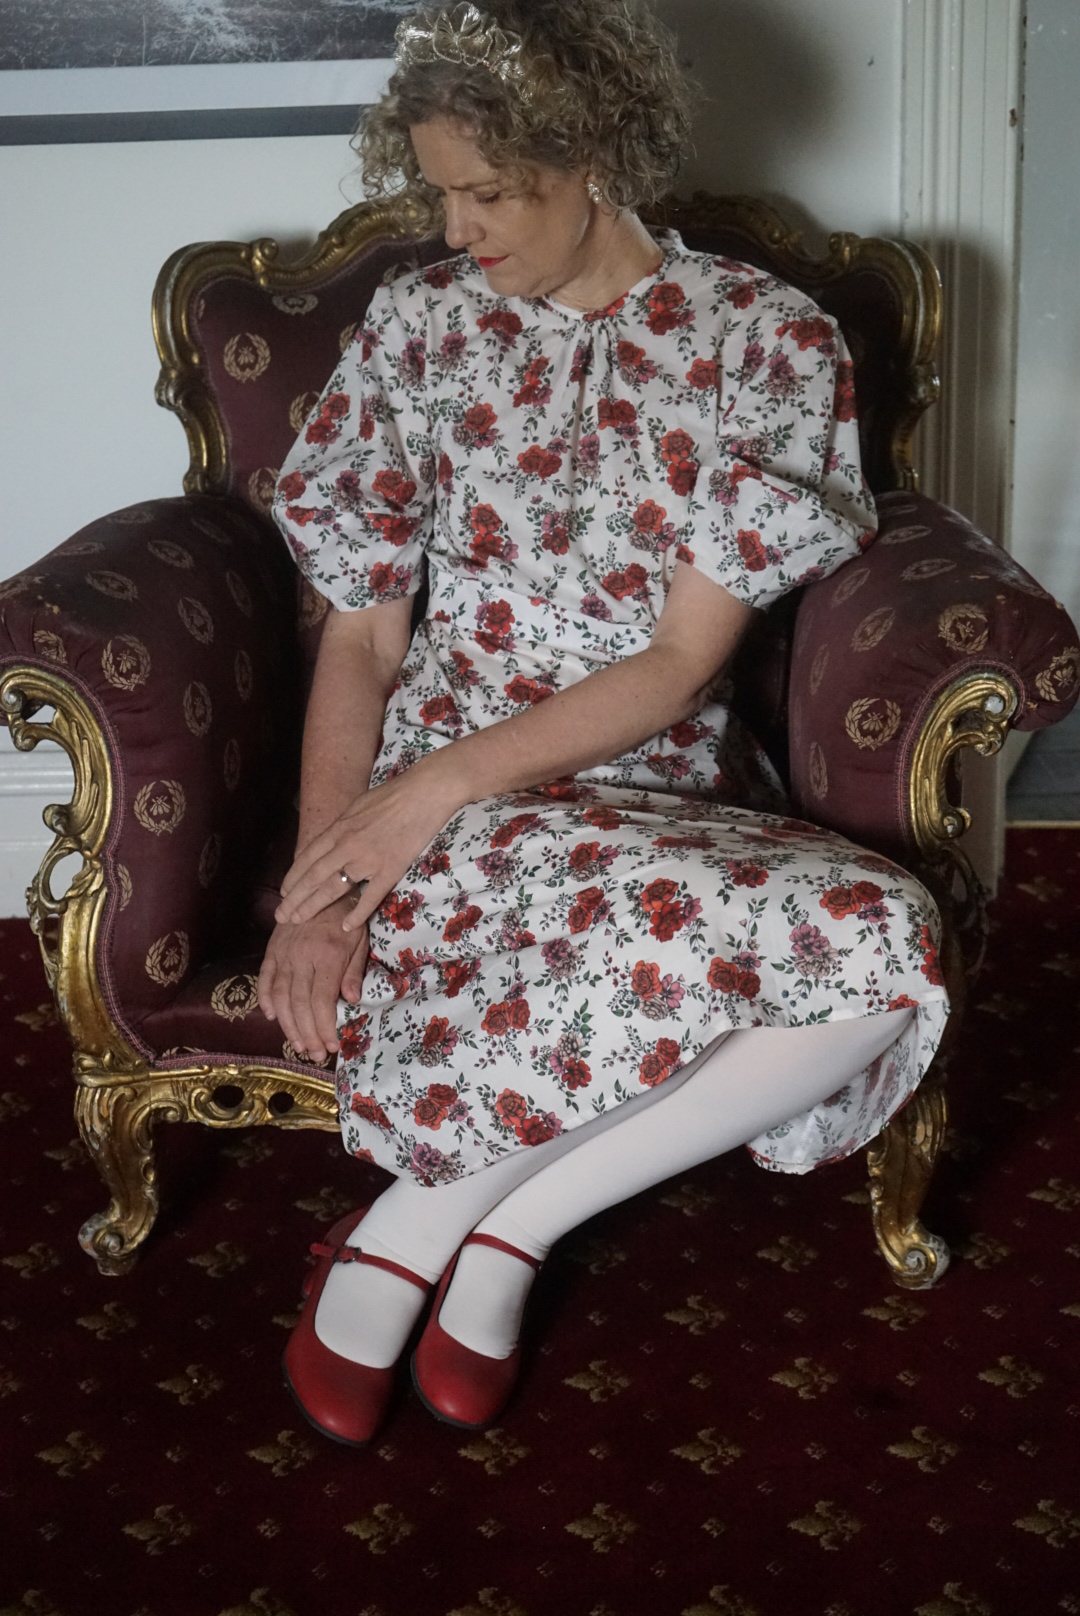
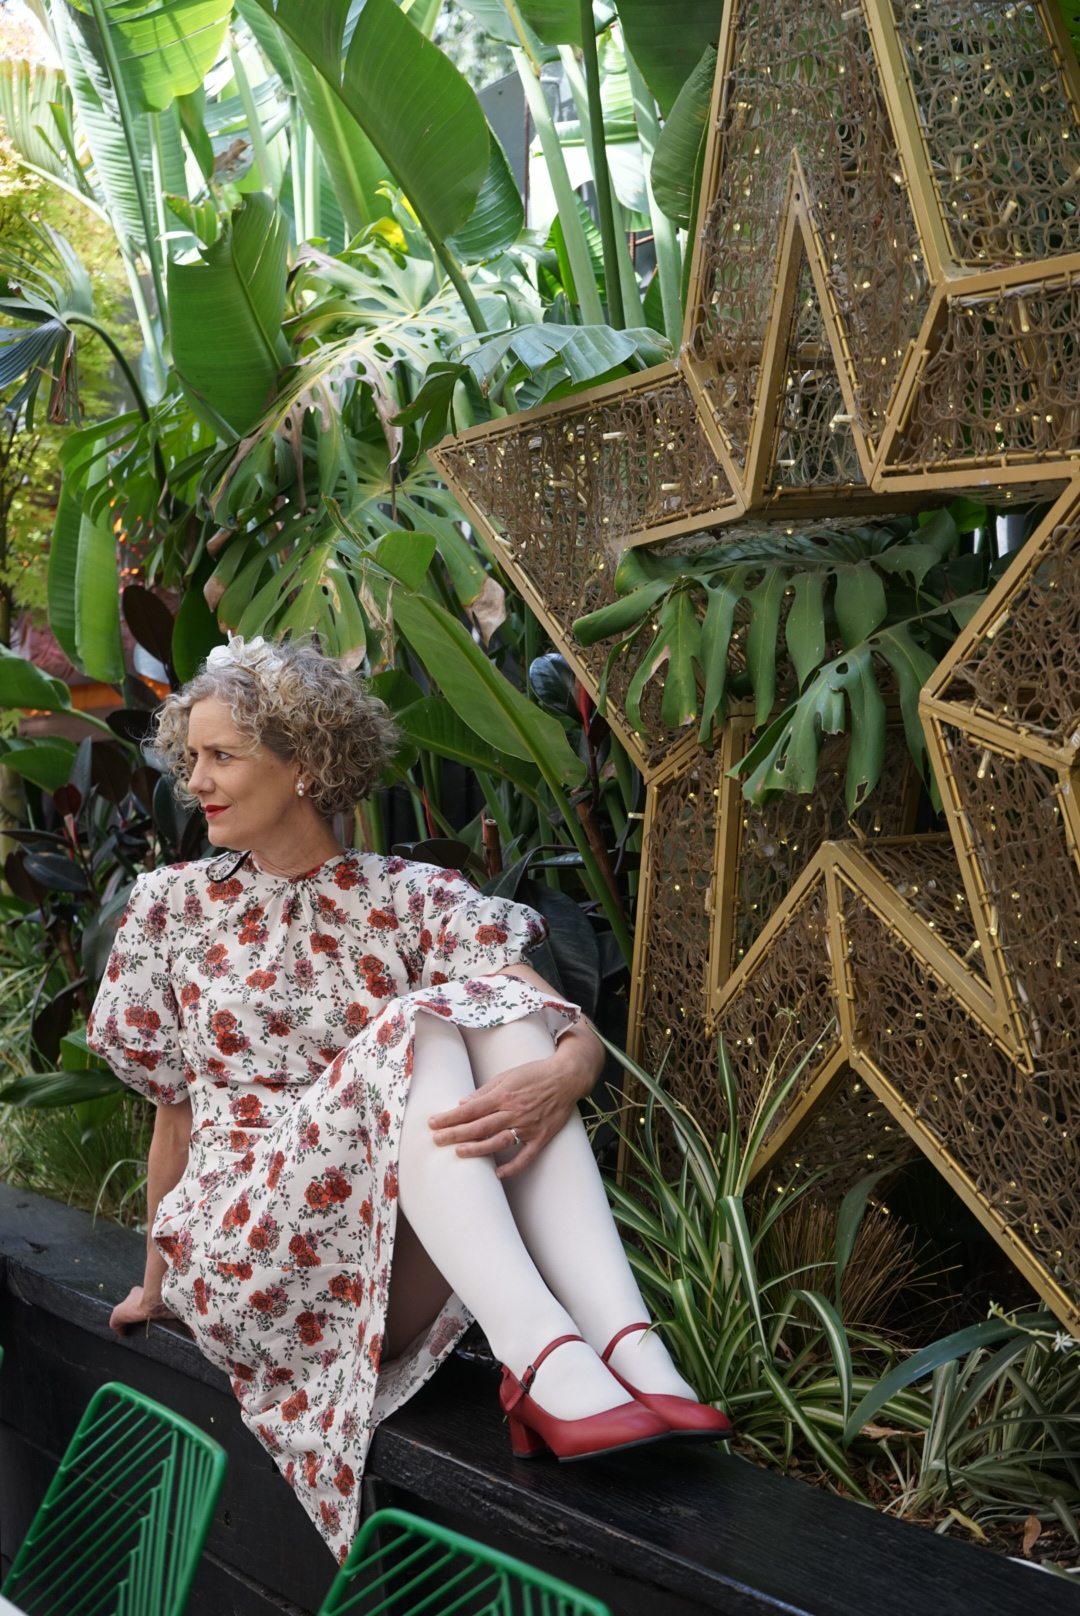
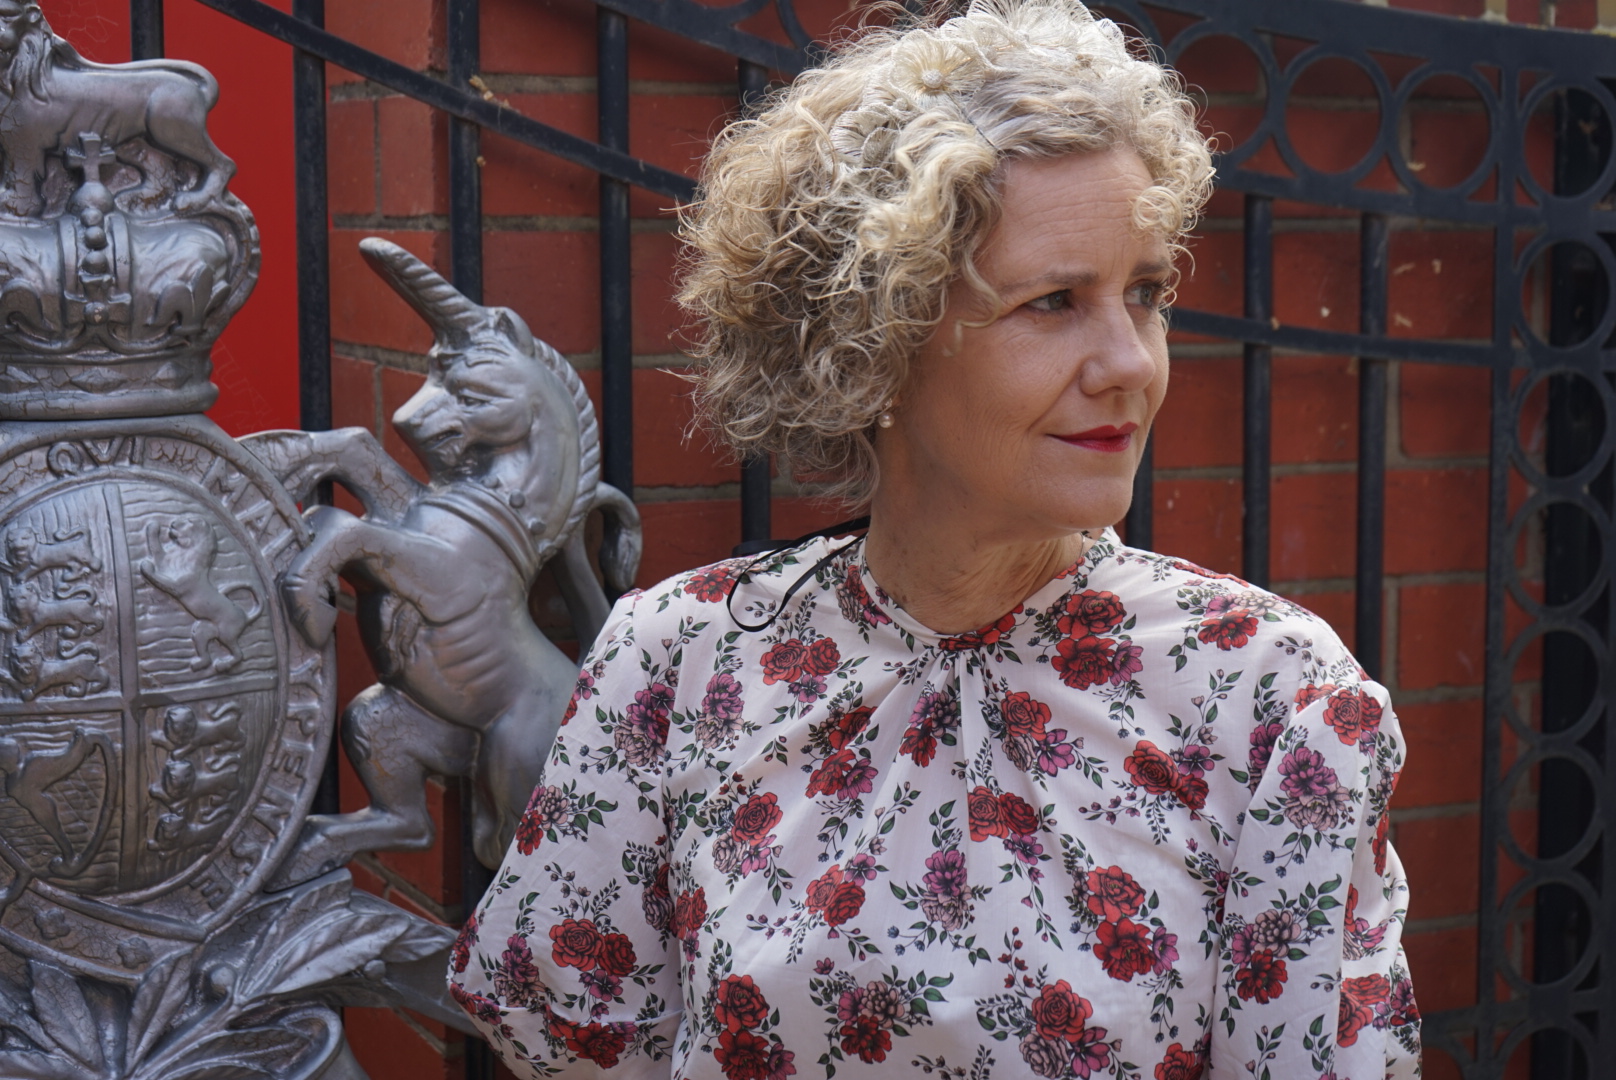
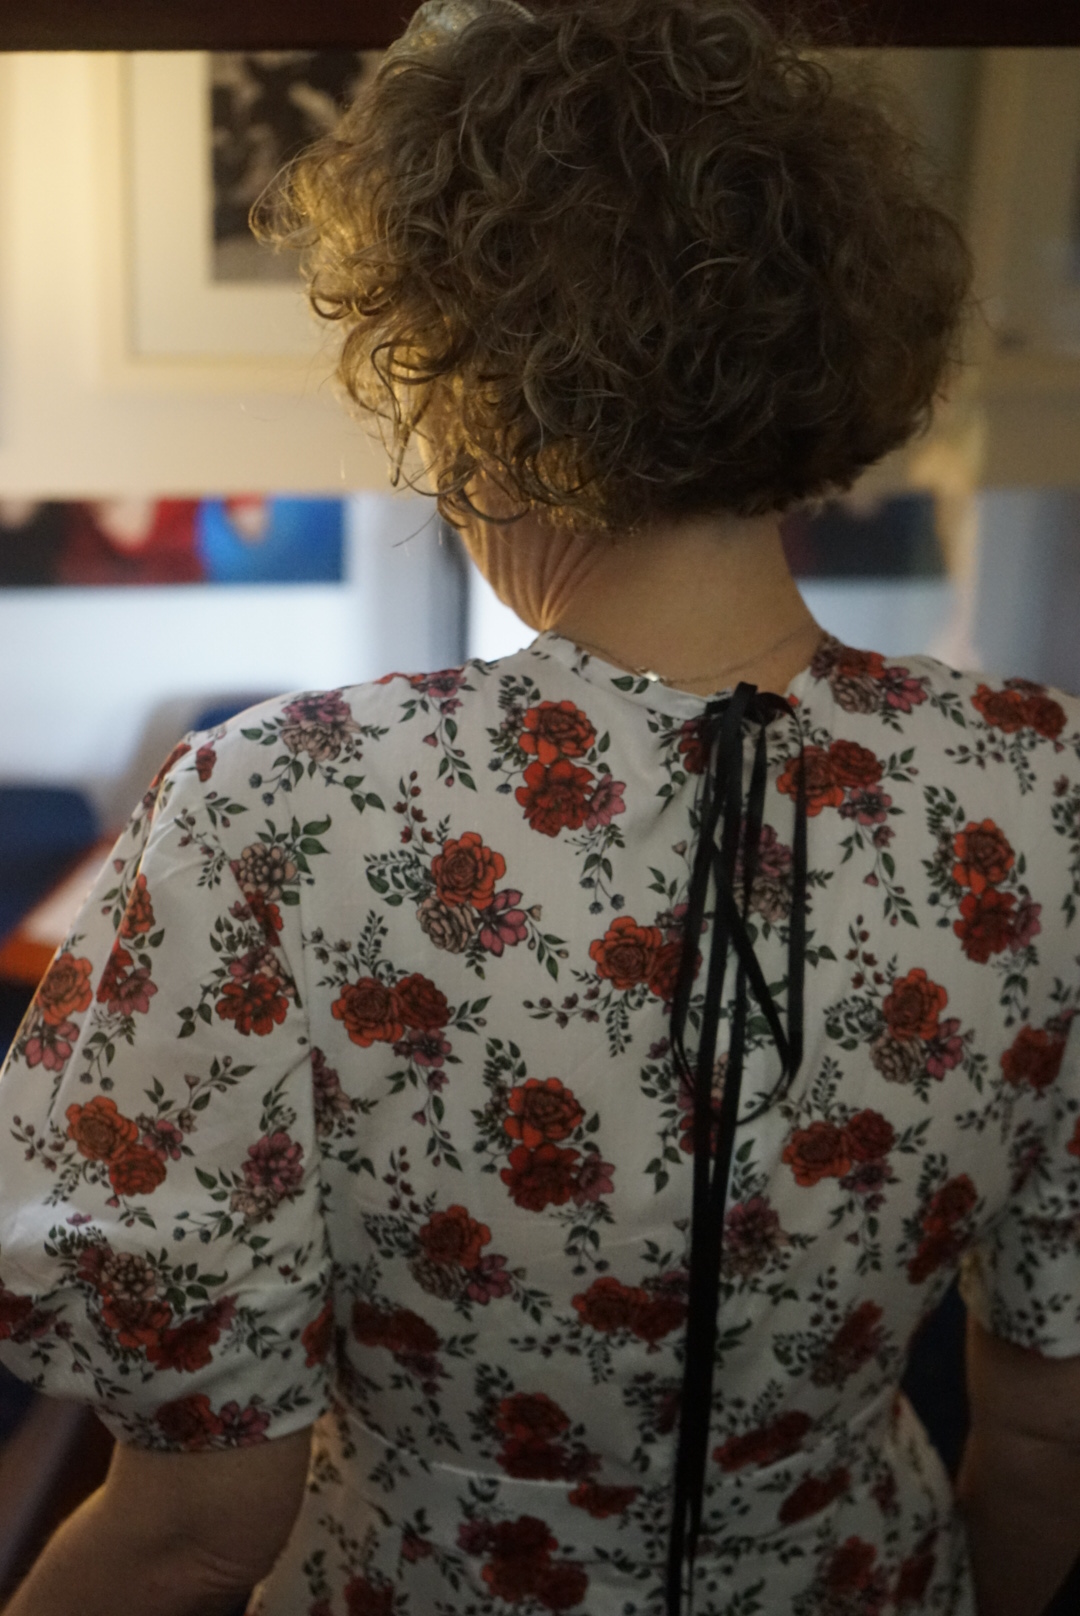
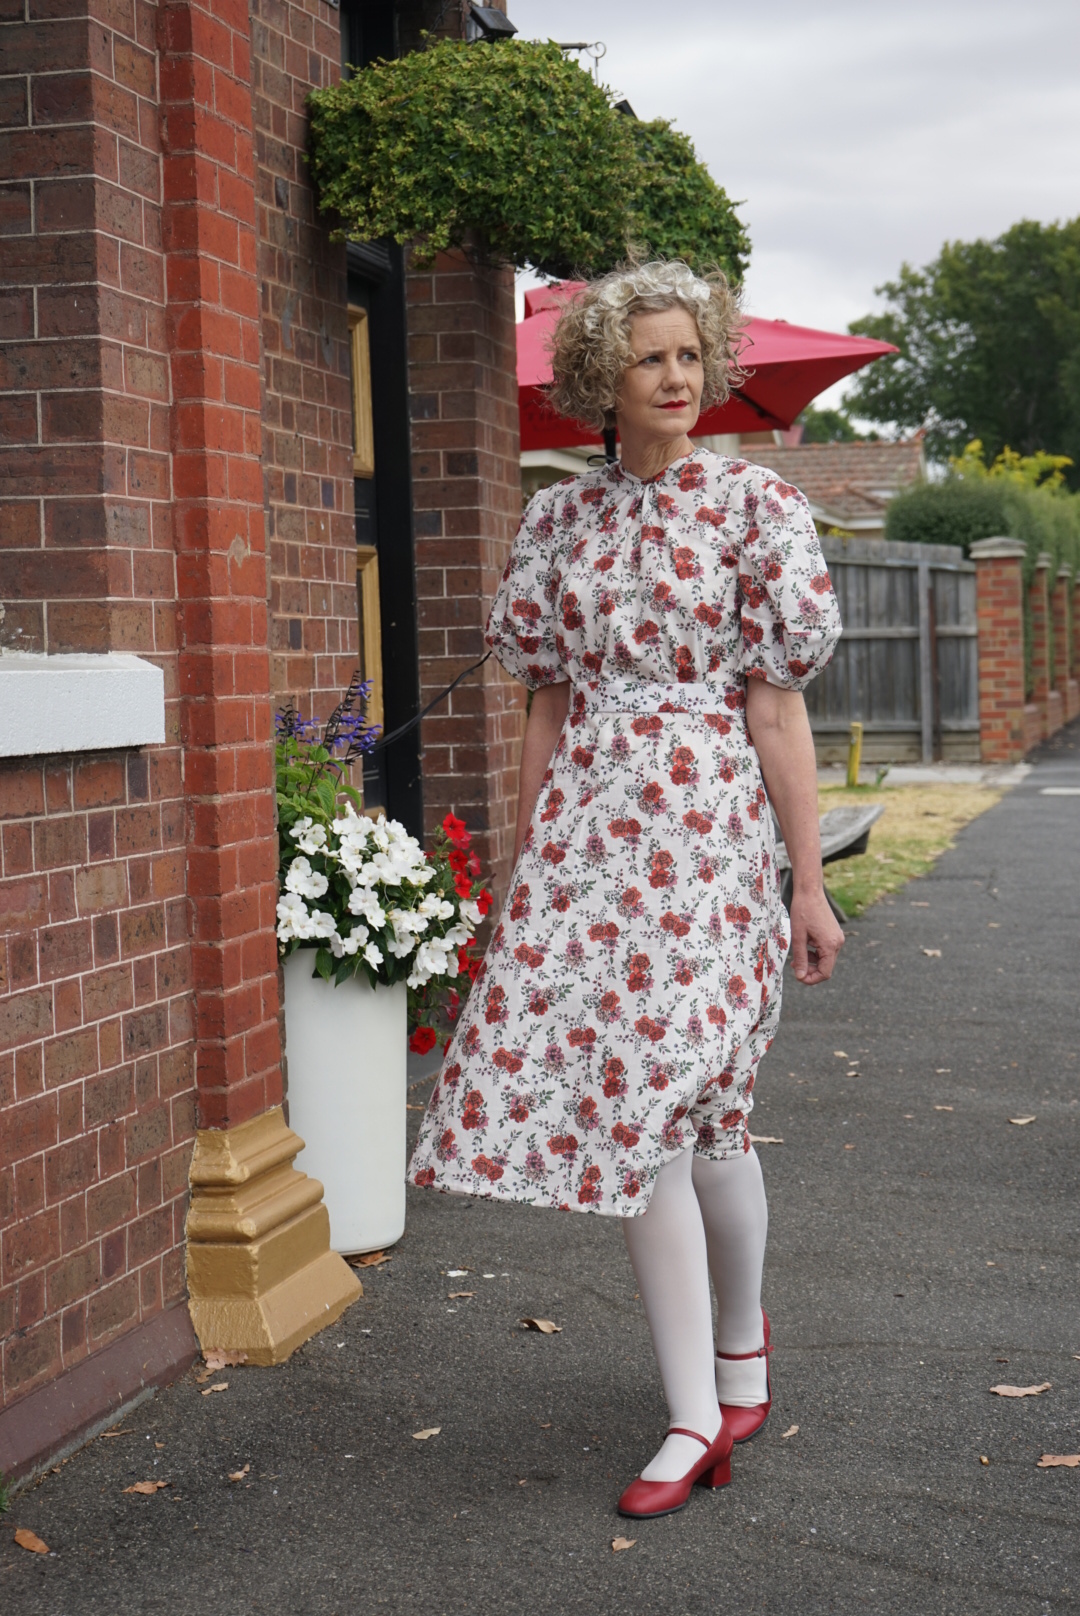
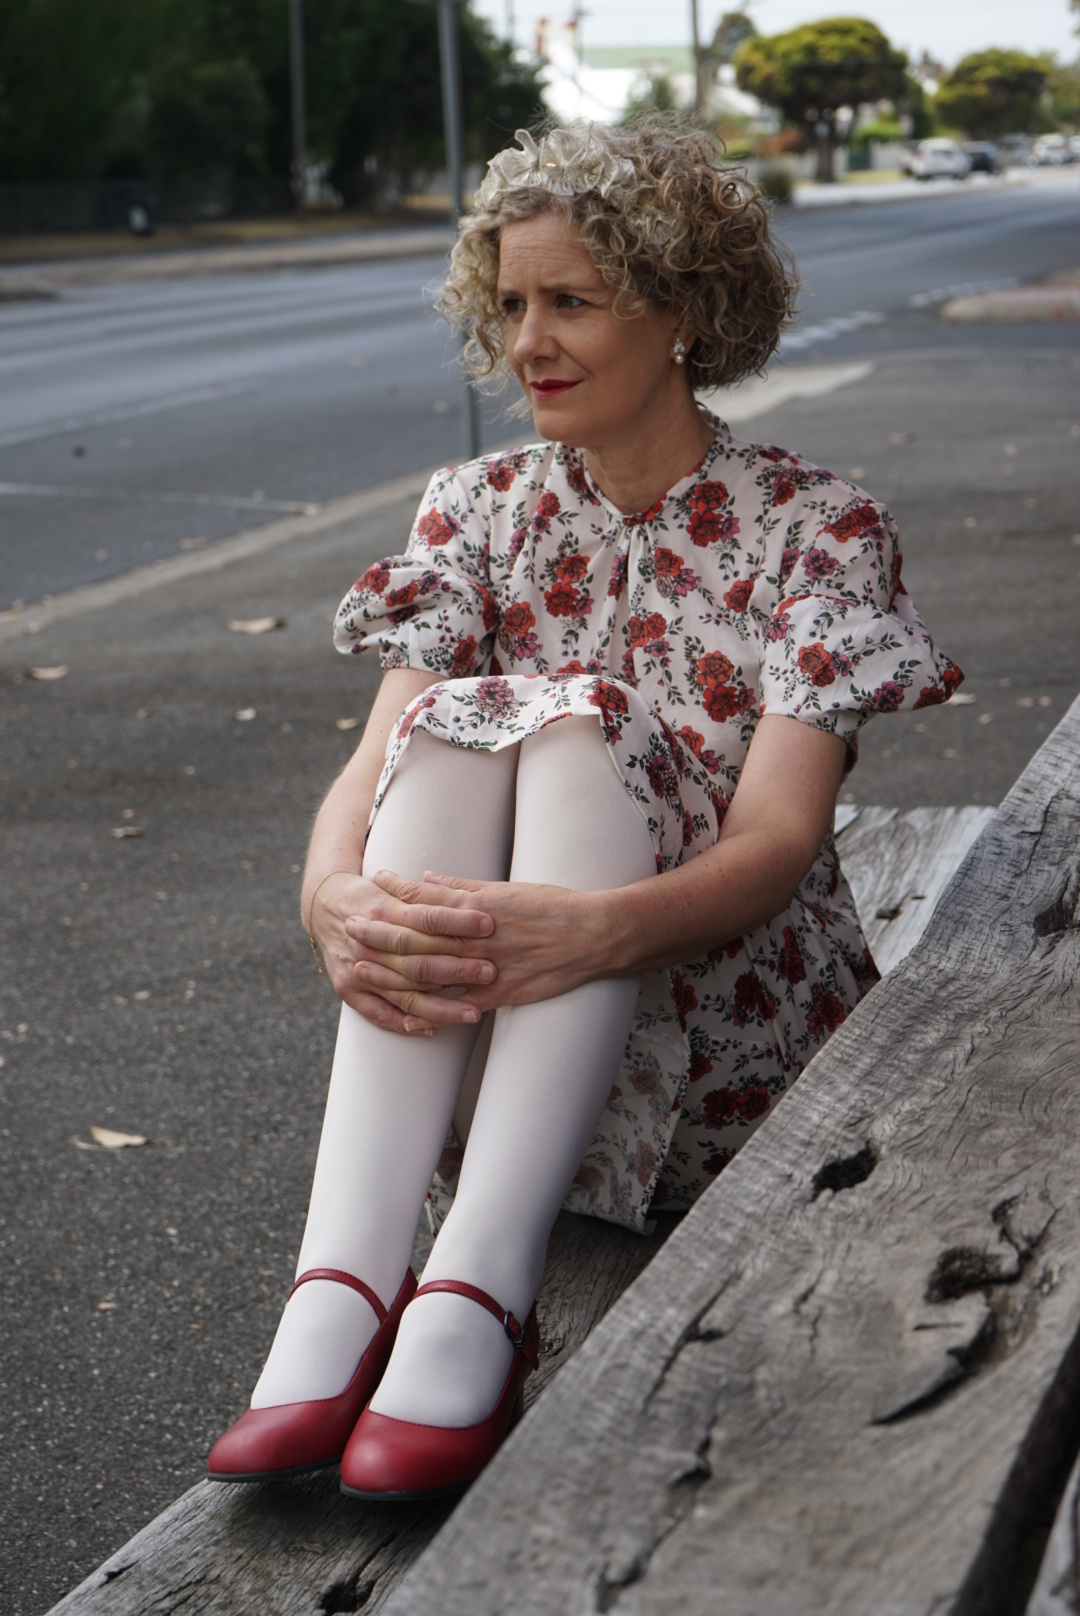
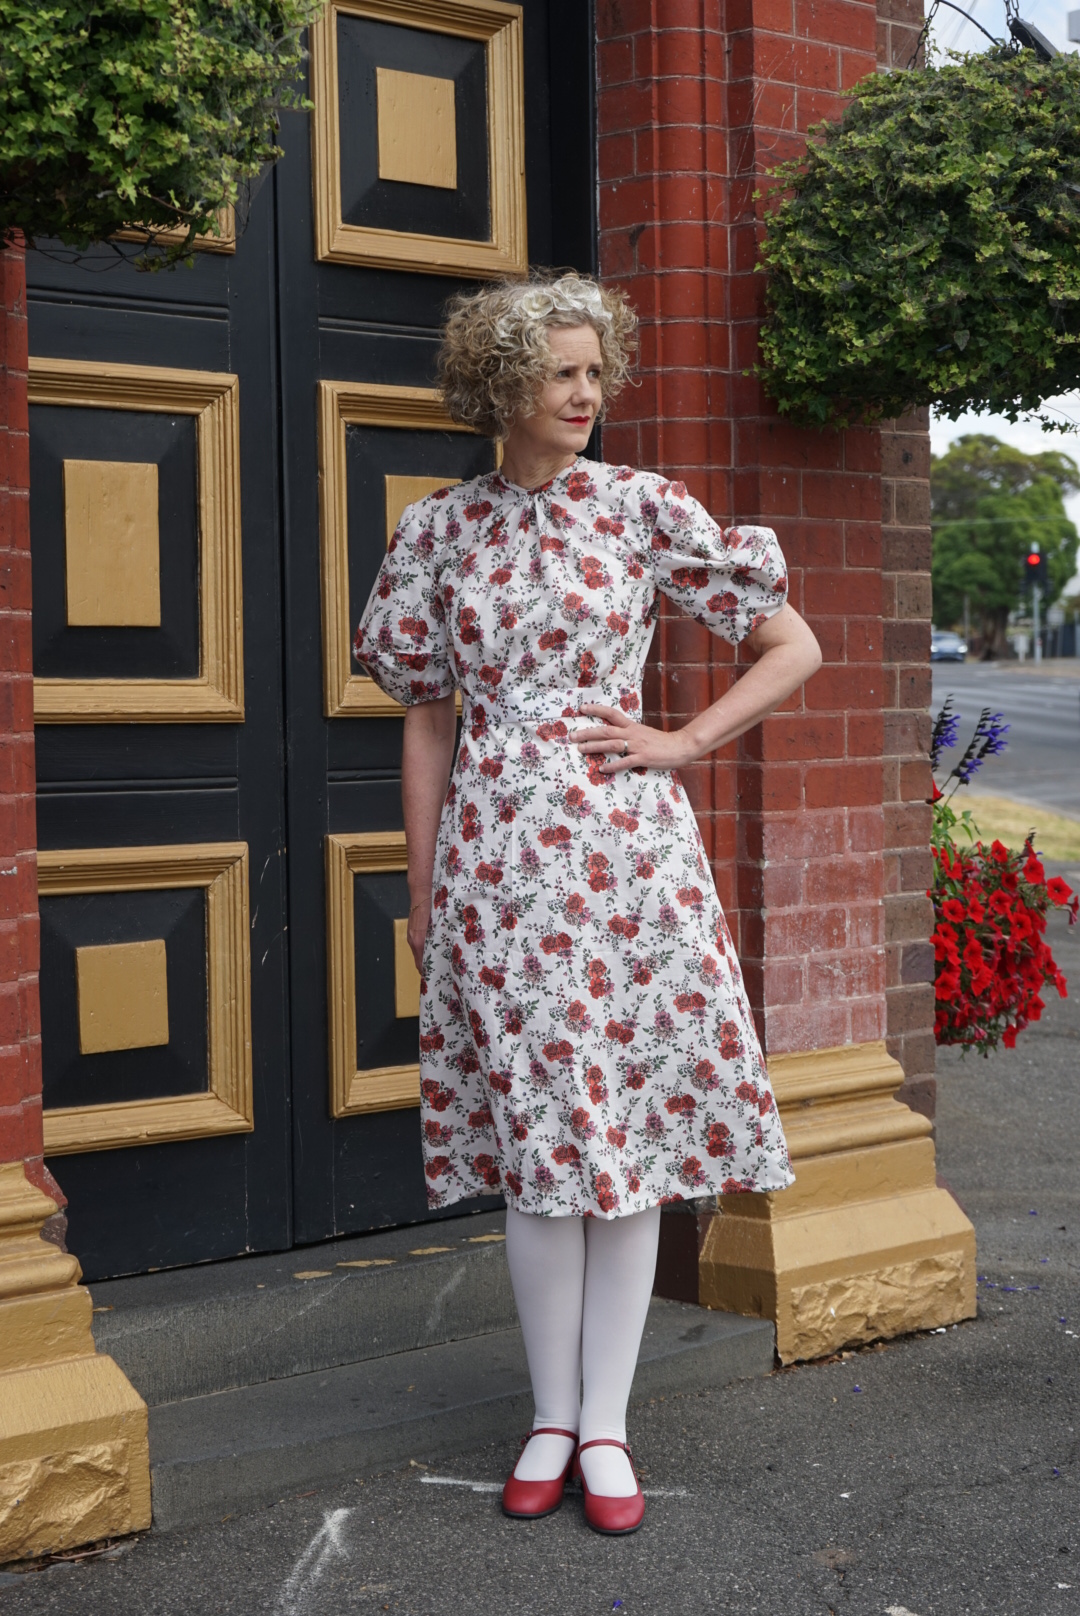
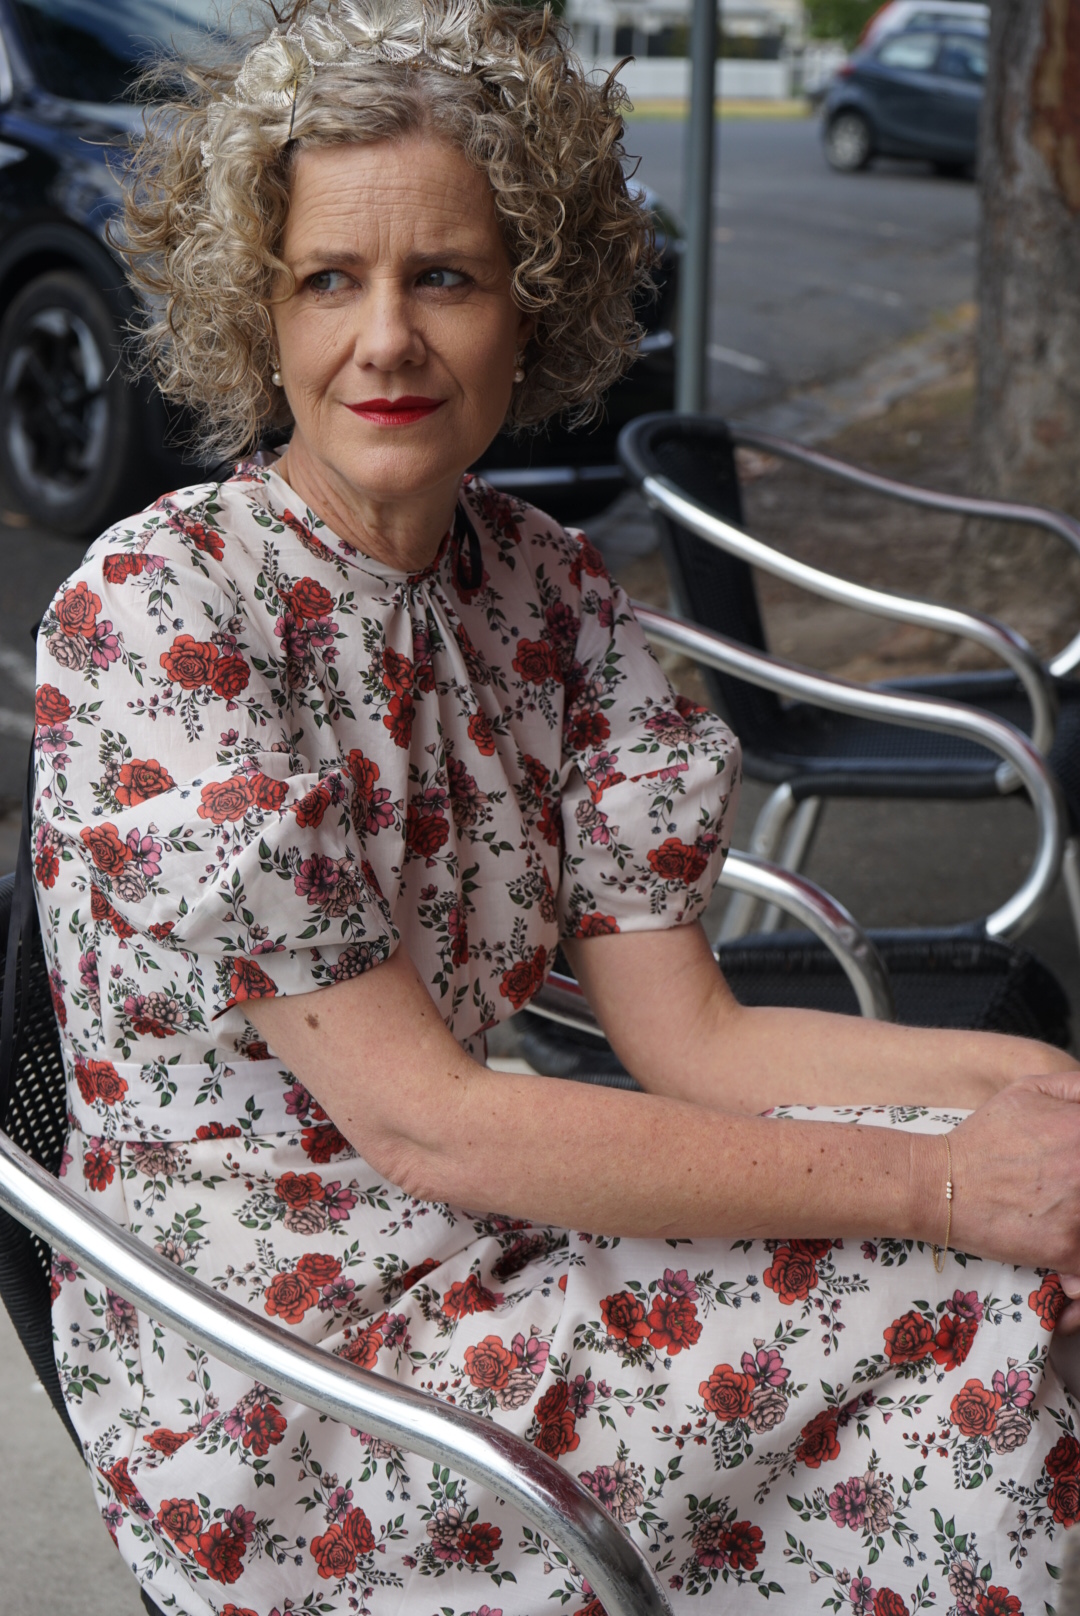
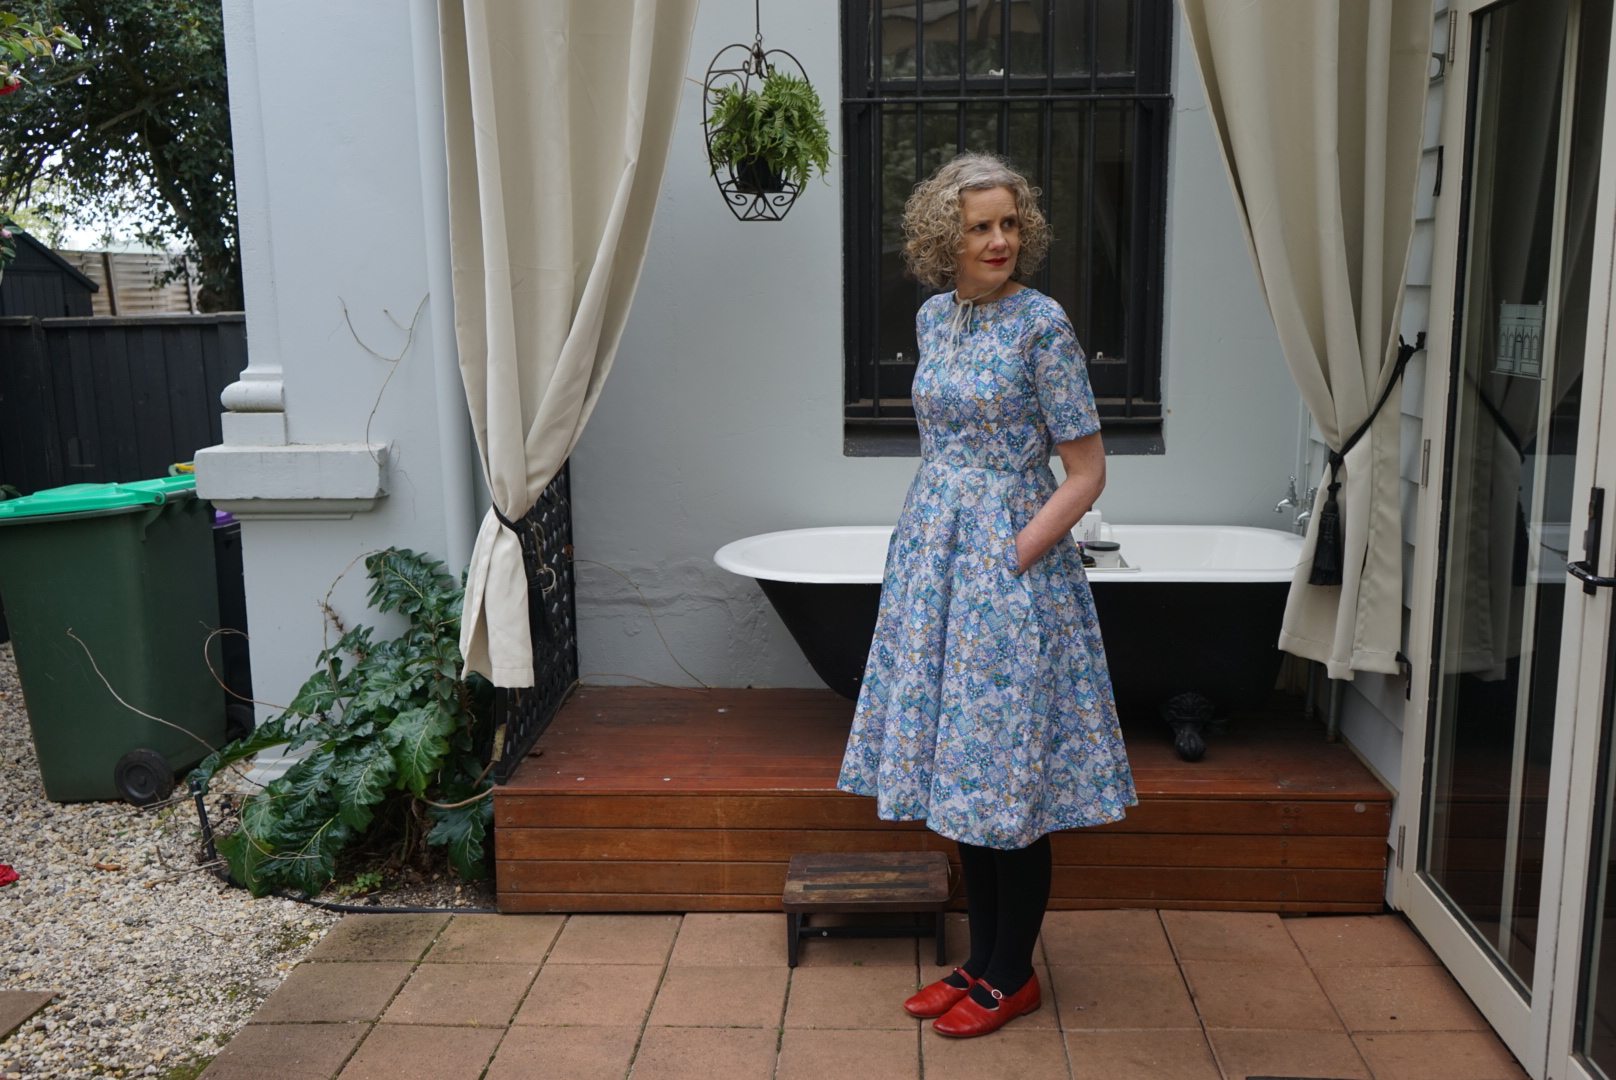
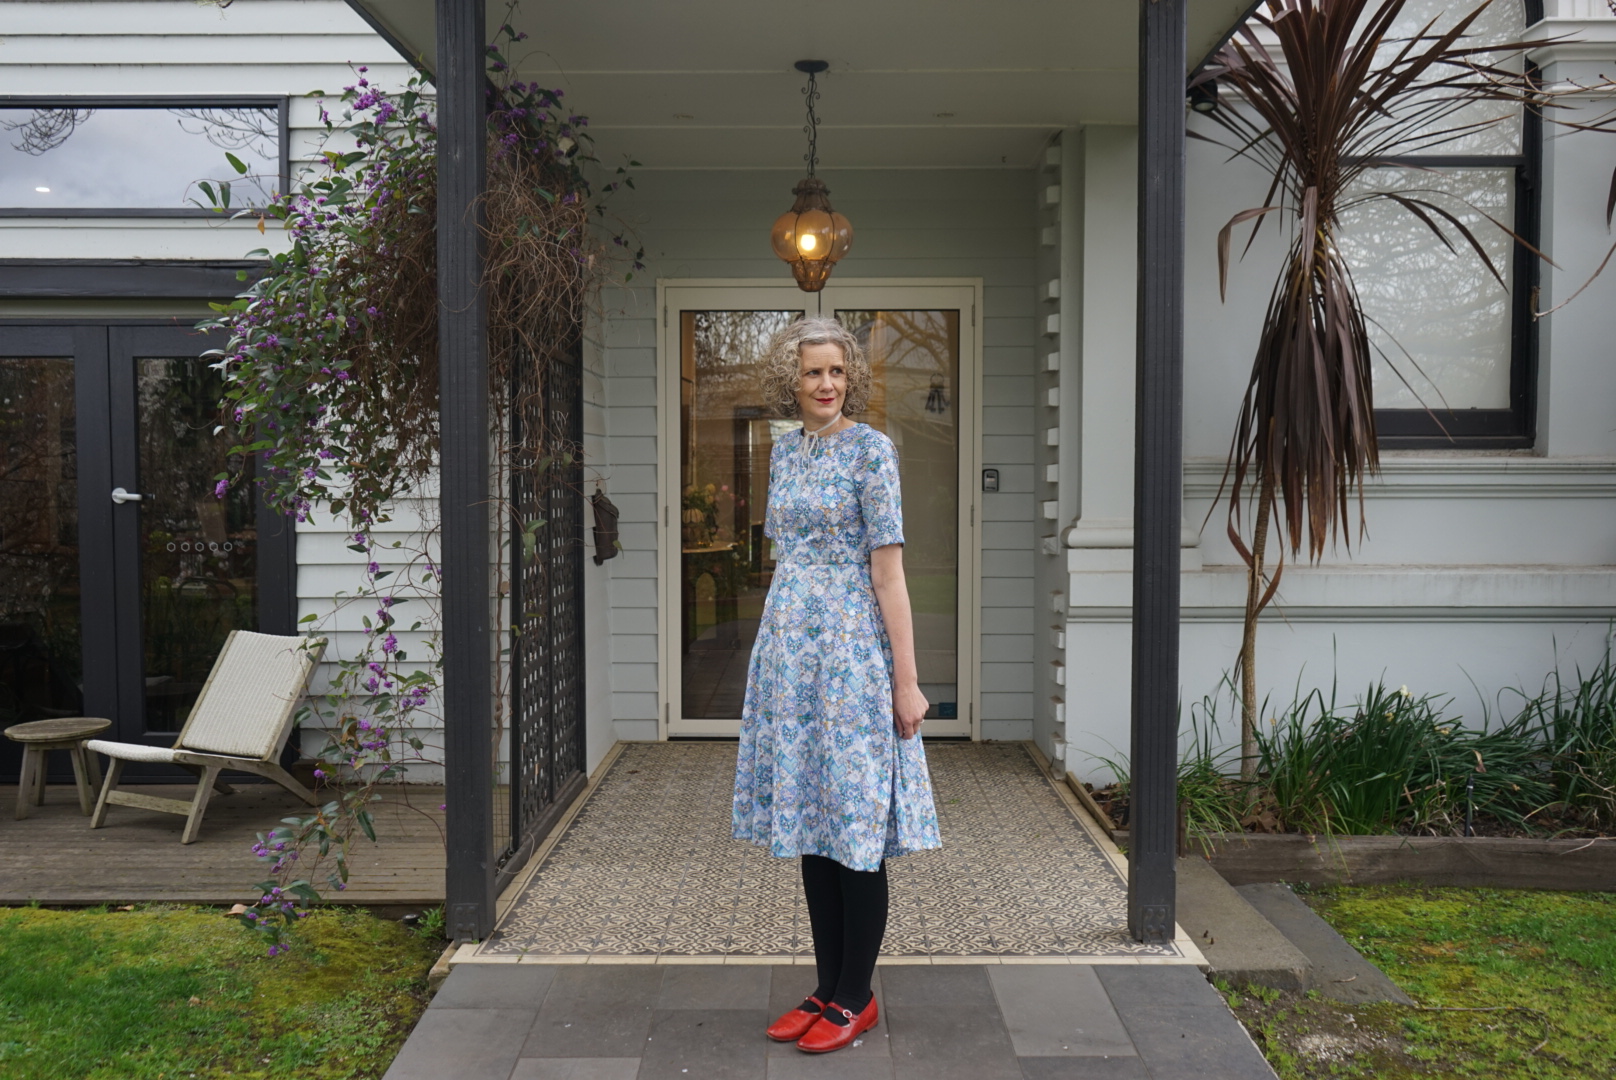
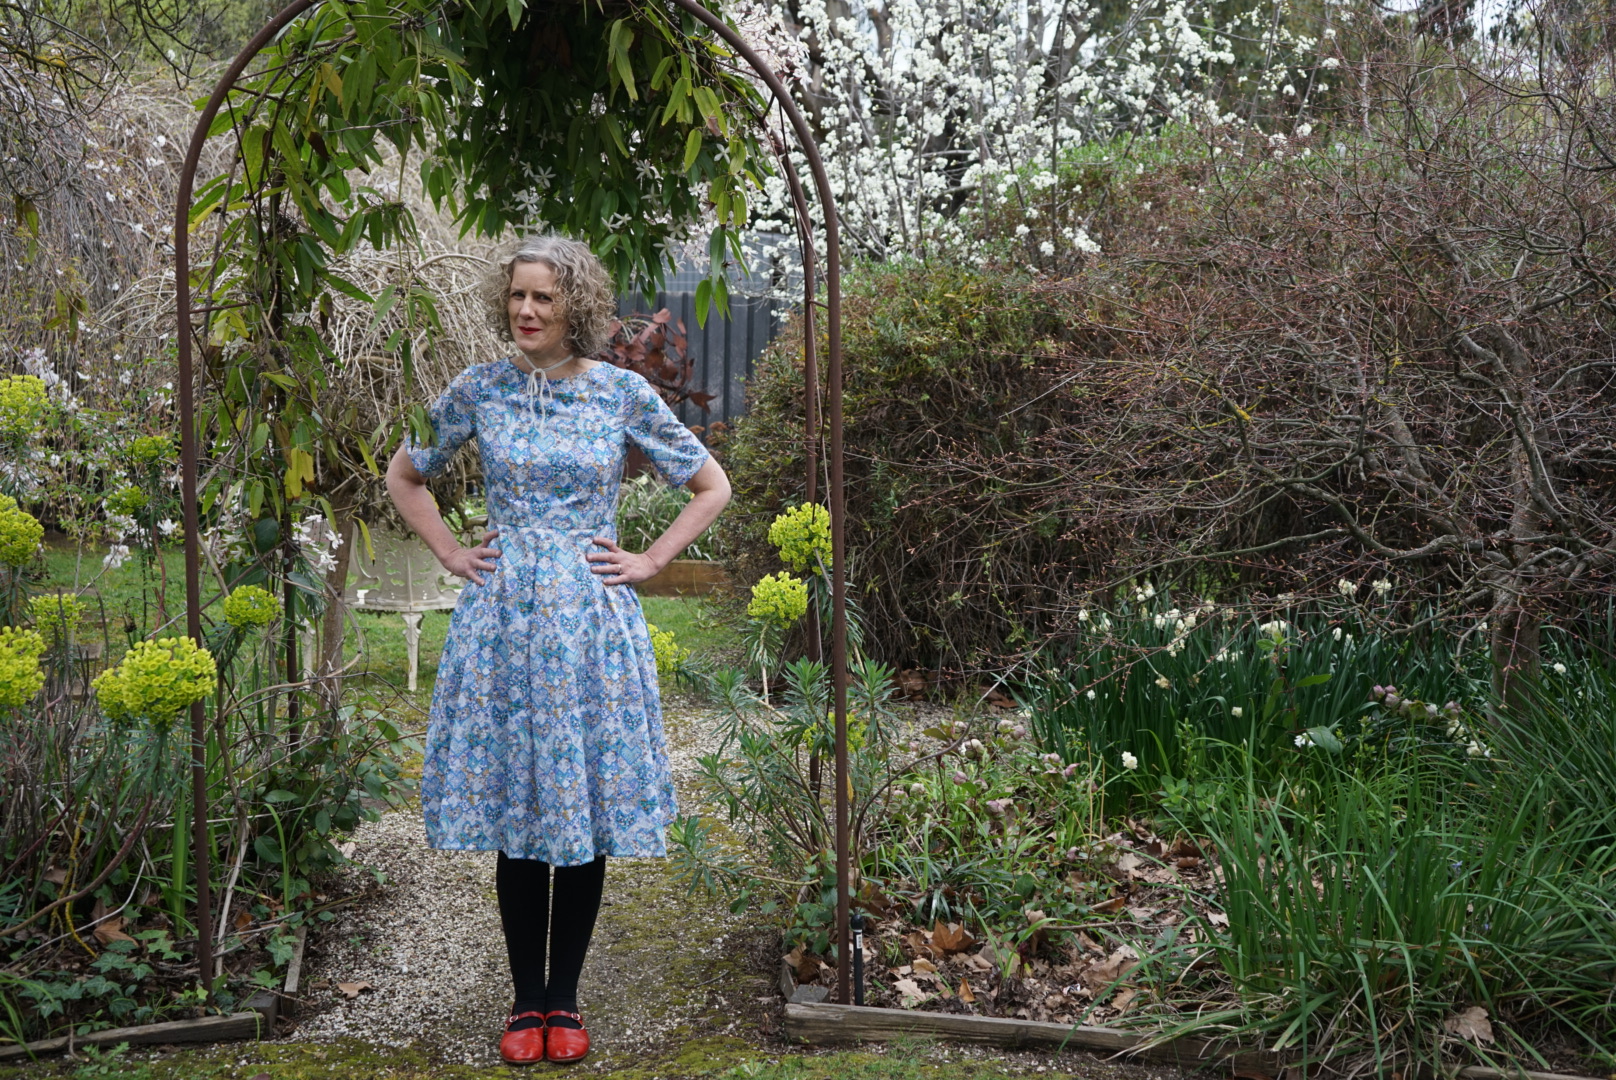
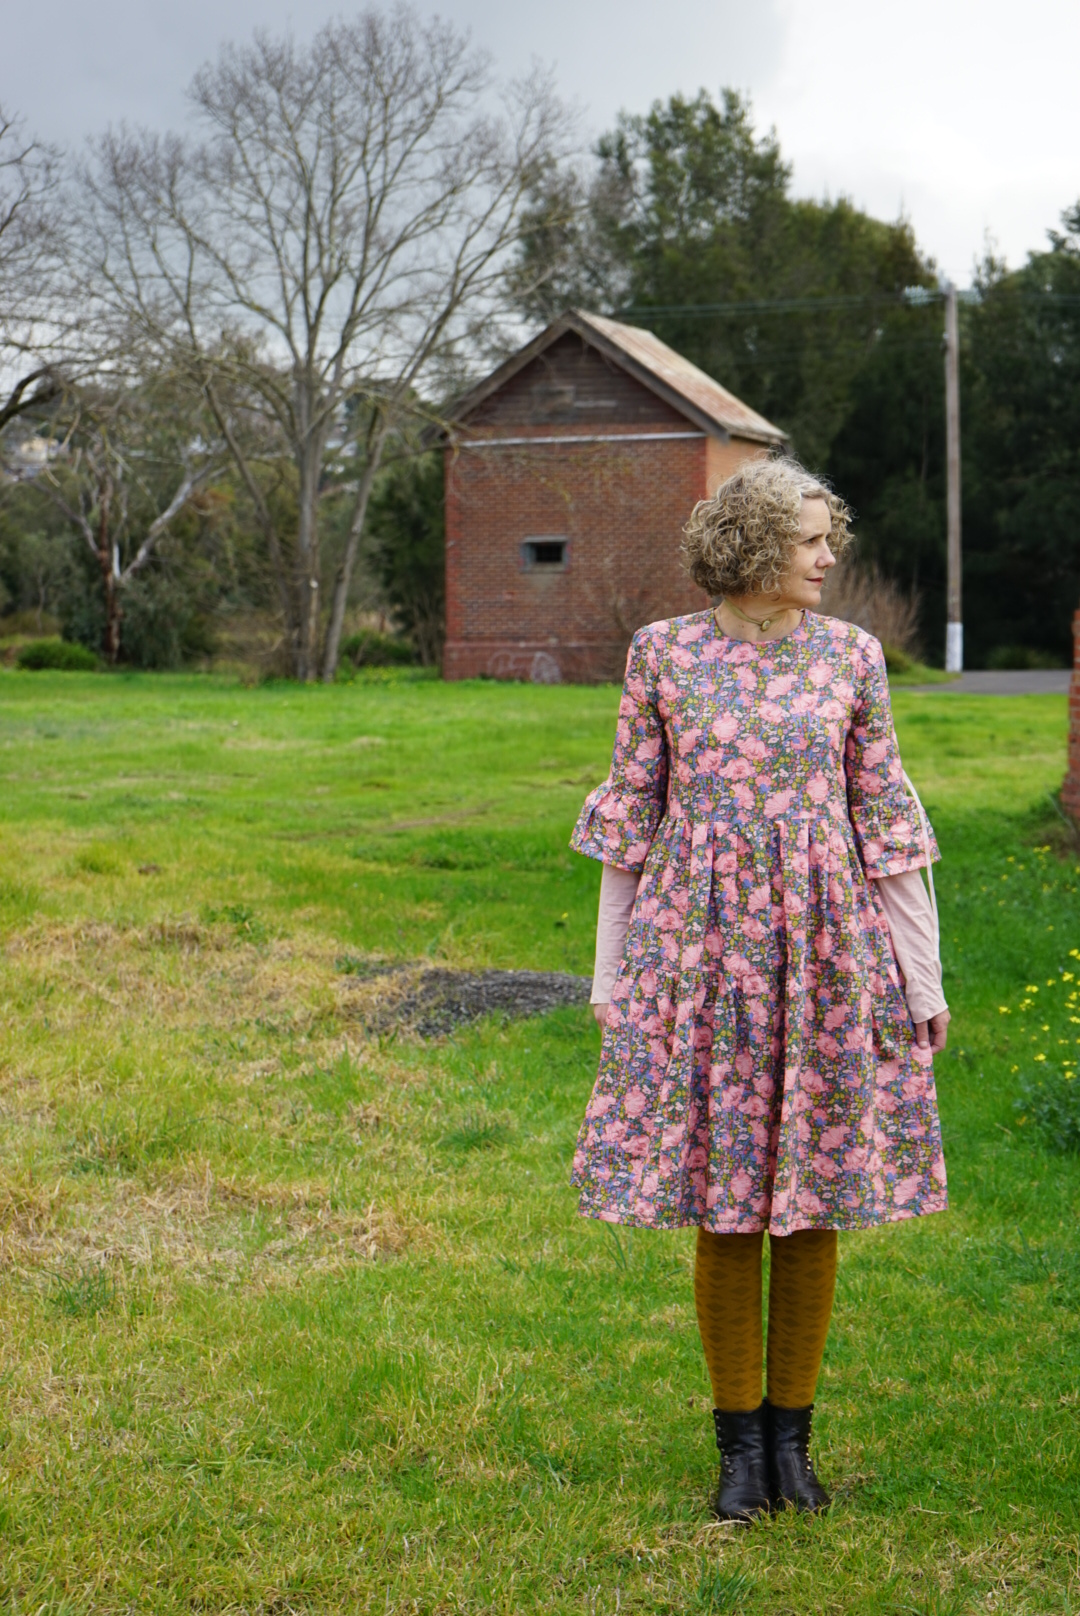
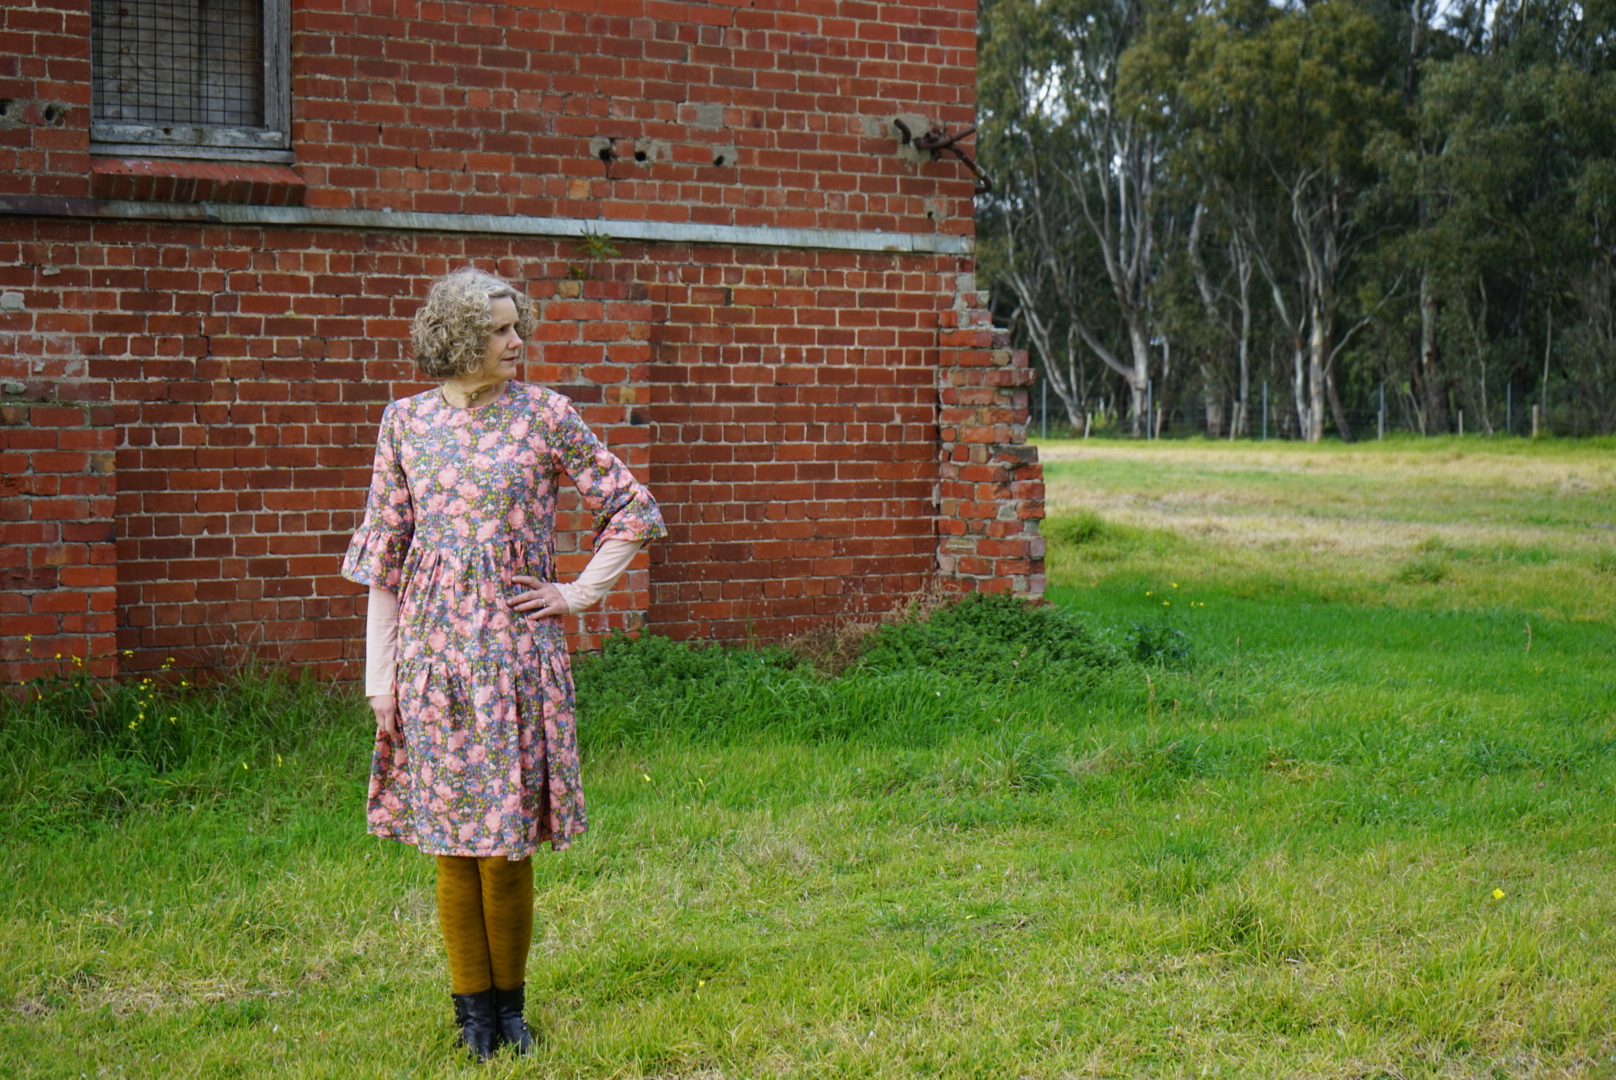
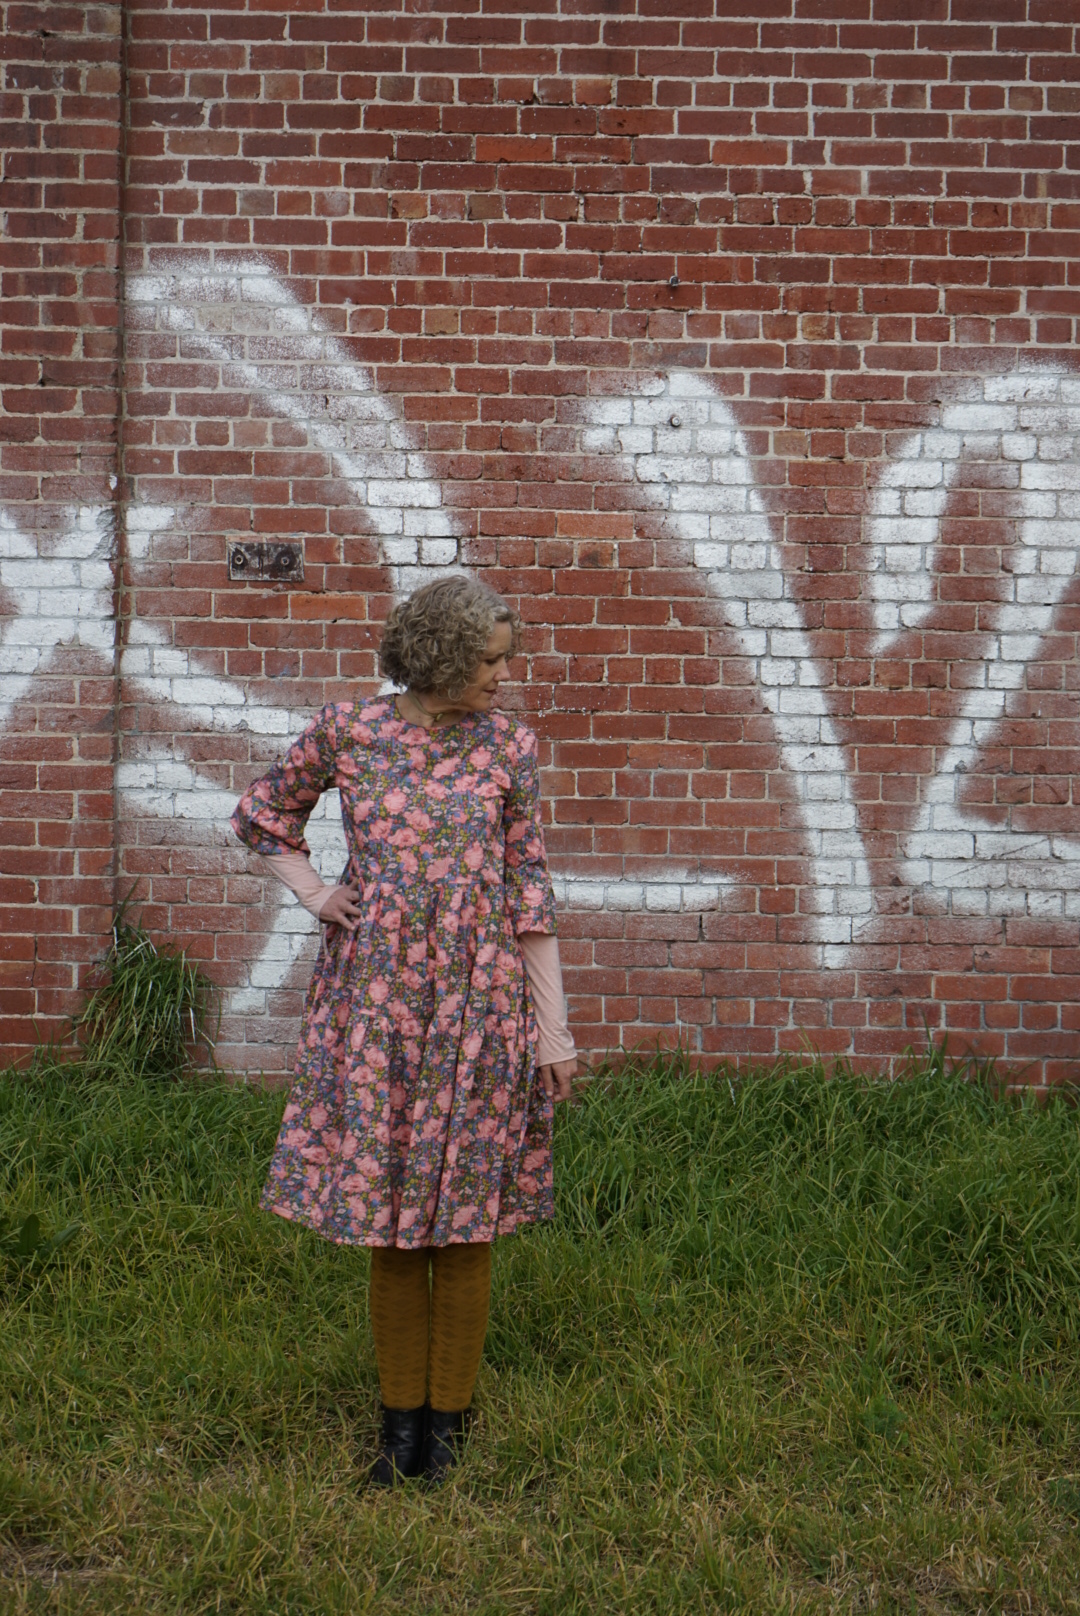
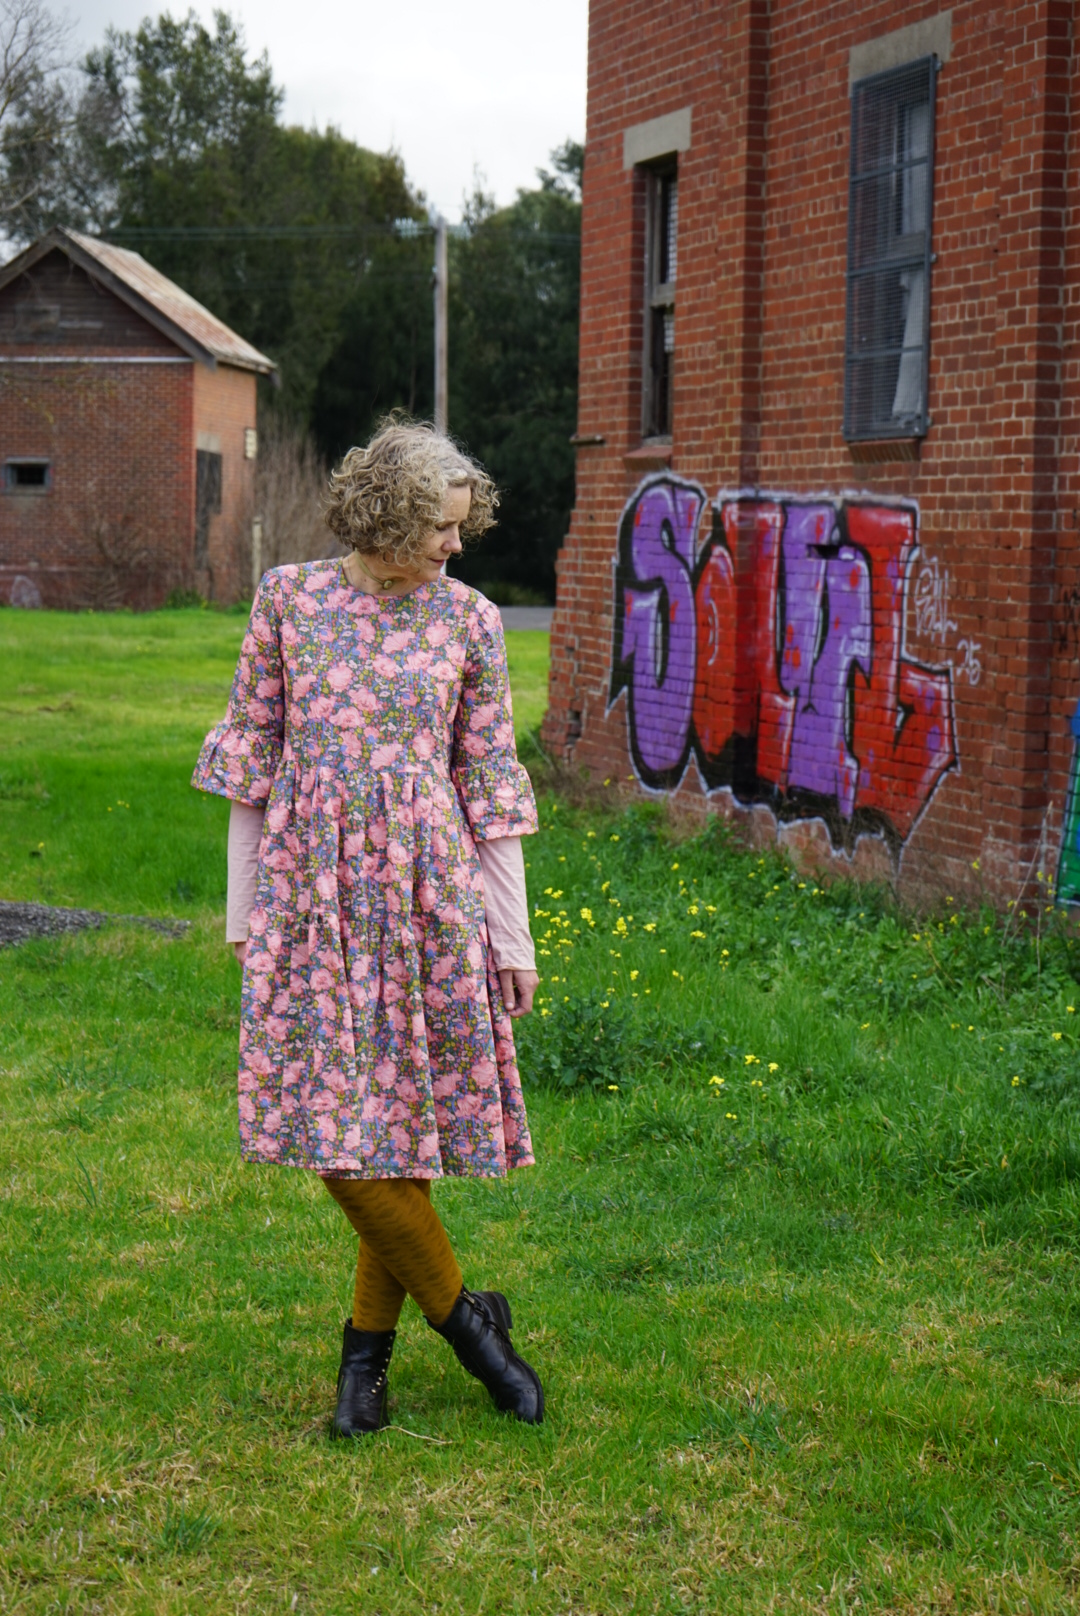
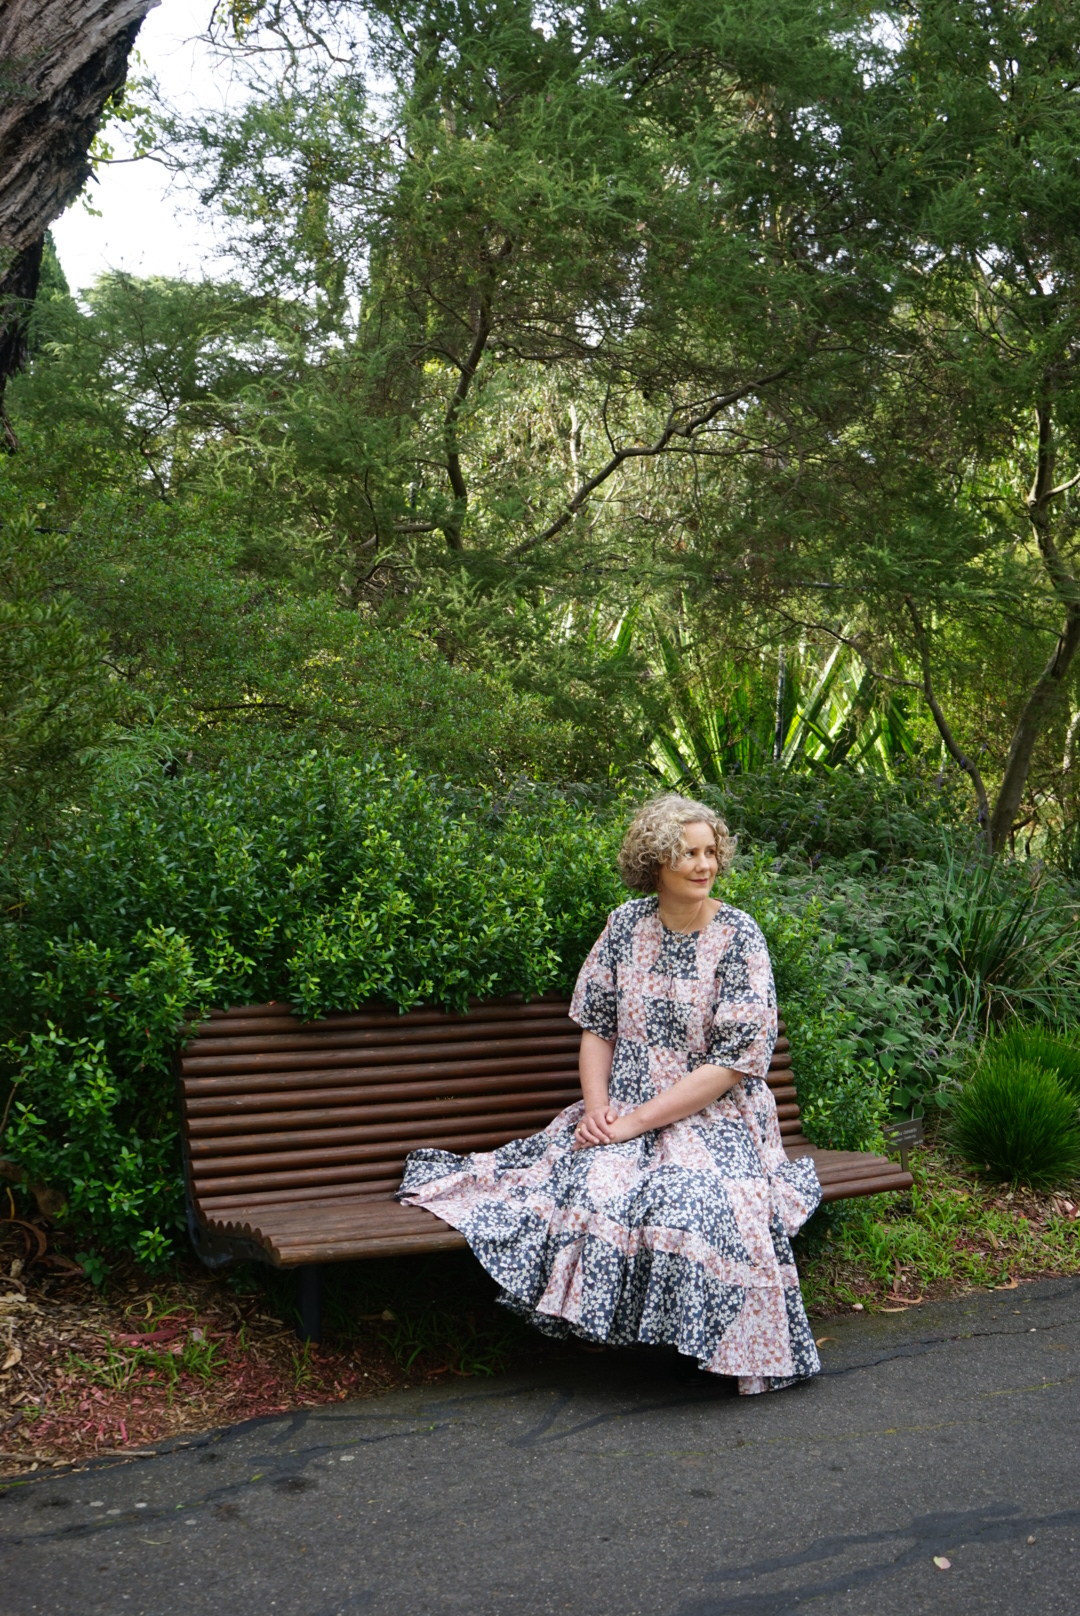
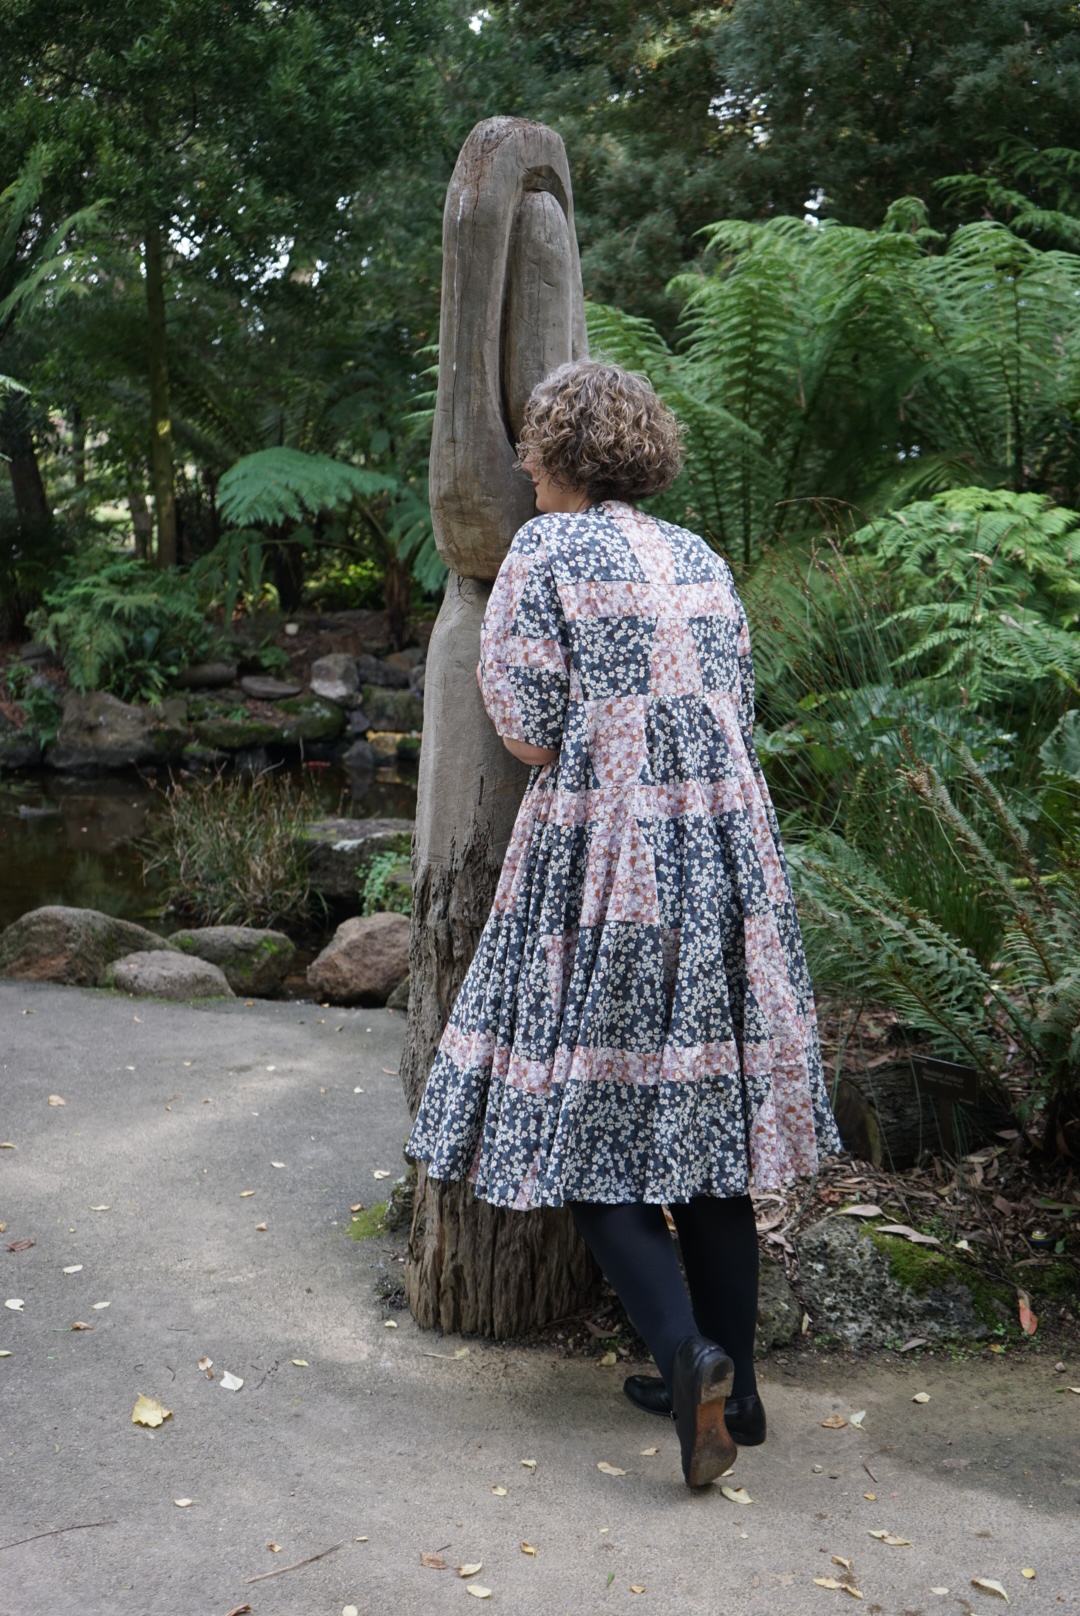
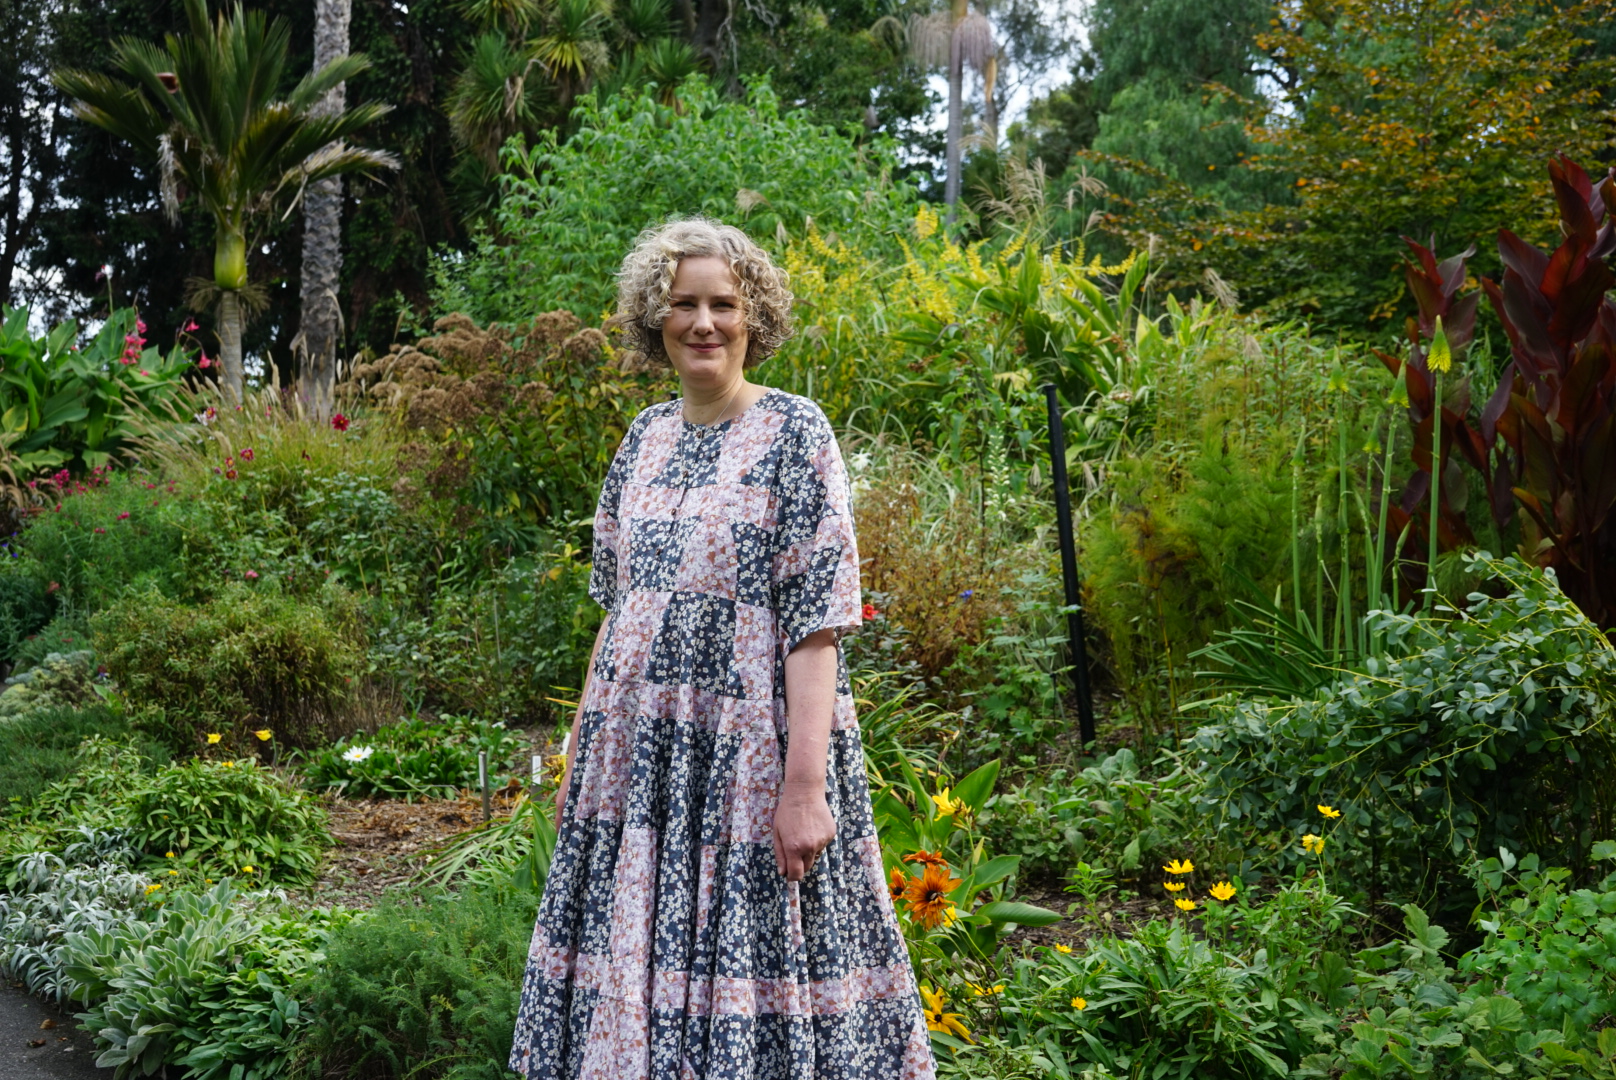
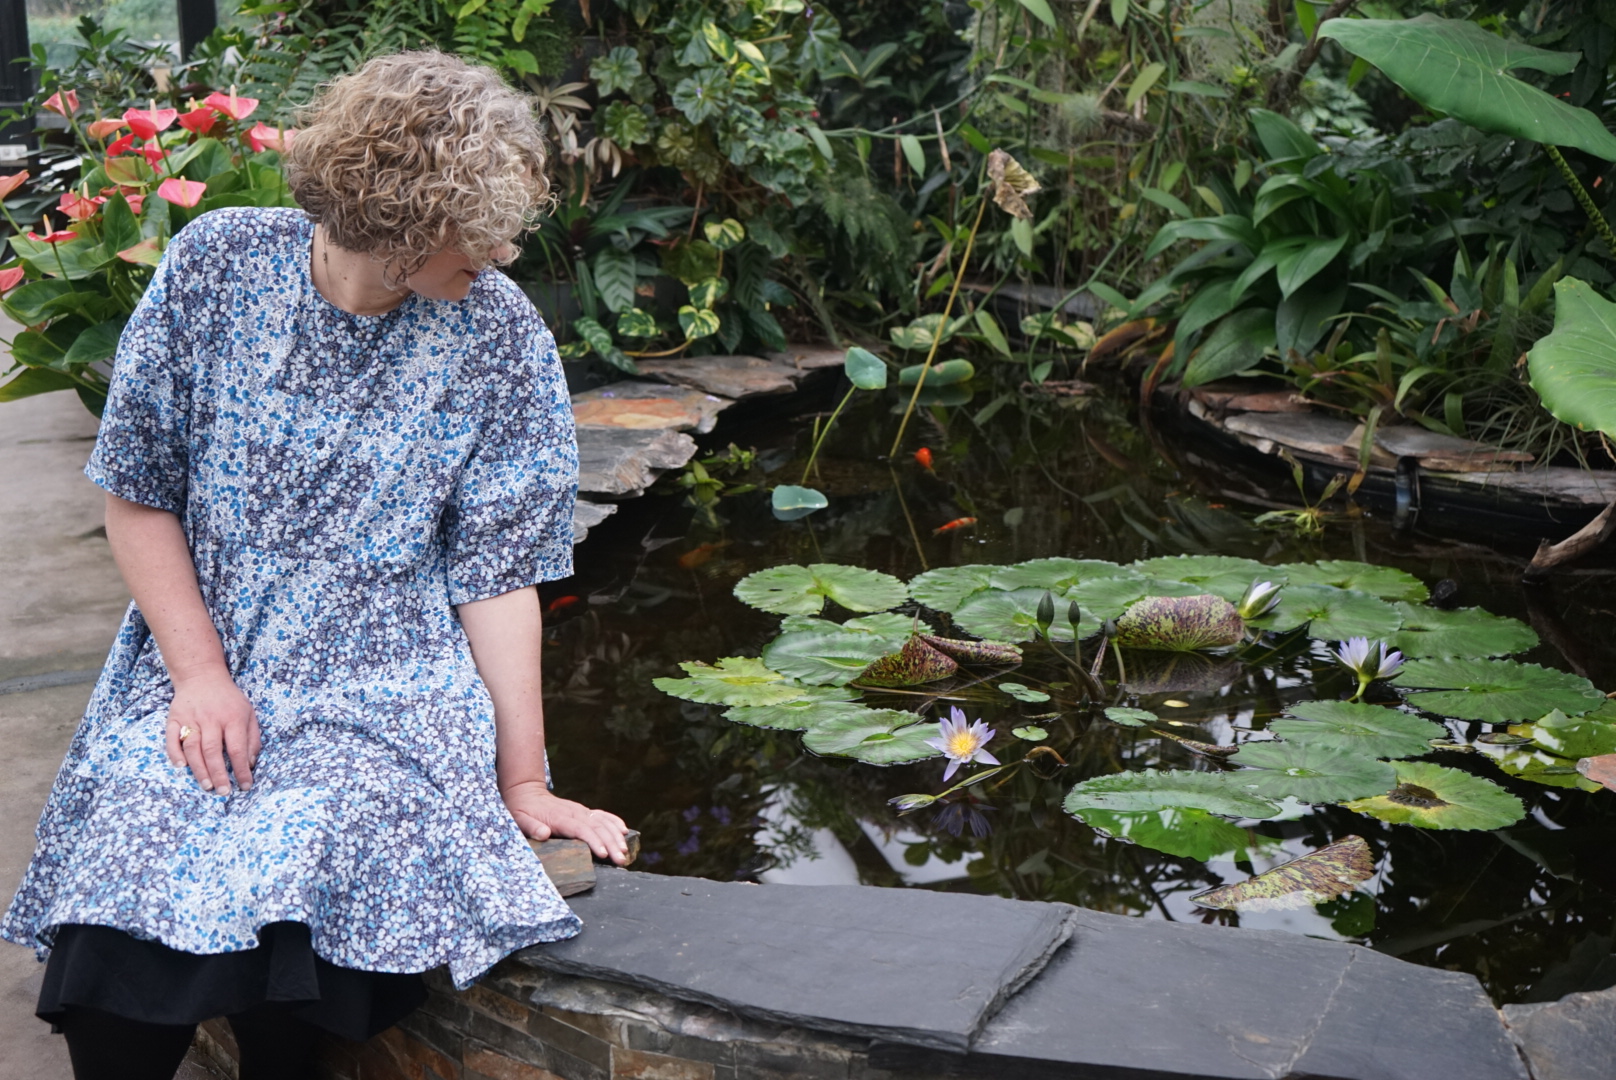
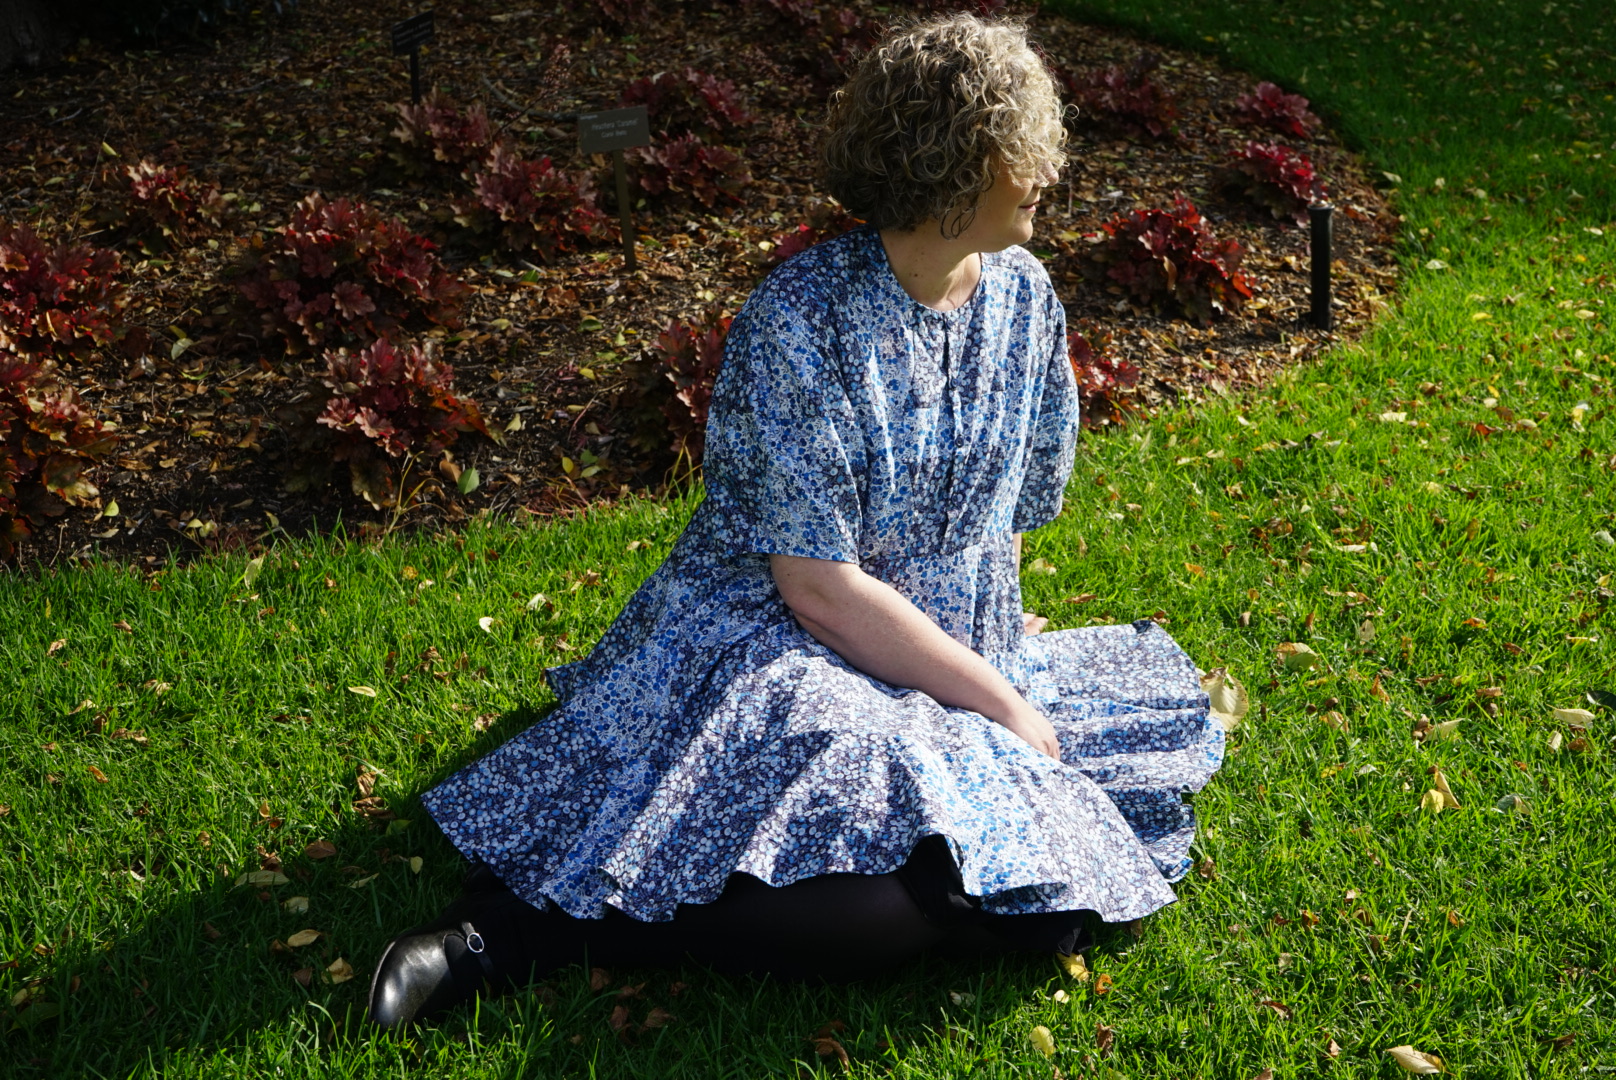
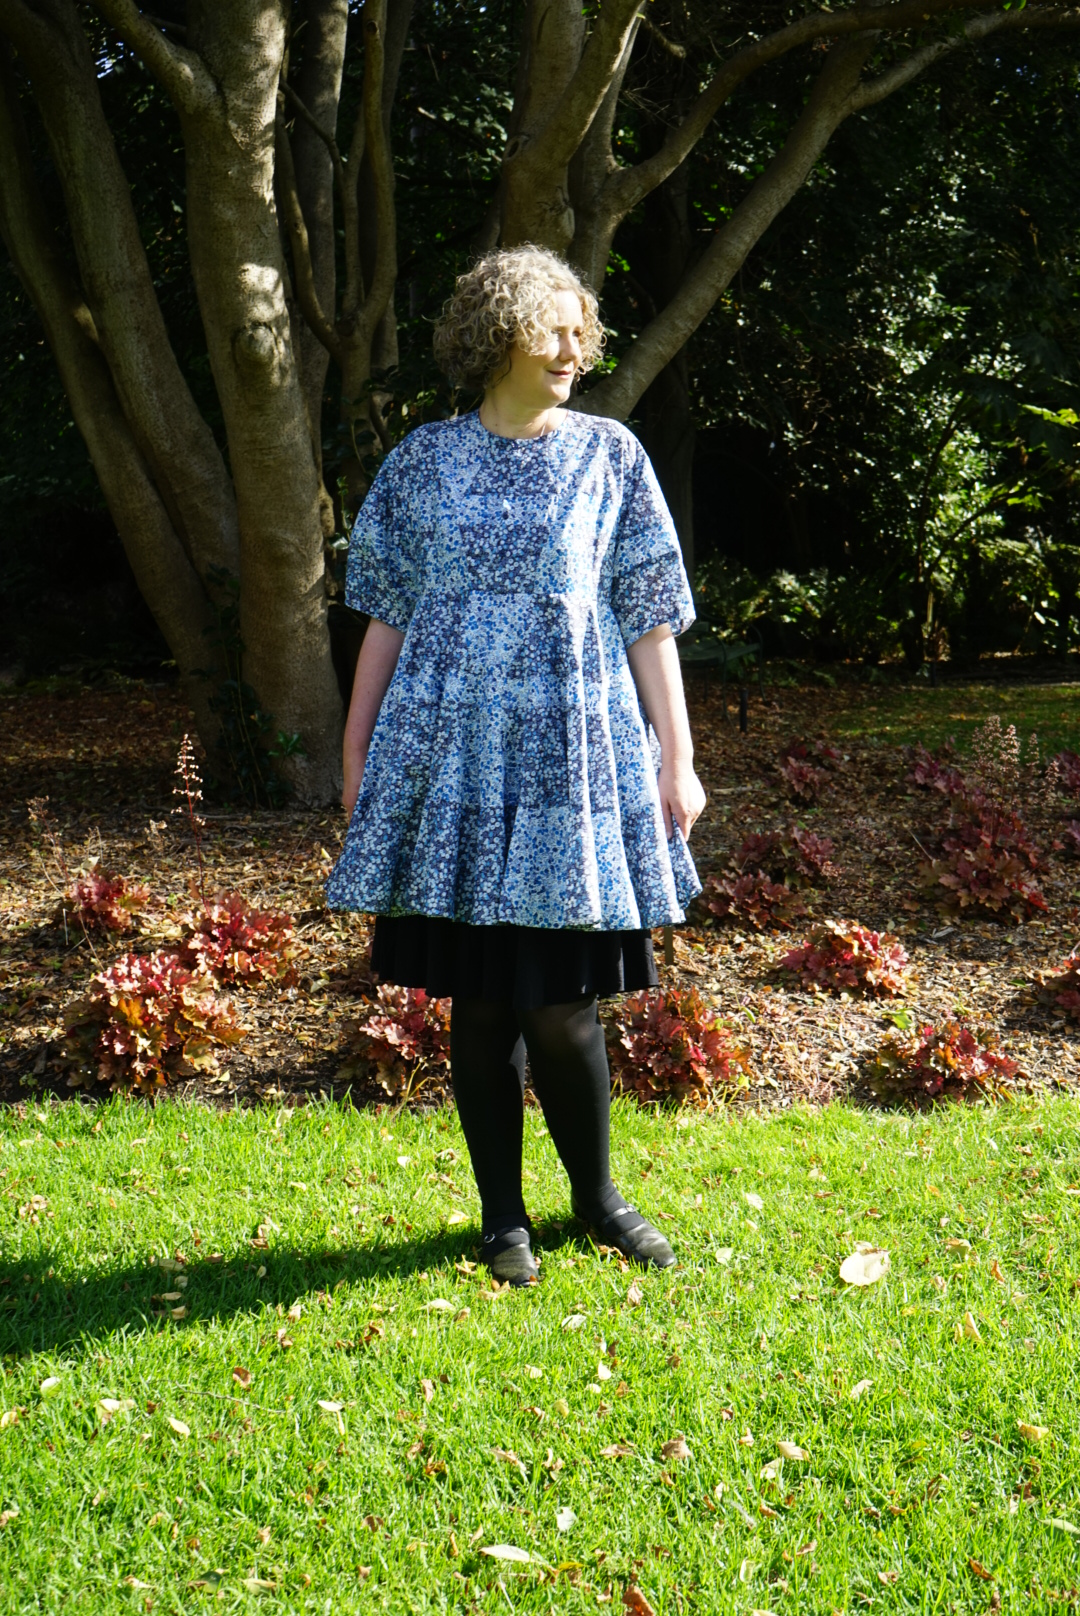
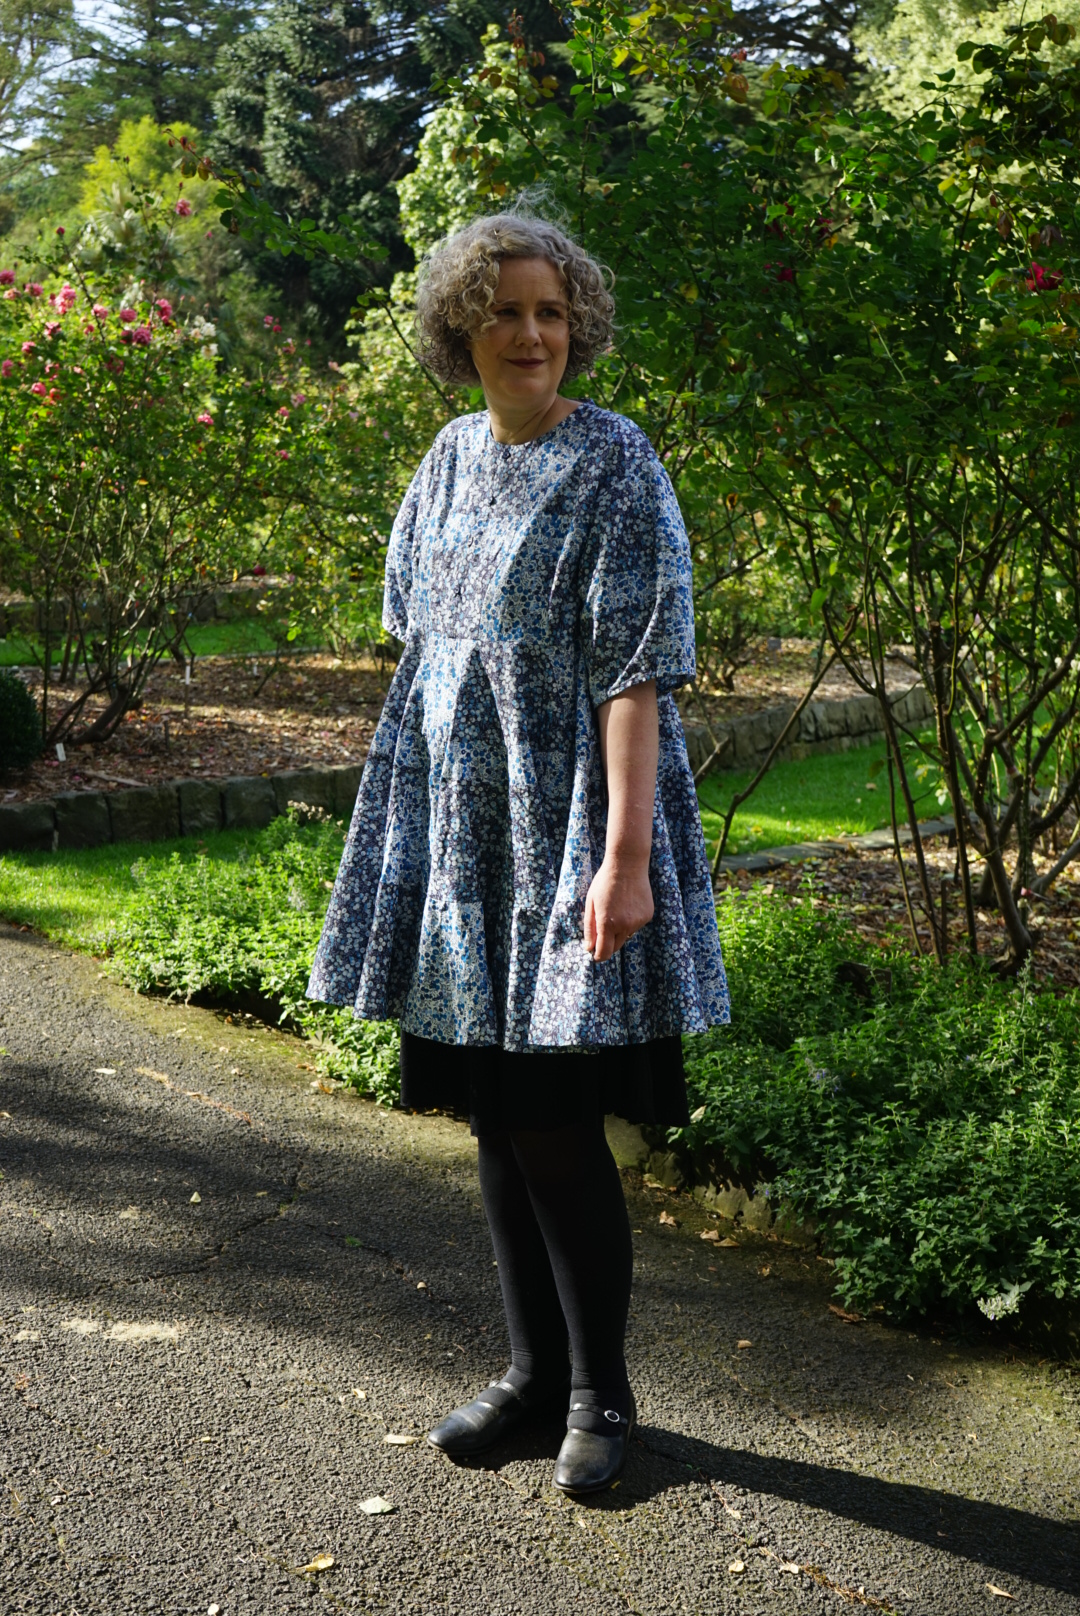
For the occasion, I chose to make the Ella dress by Silver Saga Patterns, a new-to-me company, and I couldn’t be more pleased with how it turned out. I used Flower Crown Liberty Tana Lawn from the Spring/Summer 2026 Floral Rebellion collection and made a size 38/10 based on my current measurements. The only adjustment I made was to lengthen the bodice by 2.5cm, which is fairly standard for me.
I’ll admit, I had a brief moment of uncertainty while reading through the instructions, wondering how it was all going to come together—but as I worked through each step, everything fell beautifully into place. It’s always such a satisfying experience when a pattern reveals its logic like that.
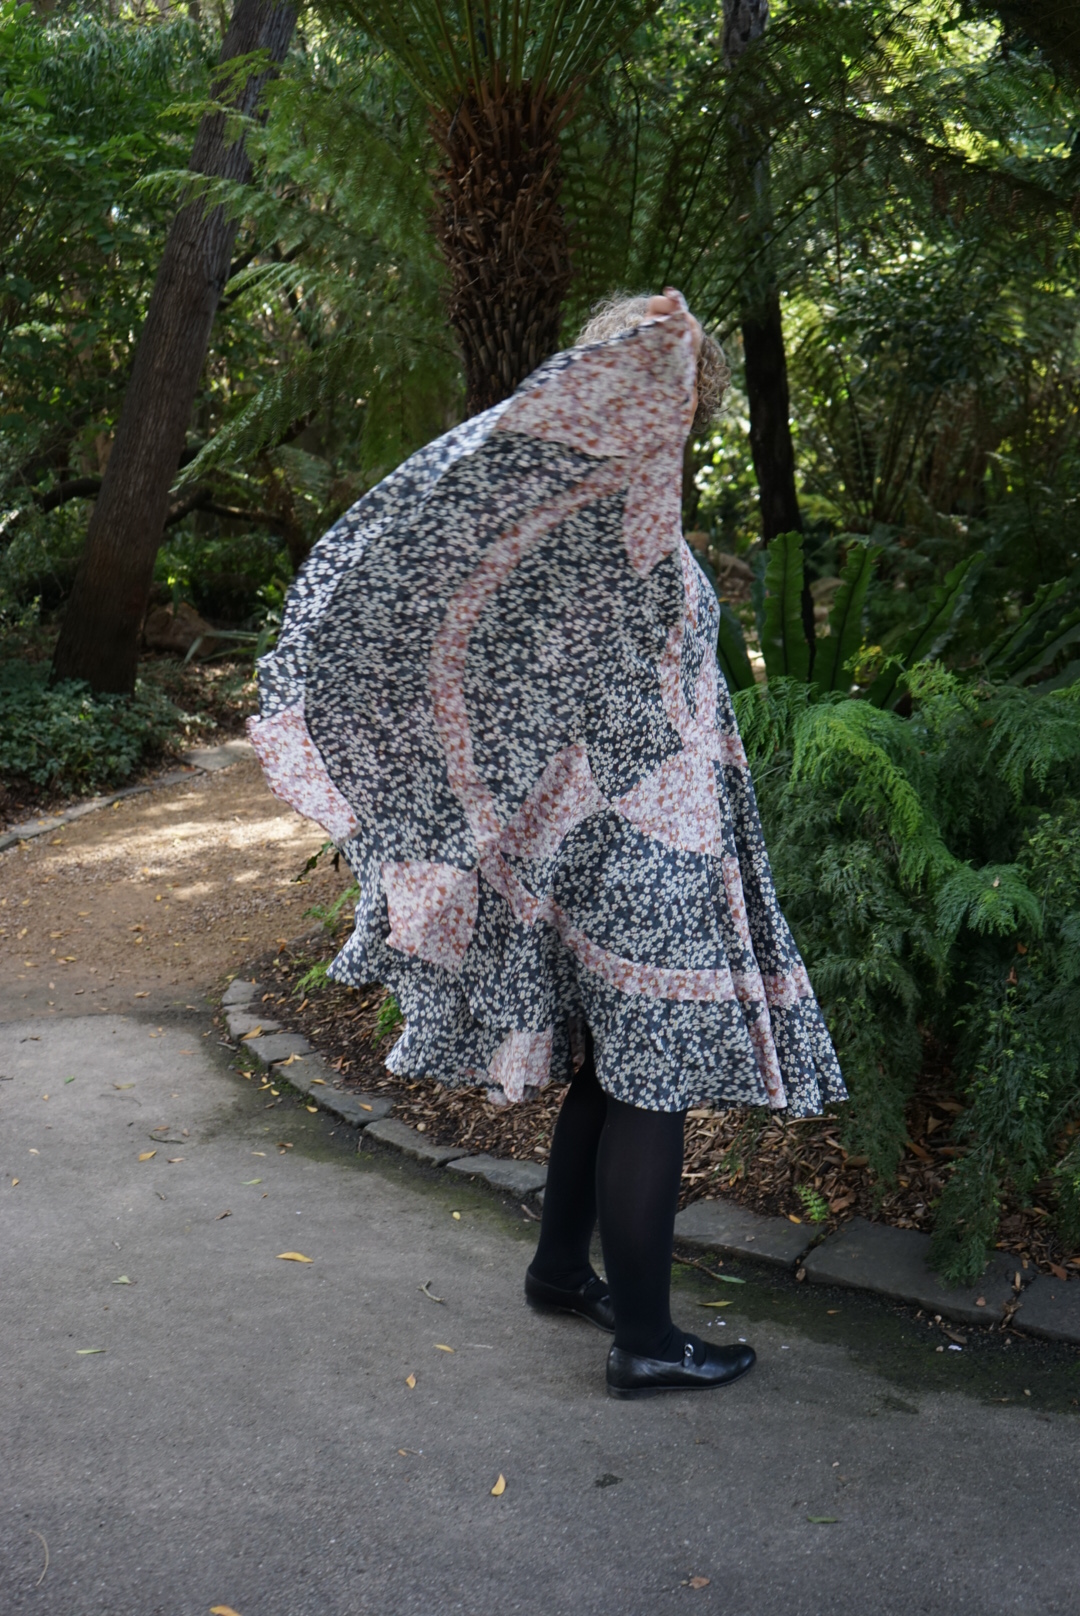
The finished dress feels incredibly elegant. The low neckline is just a little bit scandalous (in the best possible way), and the A-line skirt has a lovely movement to it, catching the breeze in a way that feels both effortless and romantic. I truly love how it turned out.
All in all, it was a gorgeous day—filled with friendship, creativity, and beautiful clothes. Exactly the kind of day that reminds me why I love sewing so much.
When Regent Street Fabrics invited me to participate in the 2026 Liberty Showcase celebrating the Spring/Summer 2026 Floral Rebellion collection, I genuinely had to pause and take it in. What an honour.
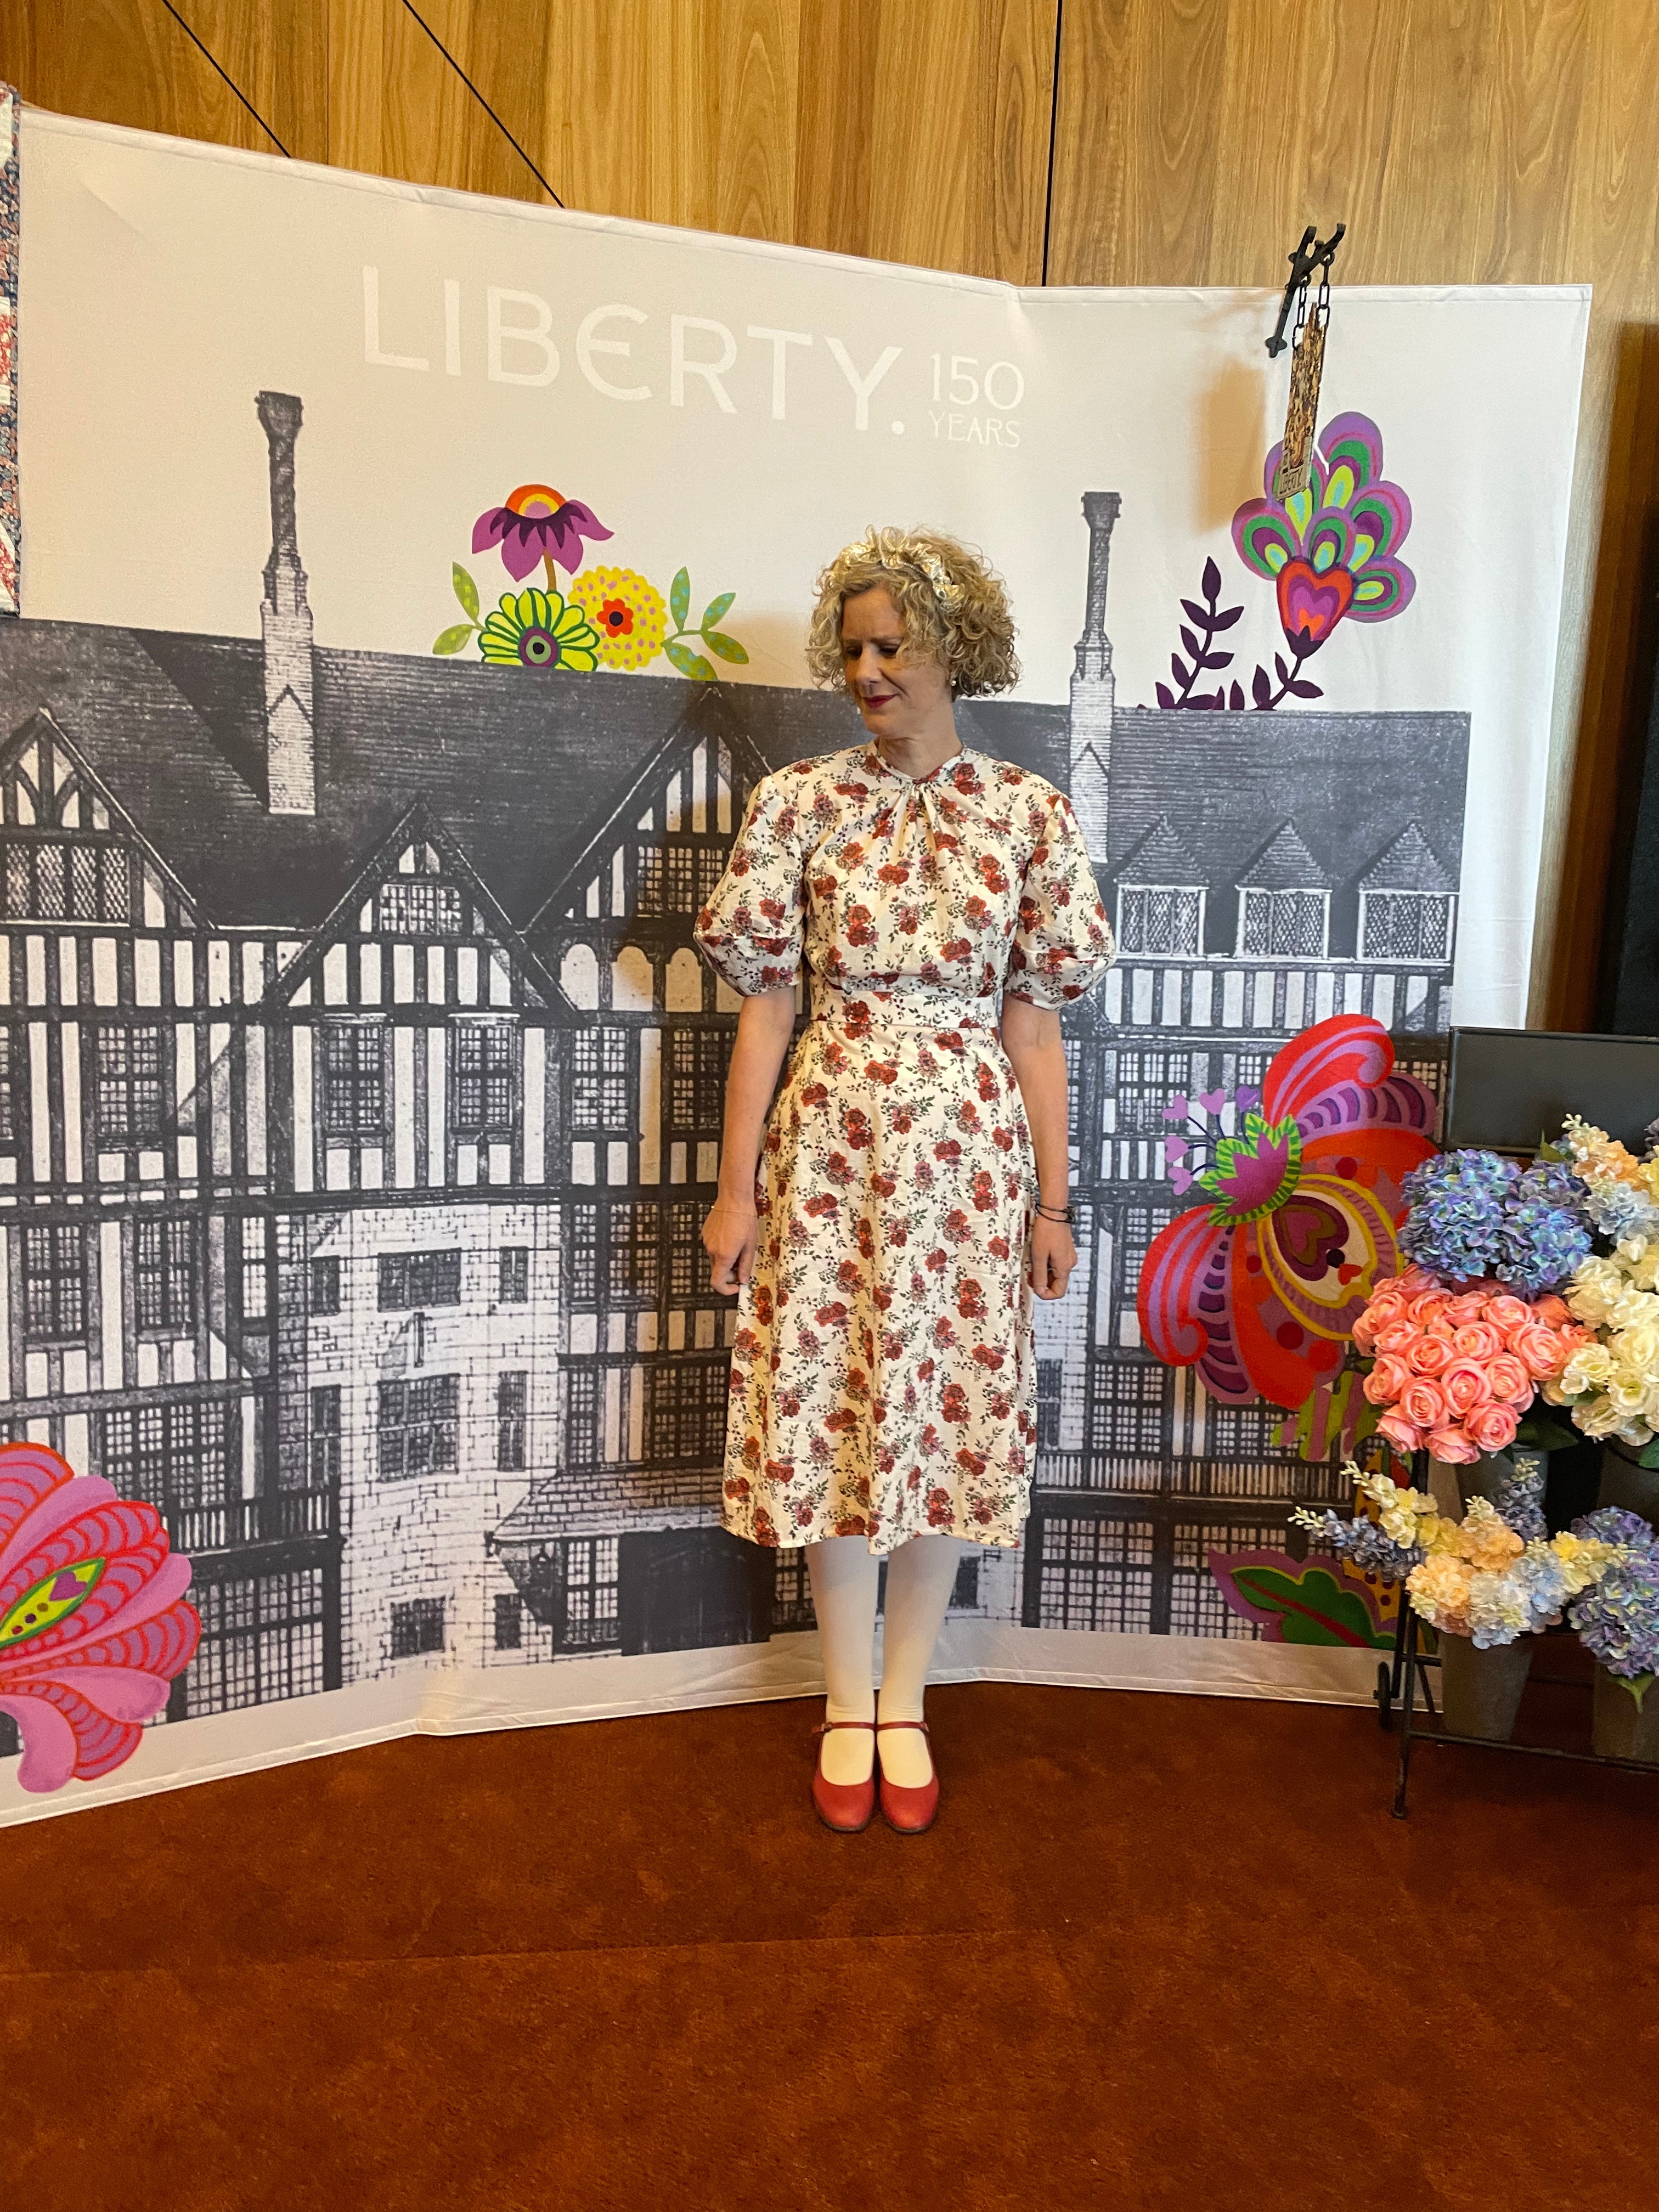
Anyone who knows me knows how deeply I adore Liberty fabrics — their history, their artistry, their ability to make every garment feel a little bit special. So to be asked to create a piece and walk the runway in front of 600 people at the Melbourne Exhibition Centre on Valentine’s Day felt both surreal and incredibly flattering.
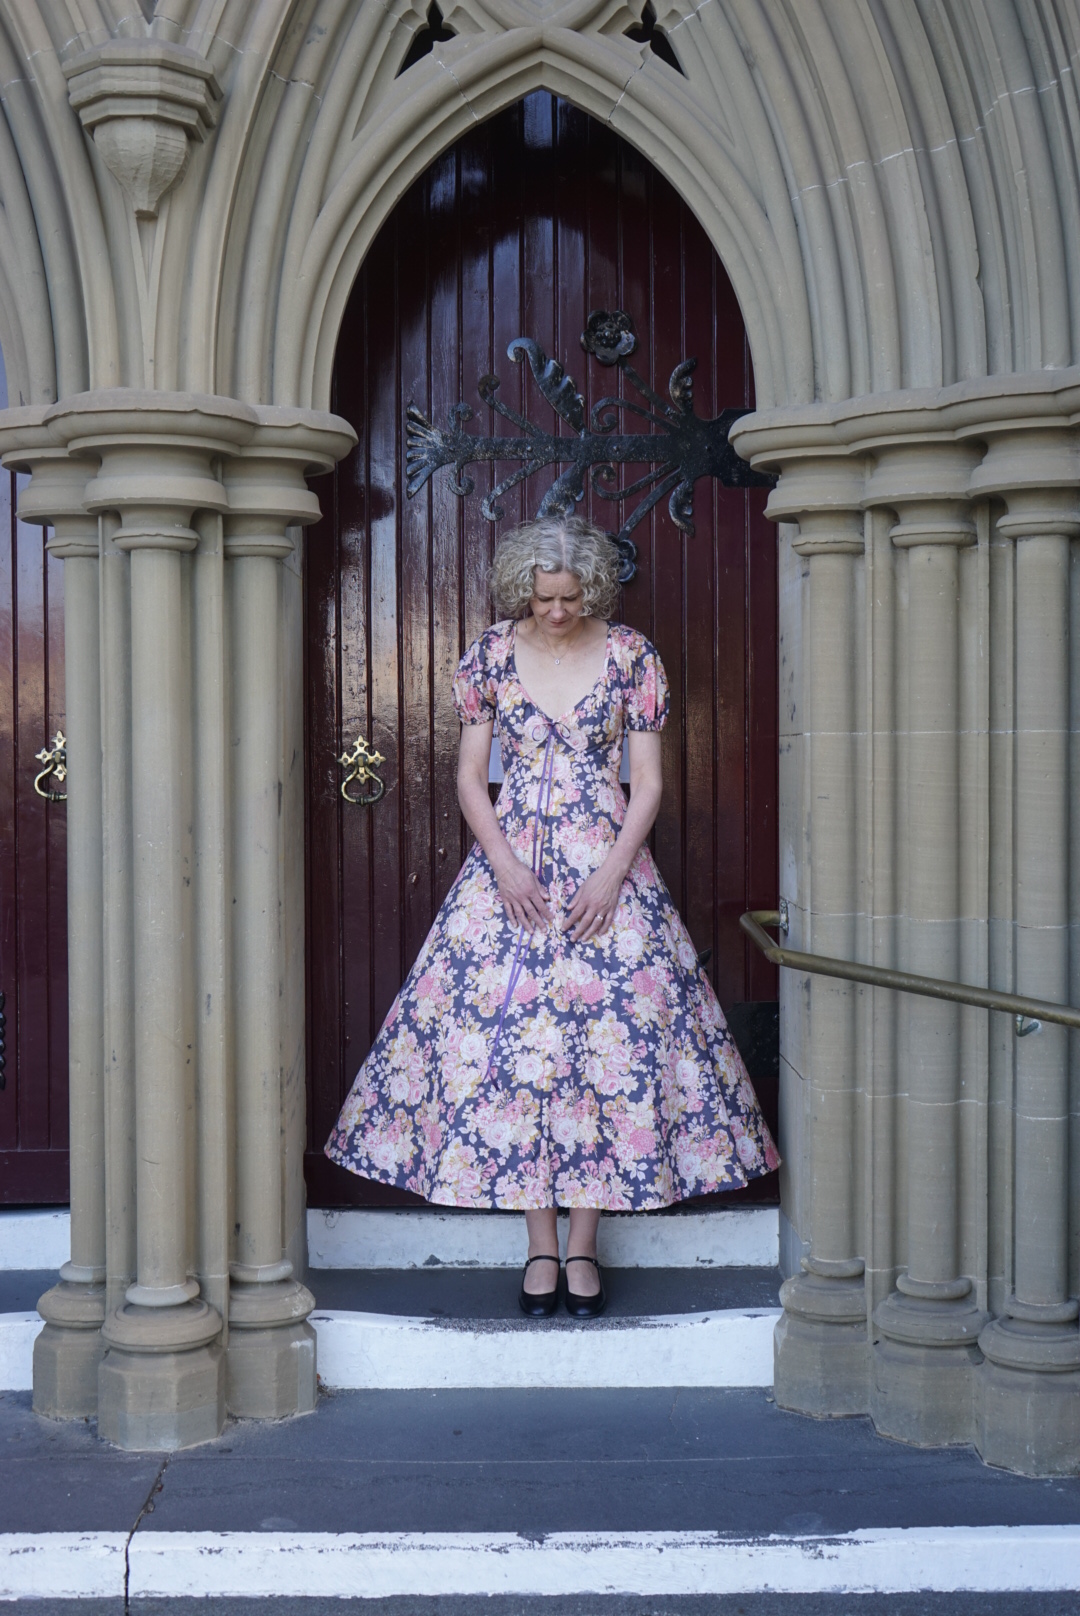
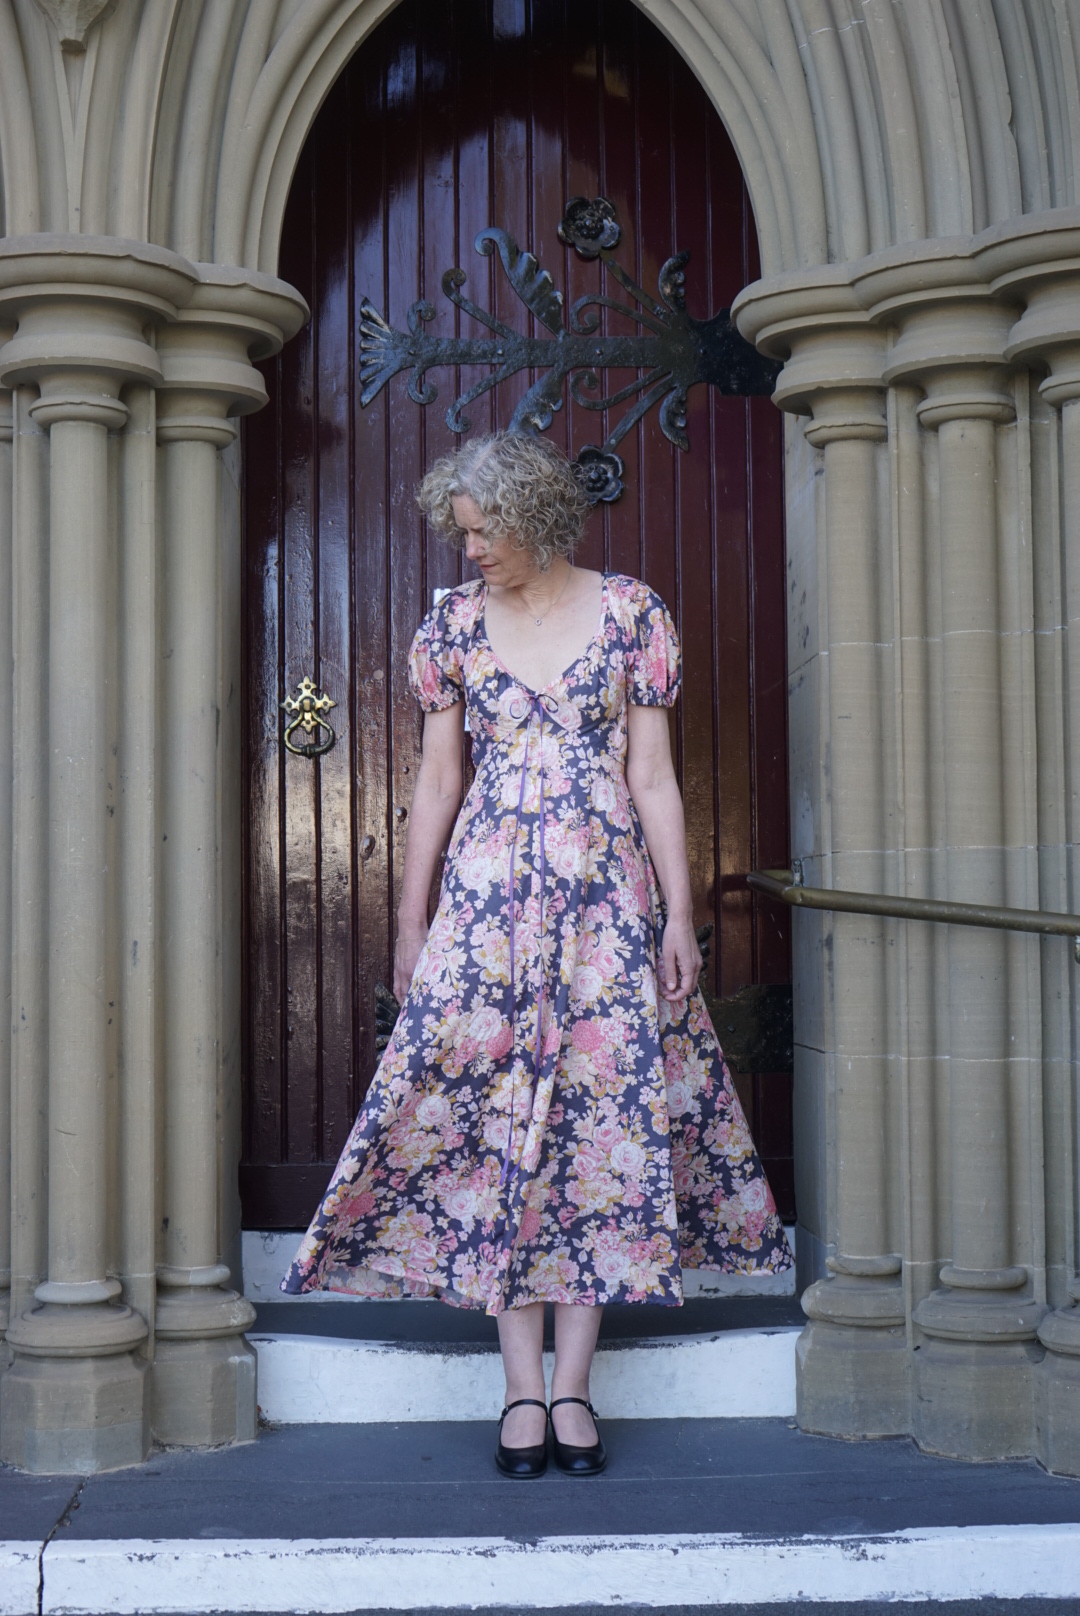
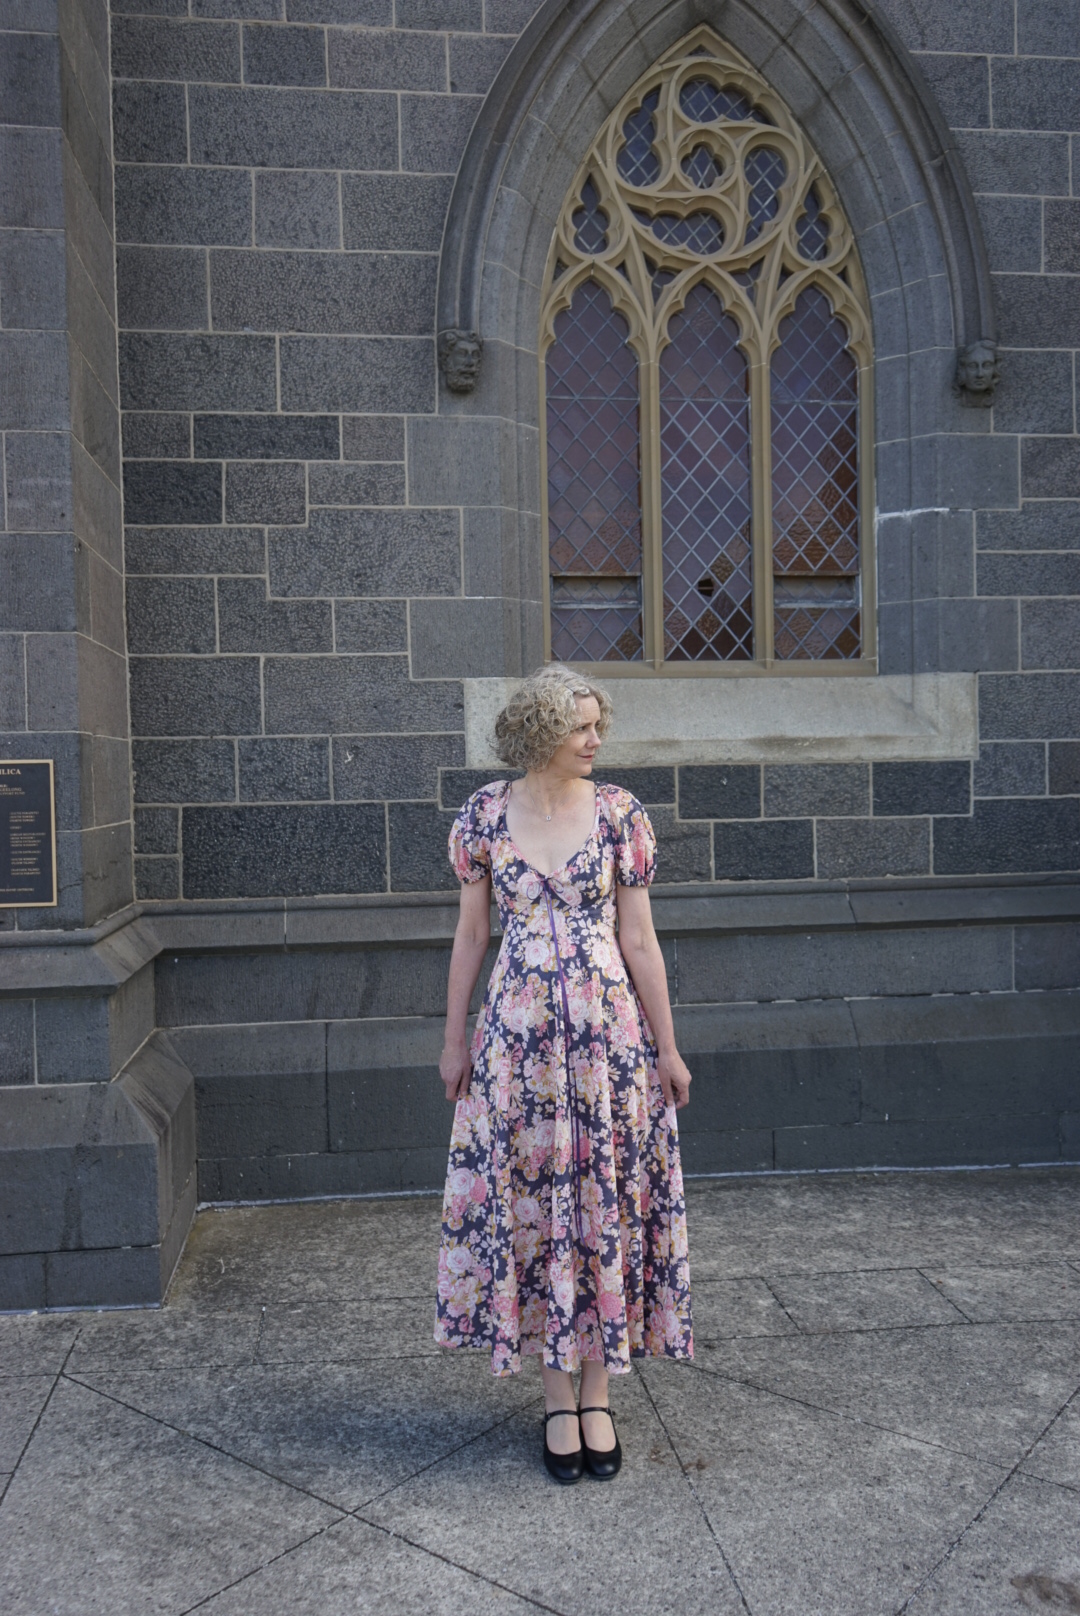
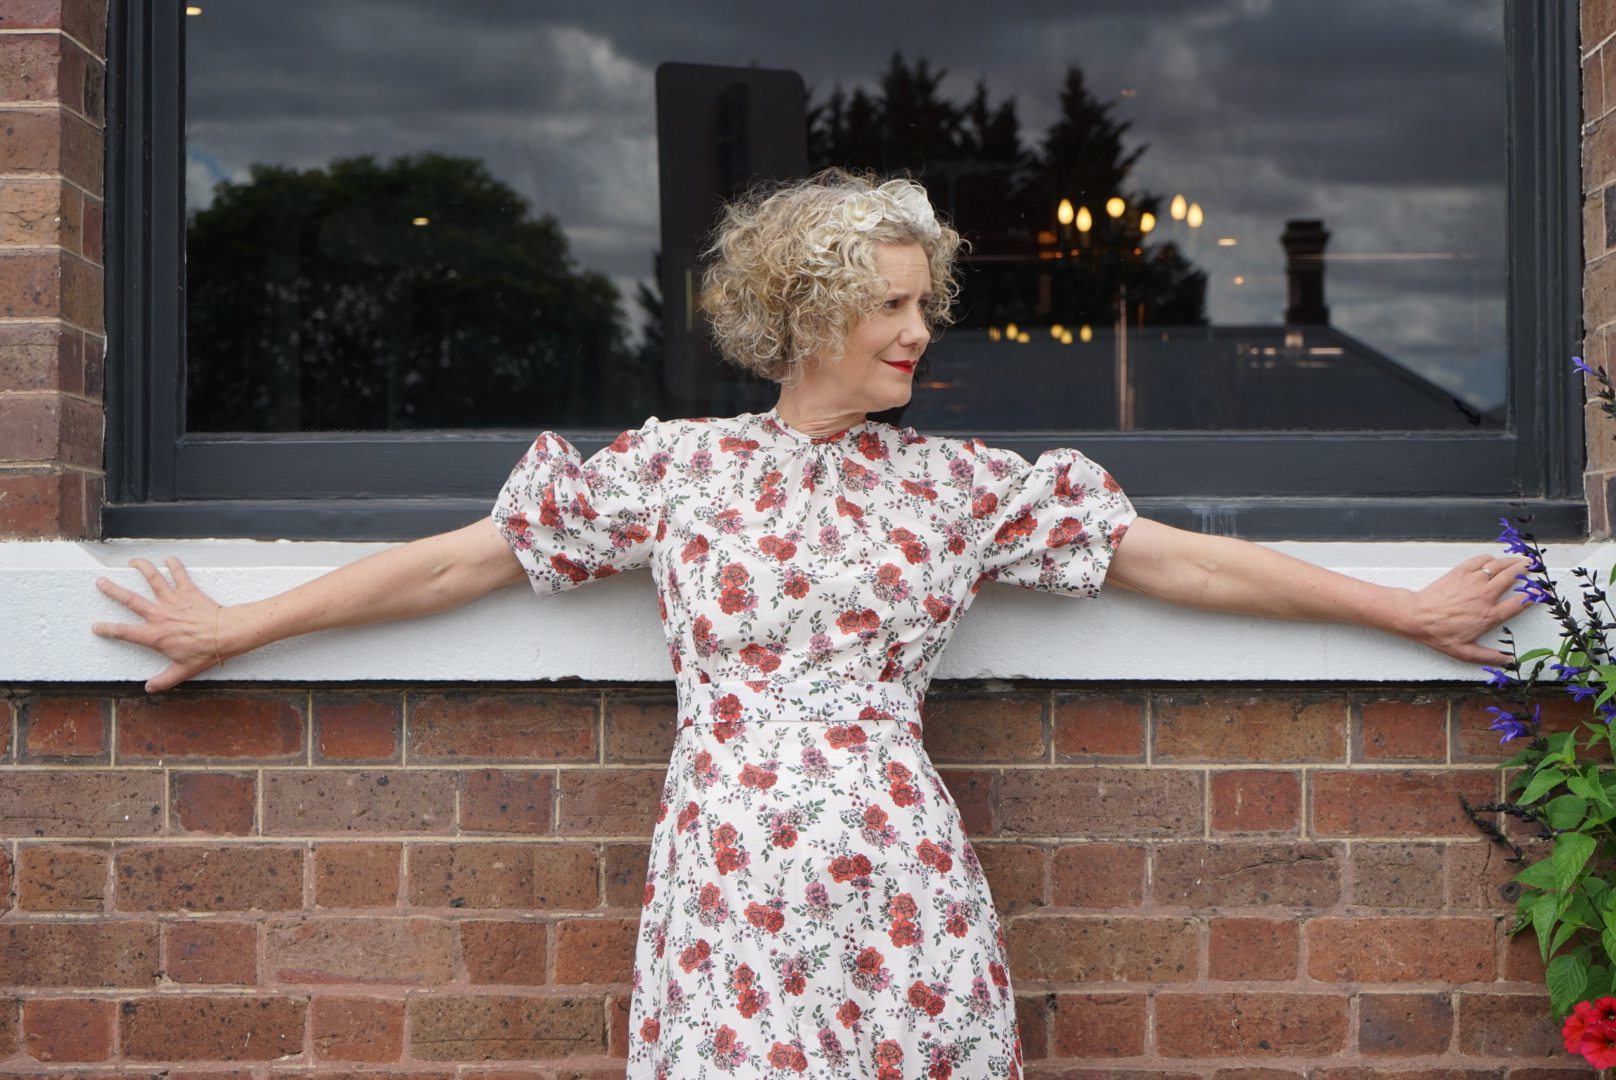
The showcase was also sponsored by Style Arc Patterns, who very generously gifted the pattern for the project. After much deliberation (and a little daydreaming), I chose the Trinnie Woven Expansion Dress — a silhouette that felt modern yet romantic, with just the right amount of drama for the runway.
For the fabric, I worked with Inked Rose Liberty Tana Lawn from the Floral Rebellion SS 2026 collection, kindly gifted by Regent Street Fabrics. I absolutely fell in love with this print — bold yet delicate, rebellious yet timeless. It’s one of those fabrics I would have purchased without hesitation had I not been sponsored. It also comes in beautiful blue and pink colourways, both equally tempting.
From a construction perspective, the dress was an absolute joy to make. Everything came together seamlessly — no unexpected hiccups, no pattern battles, just one of those rare projects where the sewing gods are entirely on your side. In true rebel spirit (perhaps inspired by the collection itself), I skipped the instructions altogether and went rogue, cutting straight into the paper pattern.
I made a straight size 10 based on the finished garment measurements, and the only adjustment I made was lengthening the bodice by 2.5 cm — my usual modification for a comfortable fit. Other than that, the pattern was beautifully drafted and required no further tweaks.
Walking the runway in a dress made with my own hands, in a Liberty fabric I truly adore, surrounded by fellow creatives and Liberty lovers, was an unforgettable experience. It felt like a perfect intersection of craftsmanship, community, and a long-standing love affair with floral prints.
On the day we also got the opportunity to listen to Anna Buruma and Mary-Anne Dunkley from Liberty of London talk about the 150 years of history of print fabrics. Amazing!
I’m so grateful to Regent Street Fabrics and Style Arc for the opportunity to be part of such a special event — and to Liberty, for continuing to create fabrics that inspire us to dream, design, and sew with joy.
Here’s to Floral Rebellion, fearless sewing, and saying yes when beautiful opportunities come knocking.
Some projects feel extra special from the very beginning, and this one definitely does. I’ve just finished sewing The Assembly Line Tulip Dress in pale blue Hello Kitty Liberty Tana Lawn – a fabric that you can only buy in Japan. It was kindly picked up for me on a recent trip by a woman I met at Sew Seasonal (thank you again!). This fabric is such a treasure, and I was determined to make the most of it.
I bought 5 metres and managed to eek out not only the Tulip Dress, but also a pair of matching Charlotte knickers – because how could I resist a co-ord moment with something so rare?
For the dress itself, I cut a size small, which according to my measurements gave me around 5 cm of ease at the bust and waist. The silhouette is simple yet striking, and I love how wearable it feels. Since Liberty Tana Lawn has such a soft, drapey hand, I added a tulle petticoat underneath to give the skirt a touch more volume – and it really makes the tulip shape shine.
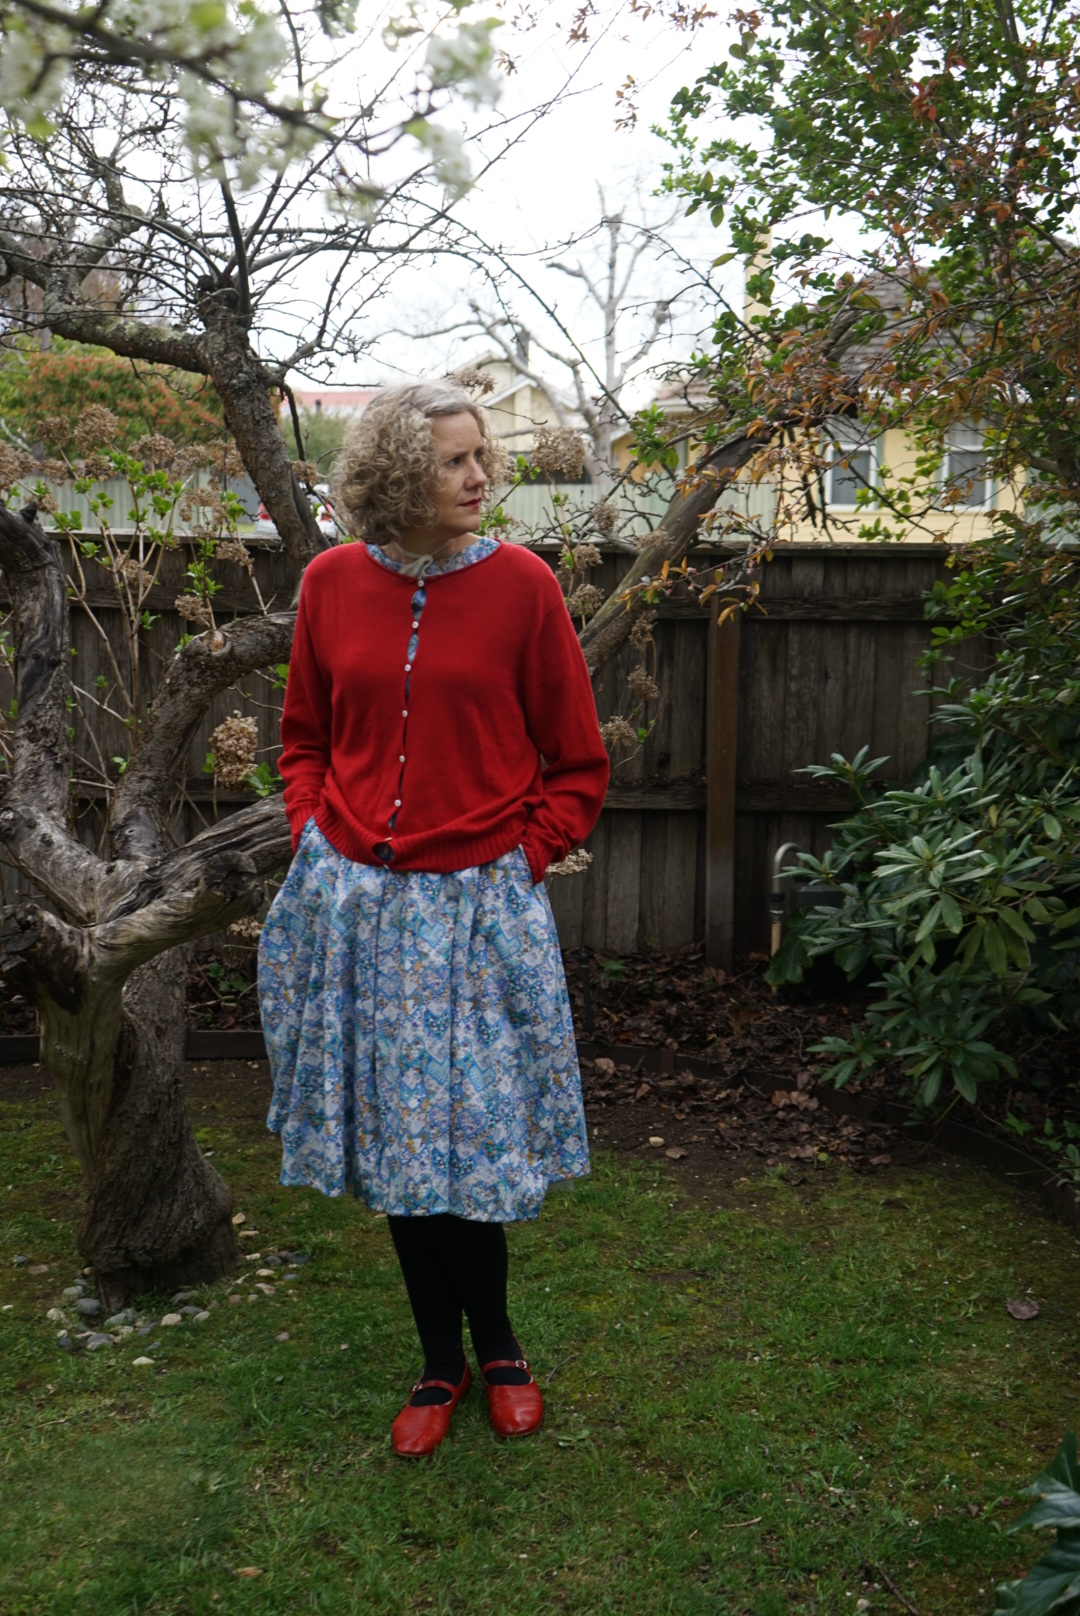
Styling-wise, I’m keeping things playful: I’ll be pairing my new dress with my red Mary Janes from Scarlet Jonesand my Francie cardigan from Lilypond. The pale blue and red together feel cheerful and summery, and the Hello Kitty print adds that perfect dose of whimsy.
This dress makes me smile every time I put it on, and I can already tell it’s going to be in heavy rotation over summer. Cute, comfortable, and just a little bit cheeky – everything I want in a handmade dress.
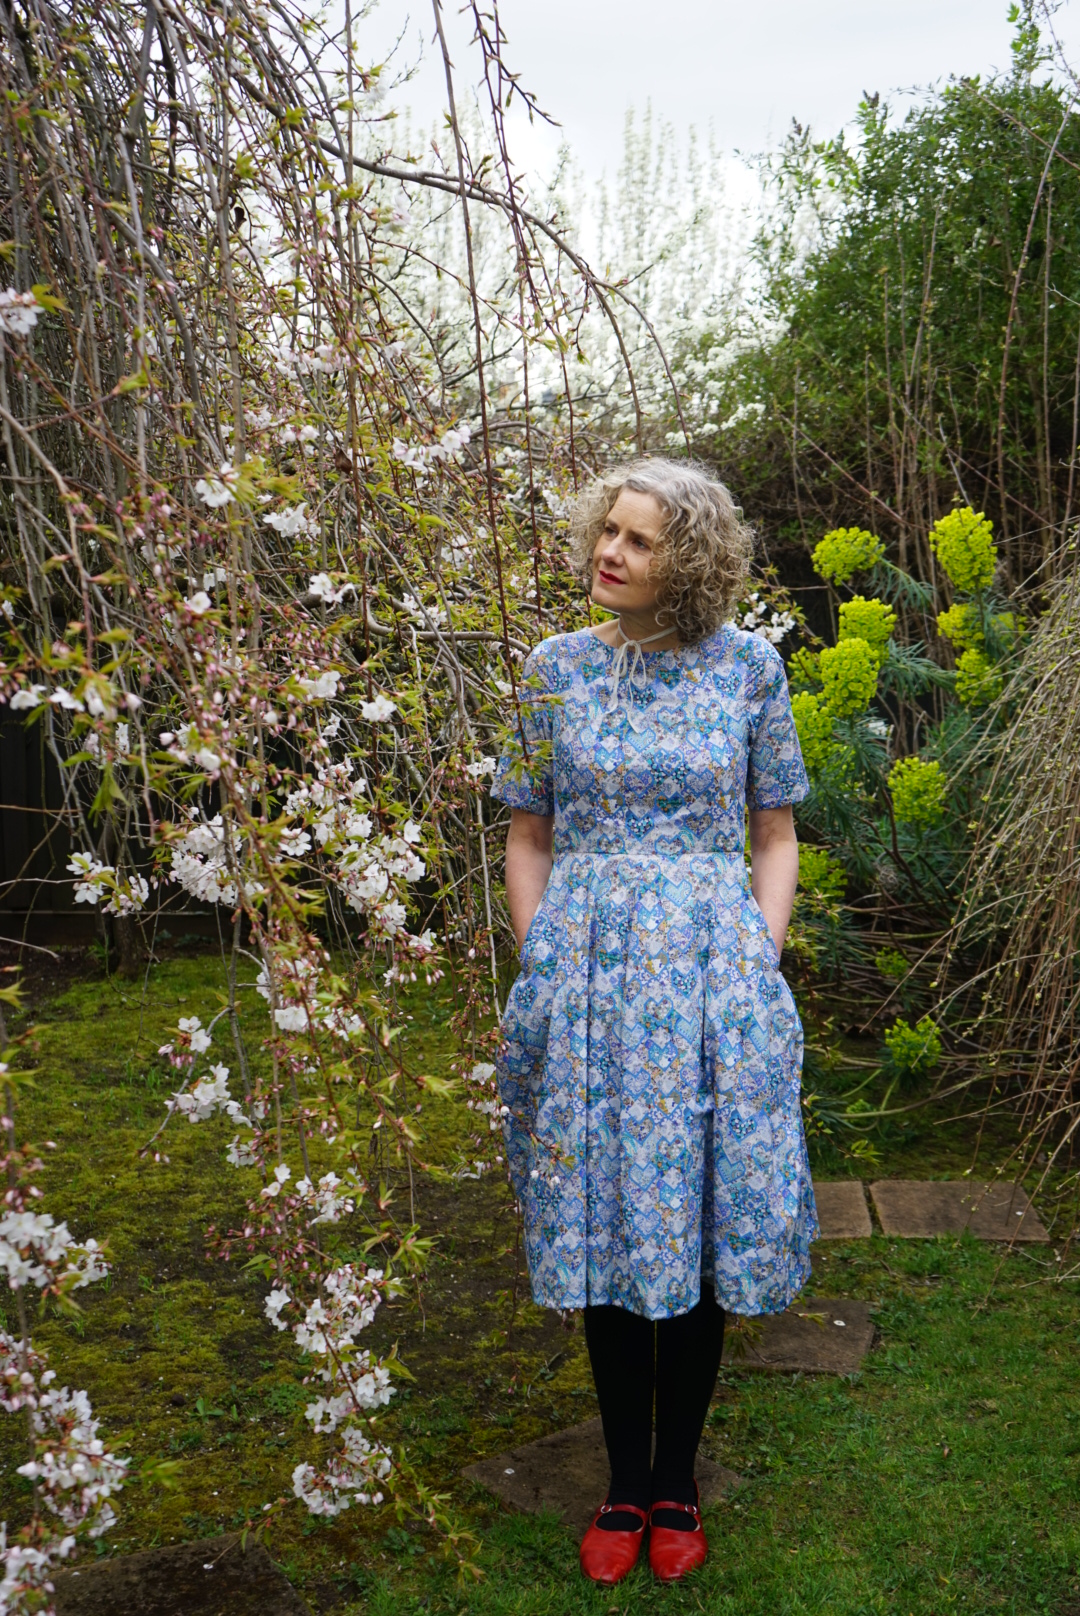
There’s something deeply comforting about sewing for the seasons — leaning into colour and texture while the world outside cools down. My latest make, the Liberty Natasha Tiered Dress, felt like just that: a little winter bloom to brighten a chilly Melbourne day.
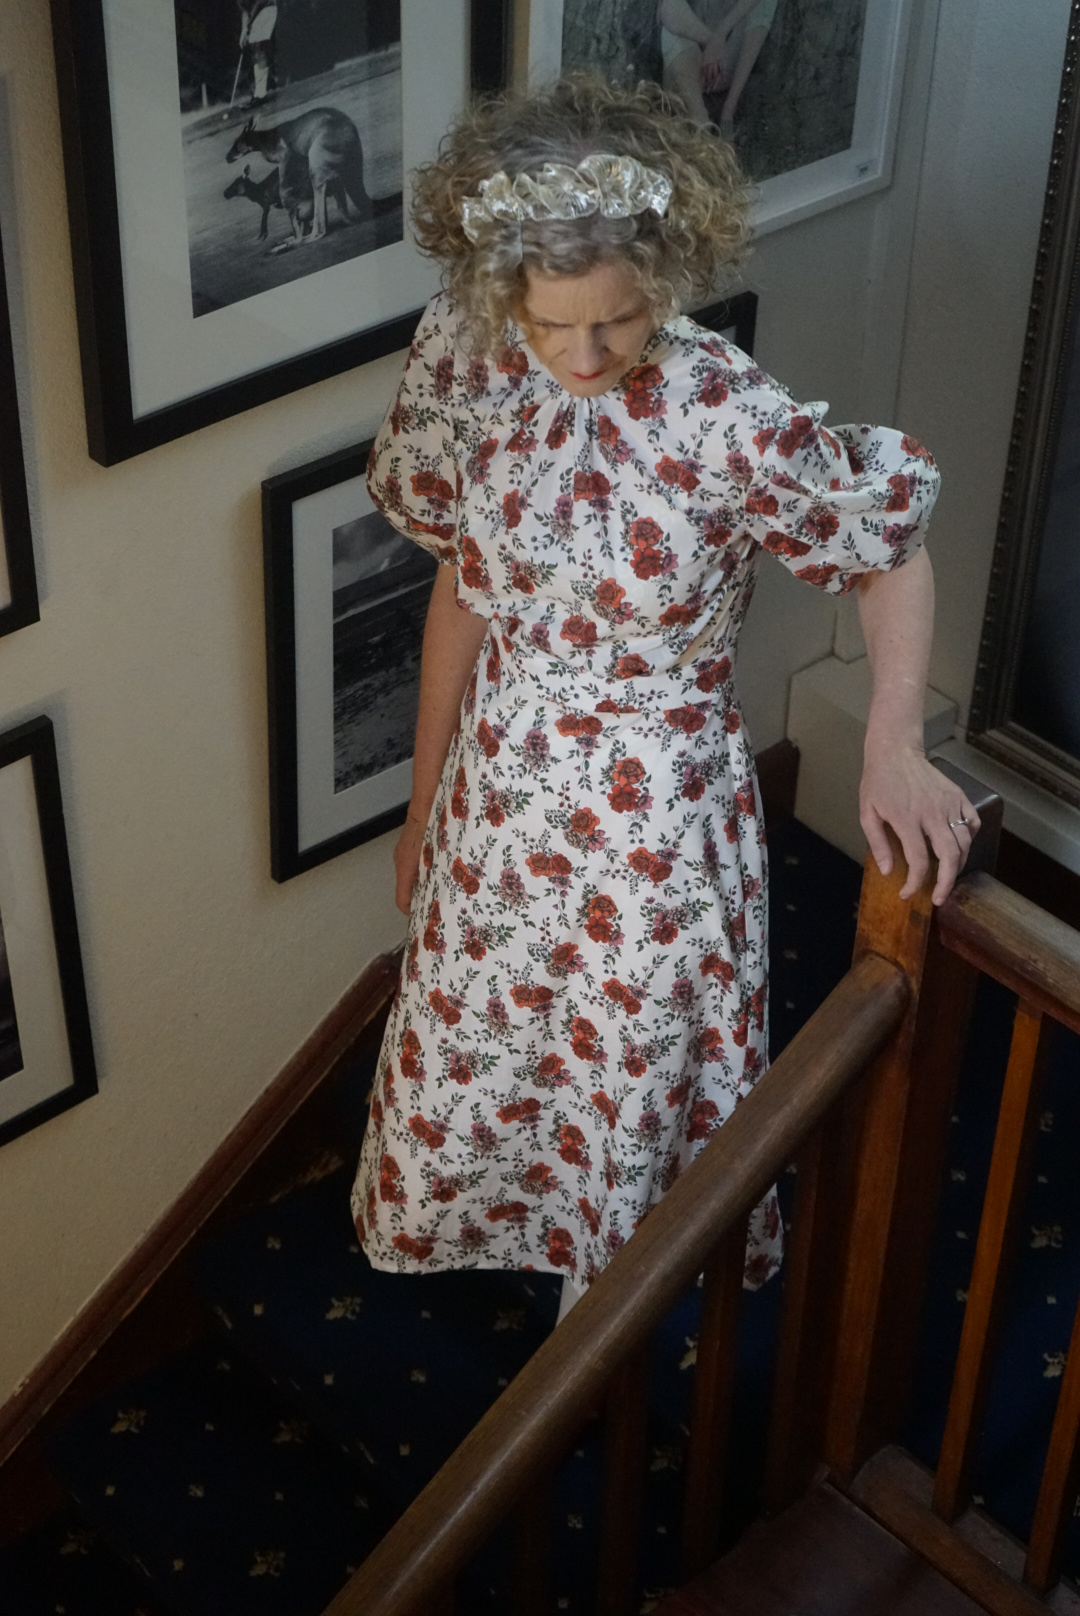
Made in Clementina Liberty Tana Lawn, one of the stunning special edition prints celebrating Liberty’s 150th anniversary, this dress had a sense of occasion before I even picked up my scissors. It’s a combination of Poppy and Daisy, boasting a nostalgic floral charm, alongside Clementina, an embodiment of Art Nouveau. I wore it to Sew Seasonal, a gorgeous get-together of around ten passionate seamstresses at The Cabinet Bar in the heart of the city. We chatted fabric, clothes, and travel over drinks — a perfect winter’s afternoon surrounded by kindred sewing spirits.
Of course, I couldn’t resist going the full ensemble: I made matching Charlotte knickers (as is my tradition) and a headscarf in the same print. The whole look felt joyful, feminine, and just a little bit cheeky — exactly the spirit of Liberty for me.
This is actually my second version of the Natasha Tiered Dress — my first was sewn in Liberty Wiltshire at Sewaway. It’s such a lovely, floaty shape that really shows off the fabric. I made it in a size 14, though I had to guess as there wasn’t any sizing info on the envelope (!). Thankfully it worked out beautifully.
One very special detail: I decided to take an early dip into my 50th birthday gift — my dreamy new Janome Skyline S7, who I’ve affectionately named Lady Sable. She’s not officially mine until November, but I couldn’t resist taking her for a spin. I used her to sew a secret line of decorative stitching along the hem — subtle and only visible if you know where to look, but oh-so-satisfying to me. I love that hidden personal touch. Something just for me.
I’ll be tucking Lady Sable away now until November so I still have something beautiful to open on the day. But I have a sneaking suspicion she’ll be leaving her quiet, stitched signatures on many future makes.
One final cherry on top? Through the Sew Seasonal group, I may have found someone heading to Japan in August who’s kindly offered to pick up some Hello Kitty Liberty Tana Lawn for me. Fingers and toes crossed!
A huge thank you to Laura for organising such a relaxed and delightful afternoon. The smaller group meant we could actually sit, connect, and really chat. I’ll absolutely be going back — it was a balm for the soul and a celebration of all things handmade.
Until then — may your bobbins be full, your thread never tangle, and your makes bring you joy.
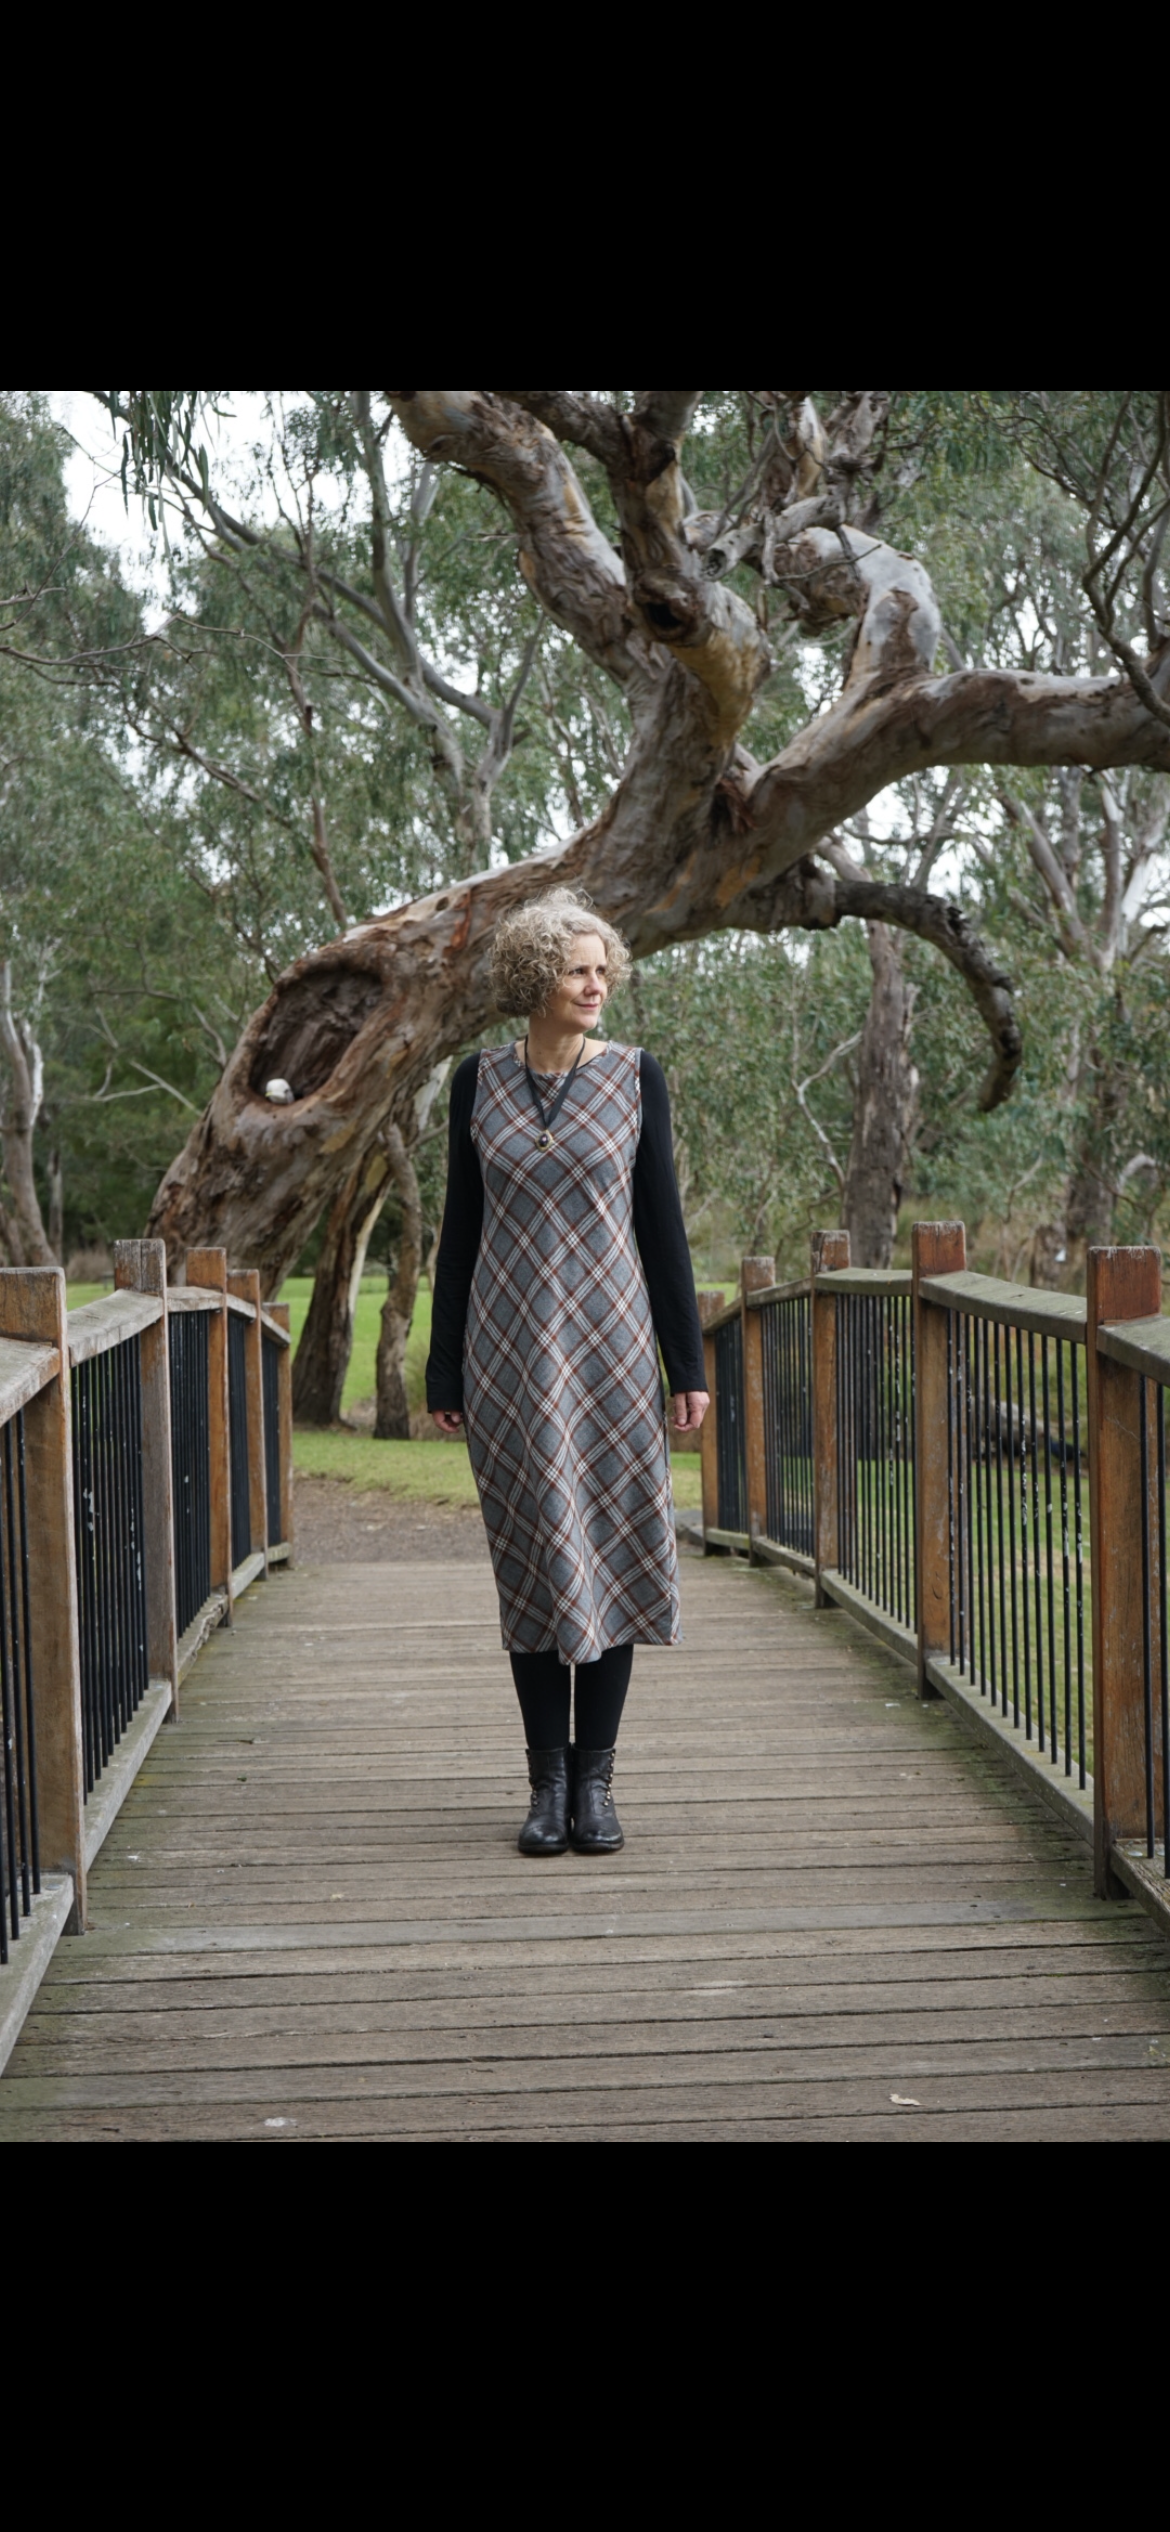
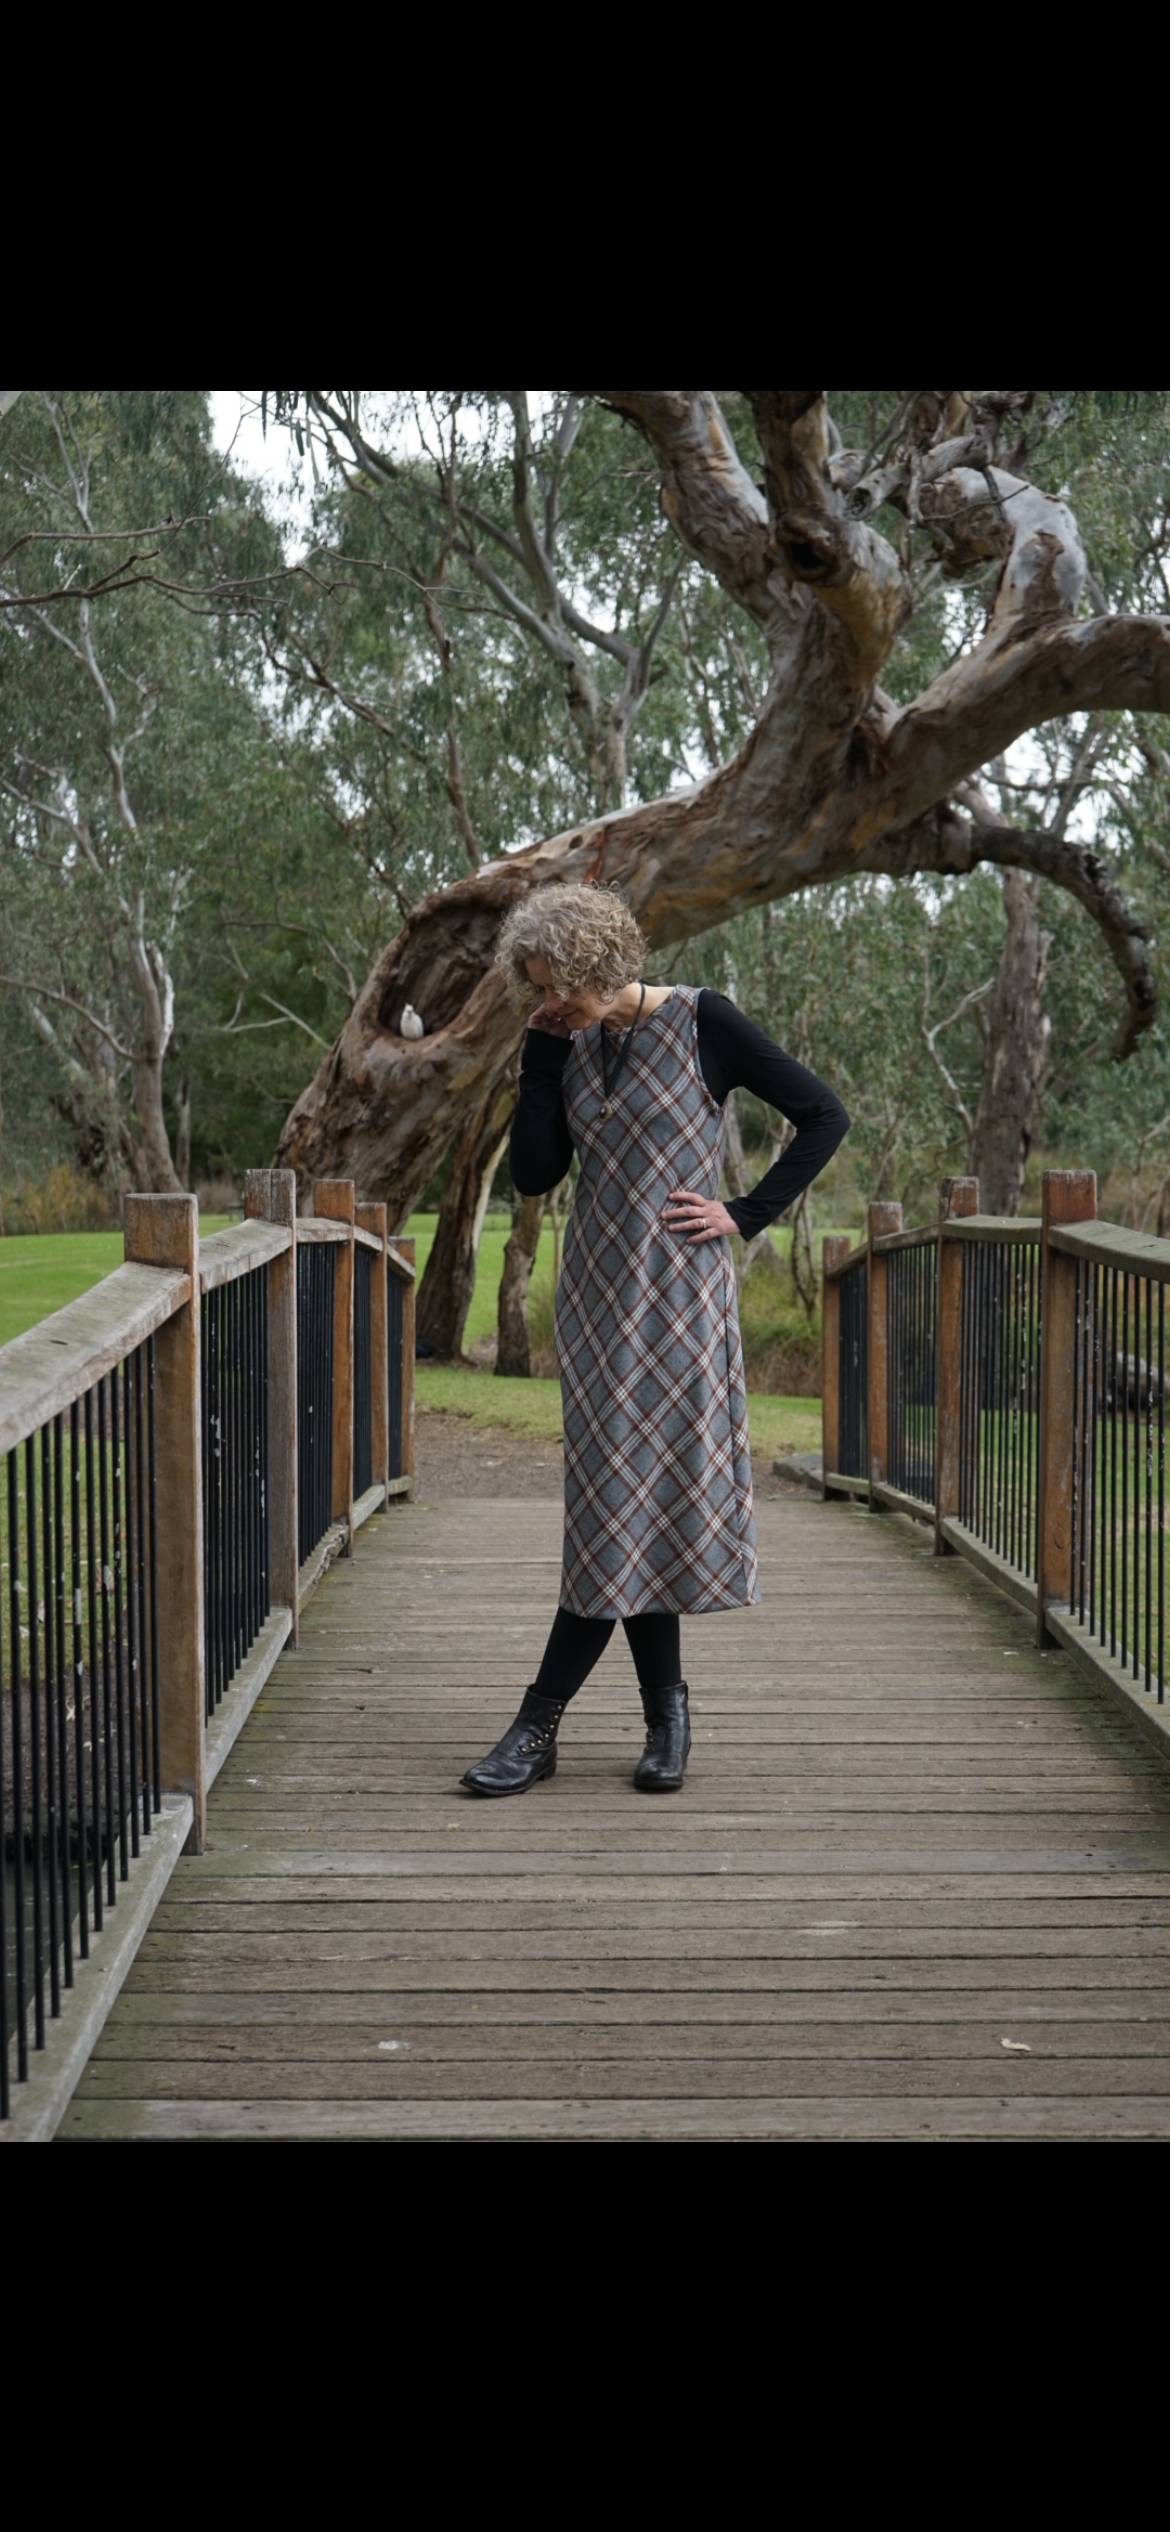
There’s a quiet kind of magic in bias-cut garments — the way they drape, move, and mould to the body without clinging. The Alessi Dress by Tessuti captures that magic beautifully, and sewing it in a soft wool made it the perfect transition piece for cooler weather. It’s elegant, uncomplicated, and exactly the kind of dress I want to reach for again and again.
The Pattern
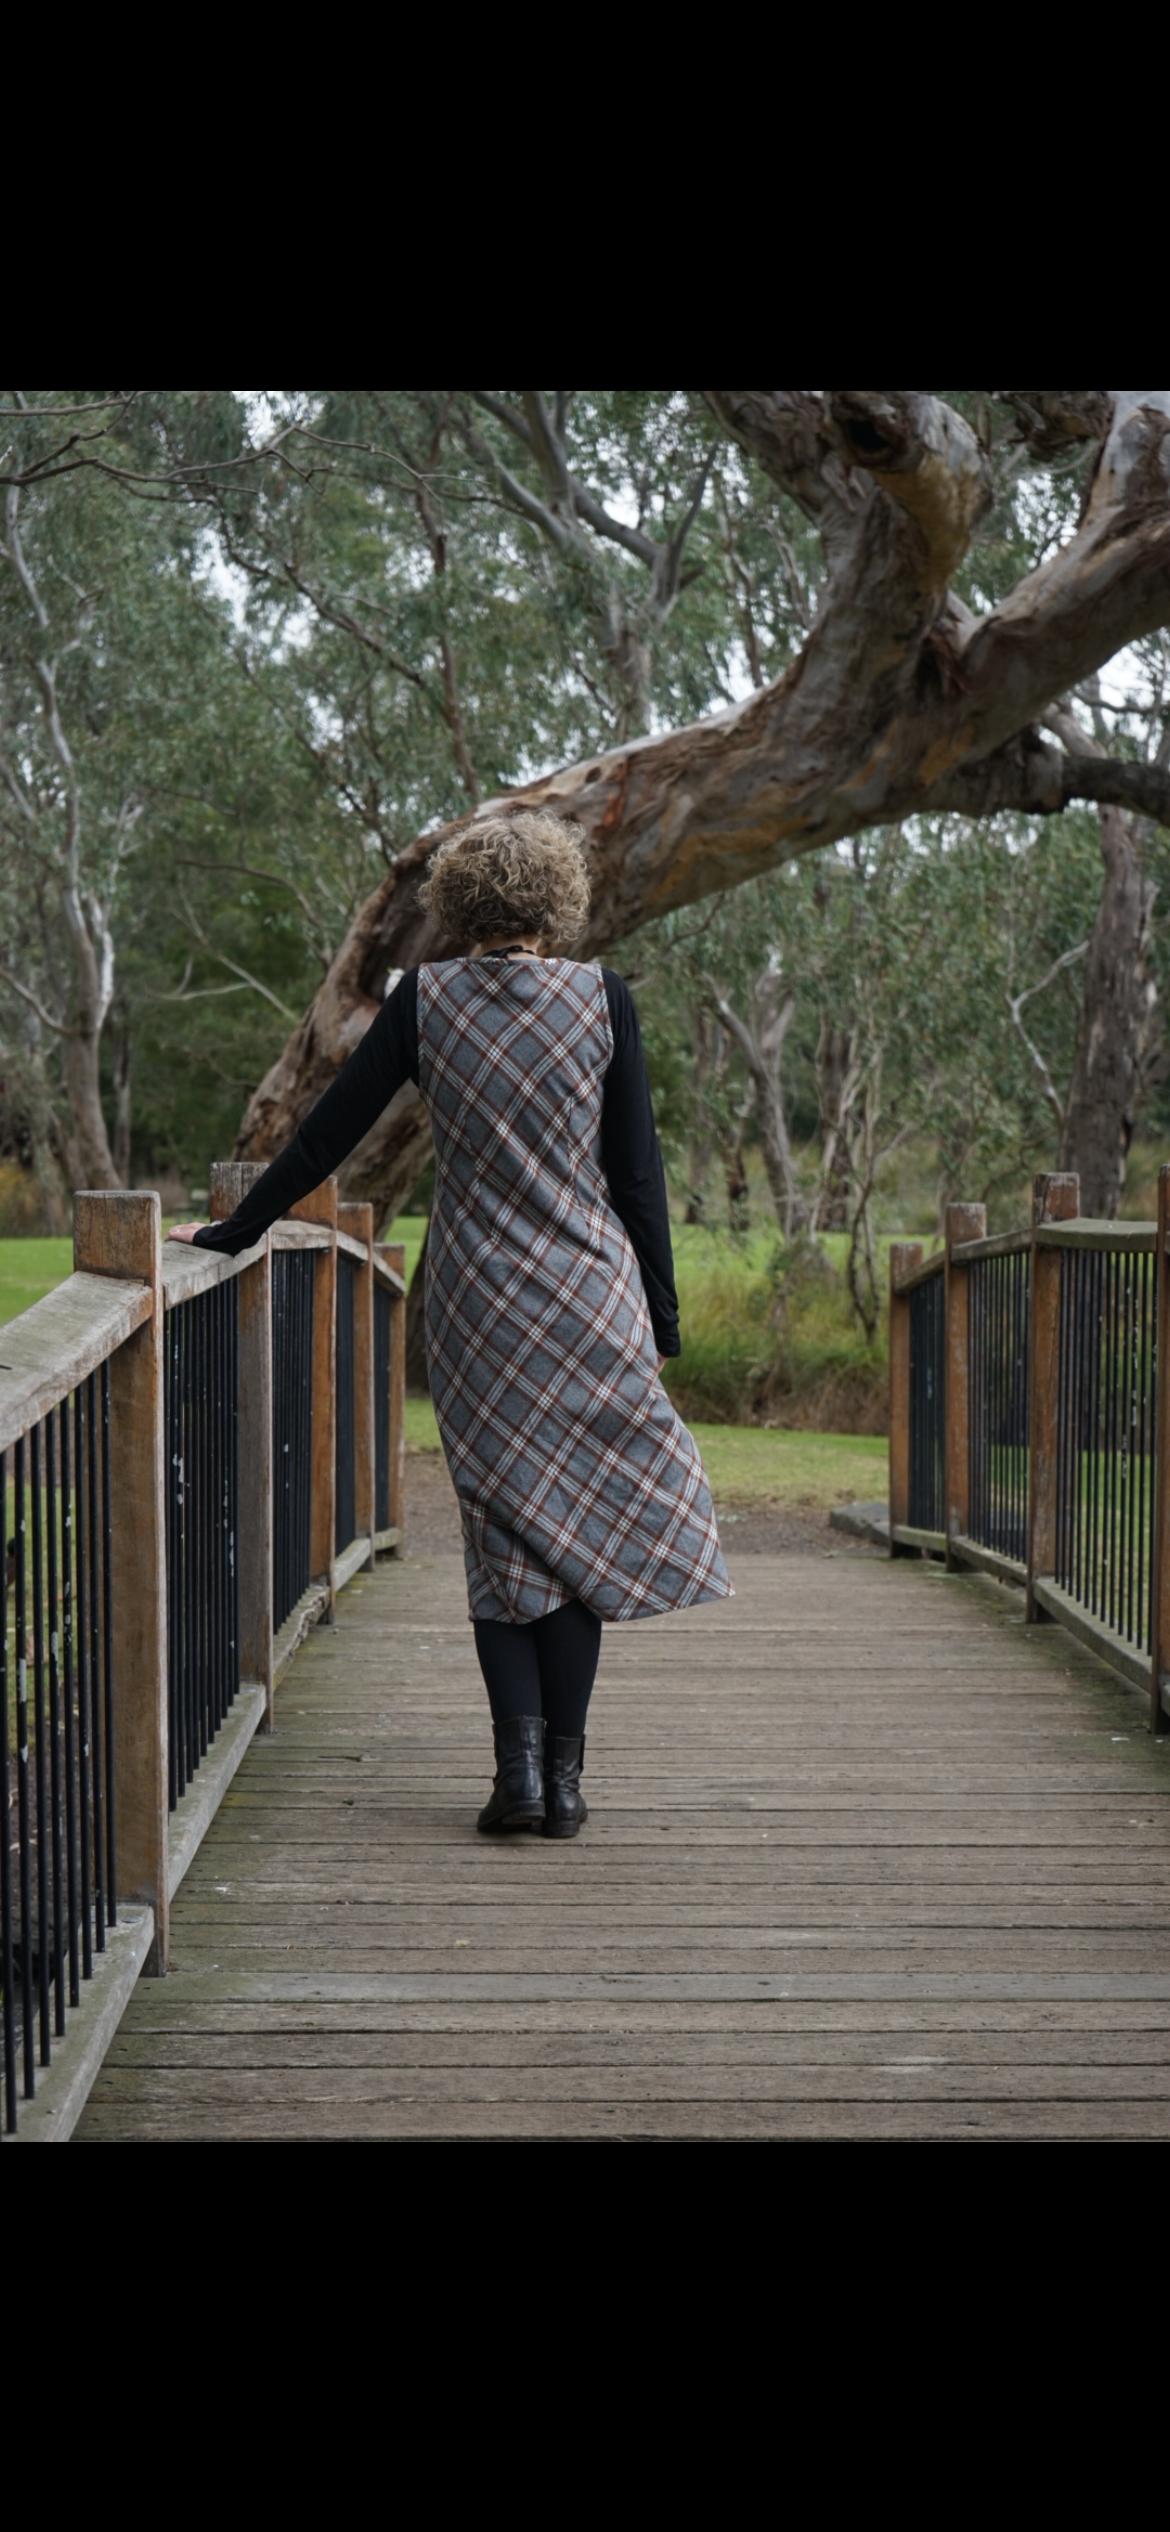
The Alessi is a midi-length, bias-cut dress with clean lines and minimal fuss. It features a bias-bound neckline and armhoes, shaped back darts for subtle definition, and a beautifully flared hem that sways just so when you walk. No bust darts, no side zipper — just clever pattern cutting and a flattering shape that does the work for you.
This is my kind of minimalist: modern, wearable, and gently tailored without being too fitted. A similar fit to the Sadie Slip dress which I so adore.
The Fabric
I sewed my Alessi in a lightweight wool from Tessuti that I picked up in their recent sale — warm without being heavy, with a soft hand and beautiful drape. It’s a bit of a departure from the usual Liberty I use, but it worked wonderfully. The bias cut gives it fluidity, while the wool adds structure and warmth — ideal for layering in winter.
The Sewing Process
This is a project that rewards slow, mindful sewing. I let my wool rest flat overnight before cutting to let it settle on the bias. I stay-stitched the neckline and armholes immediately to prevent any stretching, and took my time handling the cut pieces — bias cuts love to shift if you’re not careful! I went rogue and didn’t use the tear away vilene. I successfully made two Alessi dresses in Liberty Tana Law at Sewaway on the Kings birthday weekend without it so I risked it with the wool. I think it paid off.
The neckline and armholes are finished with a clean bias binding (one of my favourite details), and the instructions were, as always with Tessuti, clear and well-paced. The back darts provide just enough shaping to avoid the dreaded “sack” look, while still letting the fabric drape naturally around the body.
And — one of the best parts — no zipper! The dress slips on easily, especially in a fabric with a bit of give. Fewer fastenings, more elegance.
I chose to overlock my seams instead of French seaming due to the bulk of the wool which in hindsight was the right decision. The directions have you overlock them, I prefer to French seam bias dresses. I hand stitched the hem listening to Gene Harris live at Maybeck Hall. A lovely way to finish of a cosy dress.
And can we pause for a moment to appreciate the pattern placement on the front. Complete fluke as I wasn’t paying any attention to detail when laying out my fabric, but a happy coincidence none the less.
Adjustments
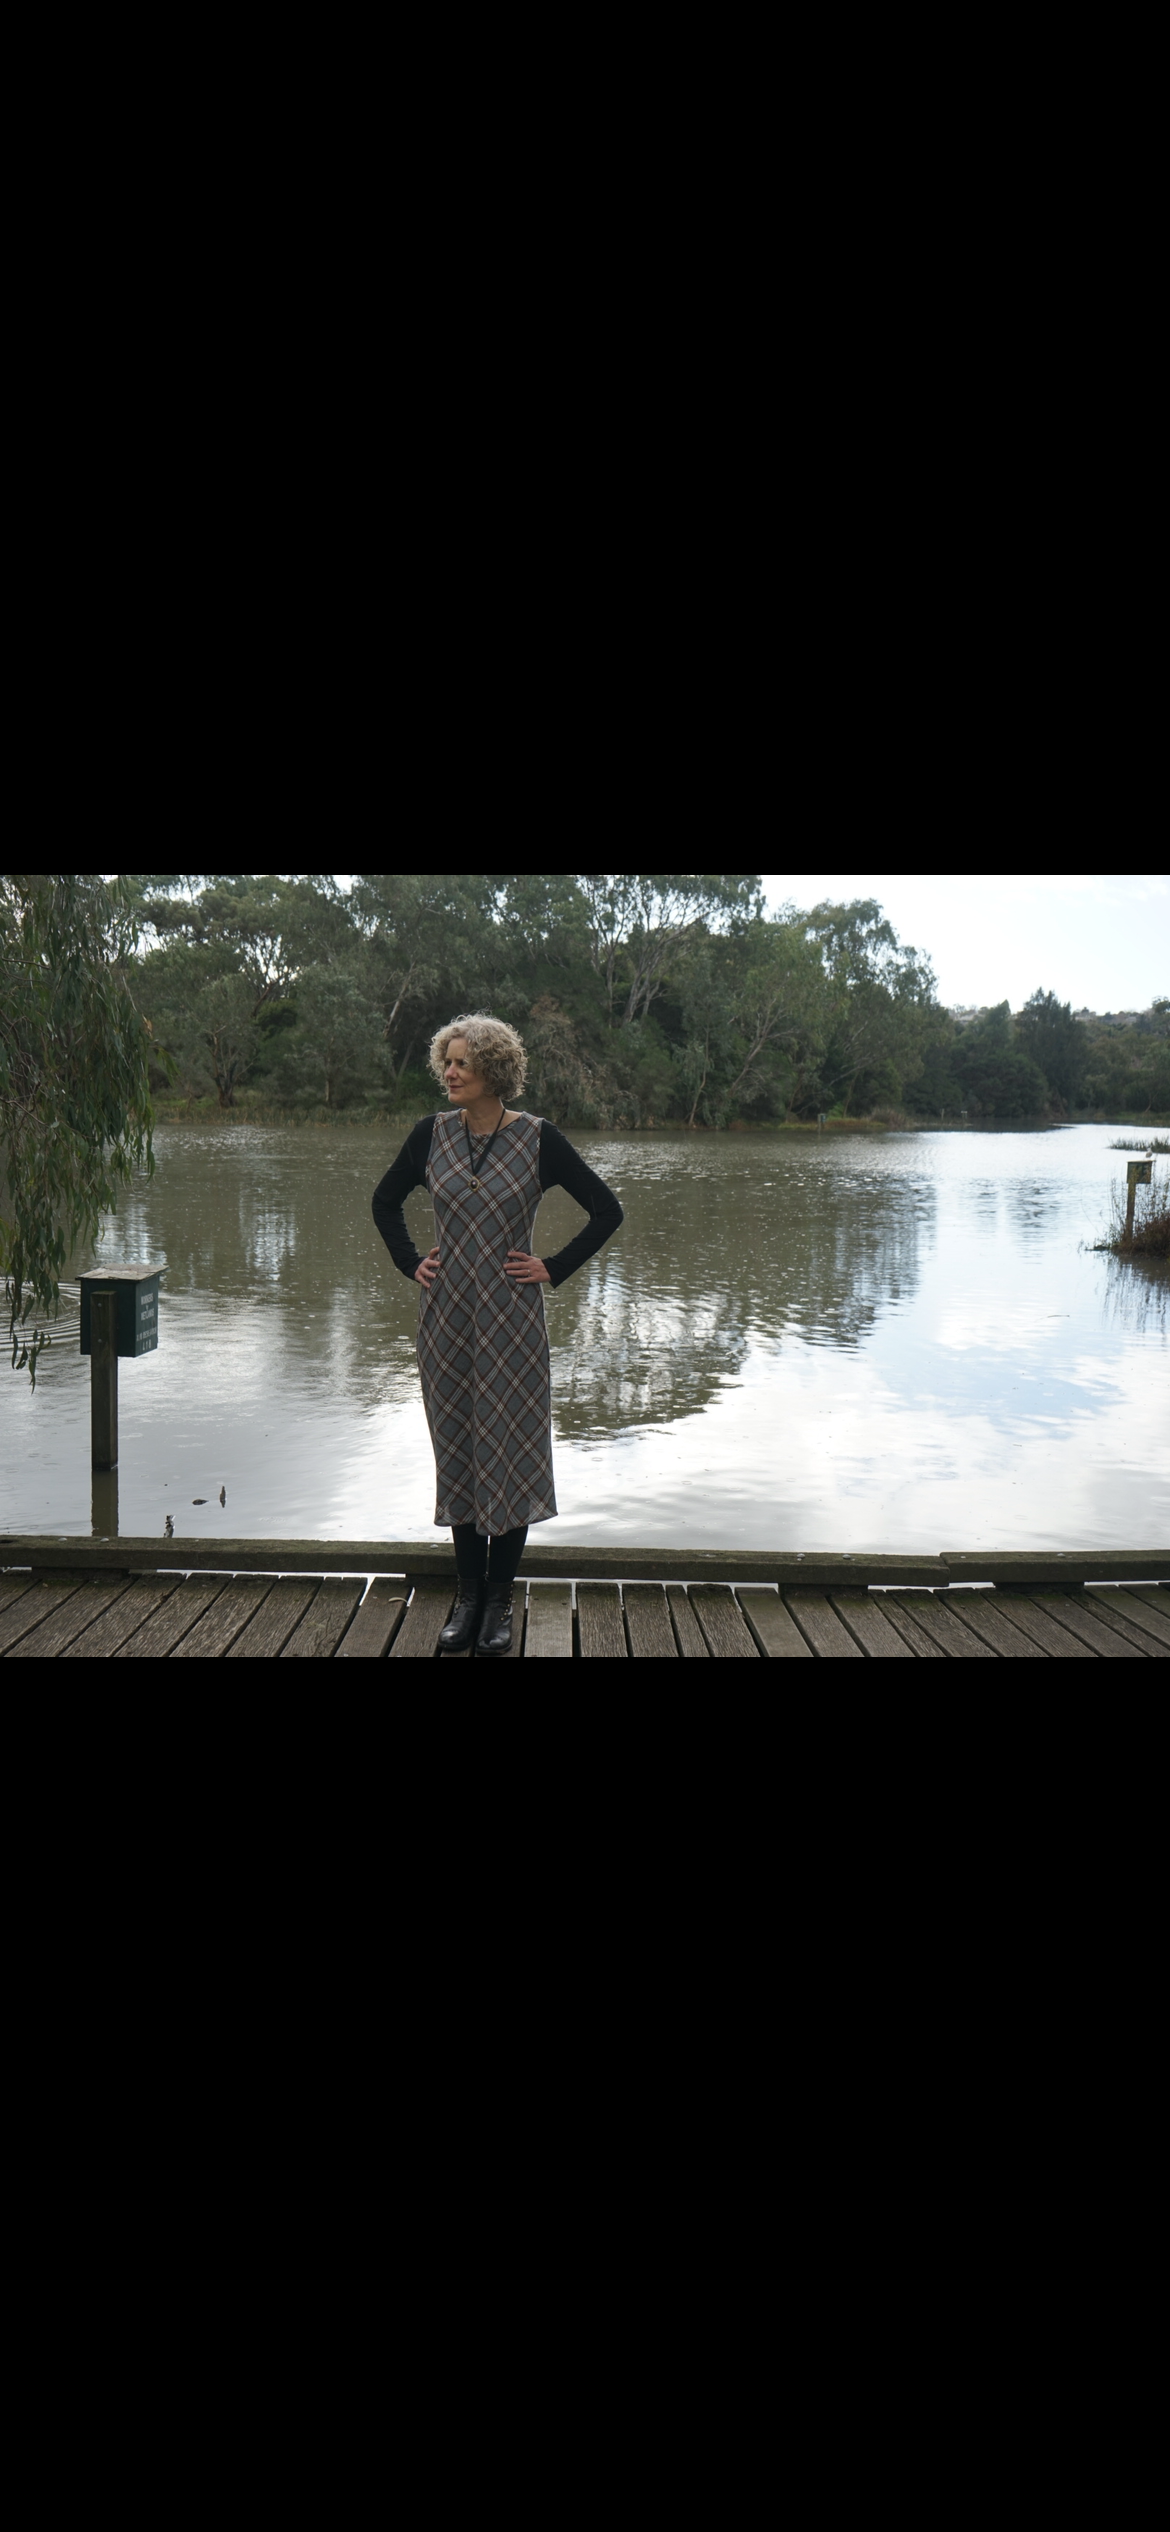
I didn’t add any length to the pattern, I found it was long enough for my liking without alteration but note it looks longer on the models.
I let the hem hang for a day before finishing, just to allow the bias to settle evenly.
No alterations to fit — the pattern is beautifully drafted.
One thing I would note was that the pattern was copy shop only not AO so I couldn’t print it at OfficeWorks and when I tried to print it at home on A4 I couldn’t get the 100% to match up with the test box so I gave up and went into Tessuti and bought a hard copy of the pattern.
Final Thoughts
This wool Alessi has quickly become one of my favourite handmade pieces. It feels grown-up but unfussy, tailored but easy to wear. I can layer it with a fitted body suit or long-sleeve tee underneath, throw on a cardigan or coat over the top, and head out feeling instantly put together. I’ve even got to the nana stage of wearing a slip under dresses and yes they were onto something!
It’s proof that simple shapes, when paired with the right fabric, can be the most chic. I’m already planning another one for spring — maybe in a washed silk or cotton lawn. Did someone say Liberty?
Tips for Sewing the Alessi in Wool:
Let your fabric rest before cutting — bias cuts love to shift.
Stay-stitch early to avoid neckline or armhole stretching. I went rogue and didn’t use the tear away vilene as recommended.
Handle your fabric gently and press as you go — wool is very responsive.
Let the dress hang before hemming for the most even finish.
Have you thought about making the Alessi dress this winter? If you do, comment below or tag me when you have completed your dress at @magdalenesmuse.
Happy sewing, Pips
Dress Pattern: the Alessi bias dress by Tessuti Patterns
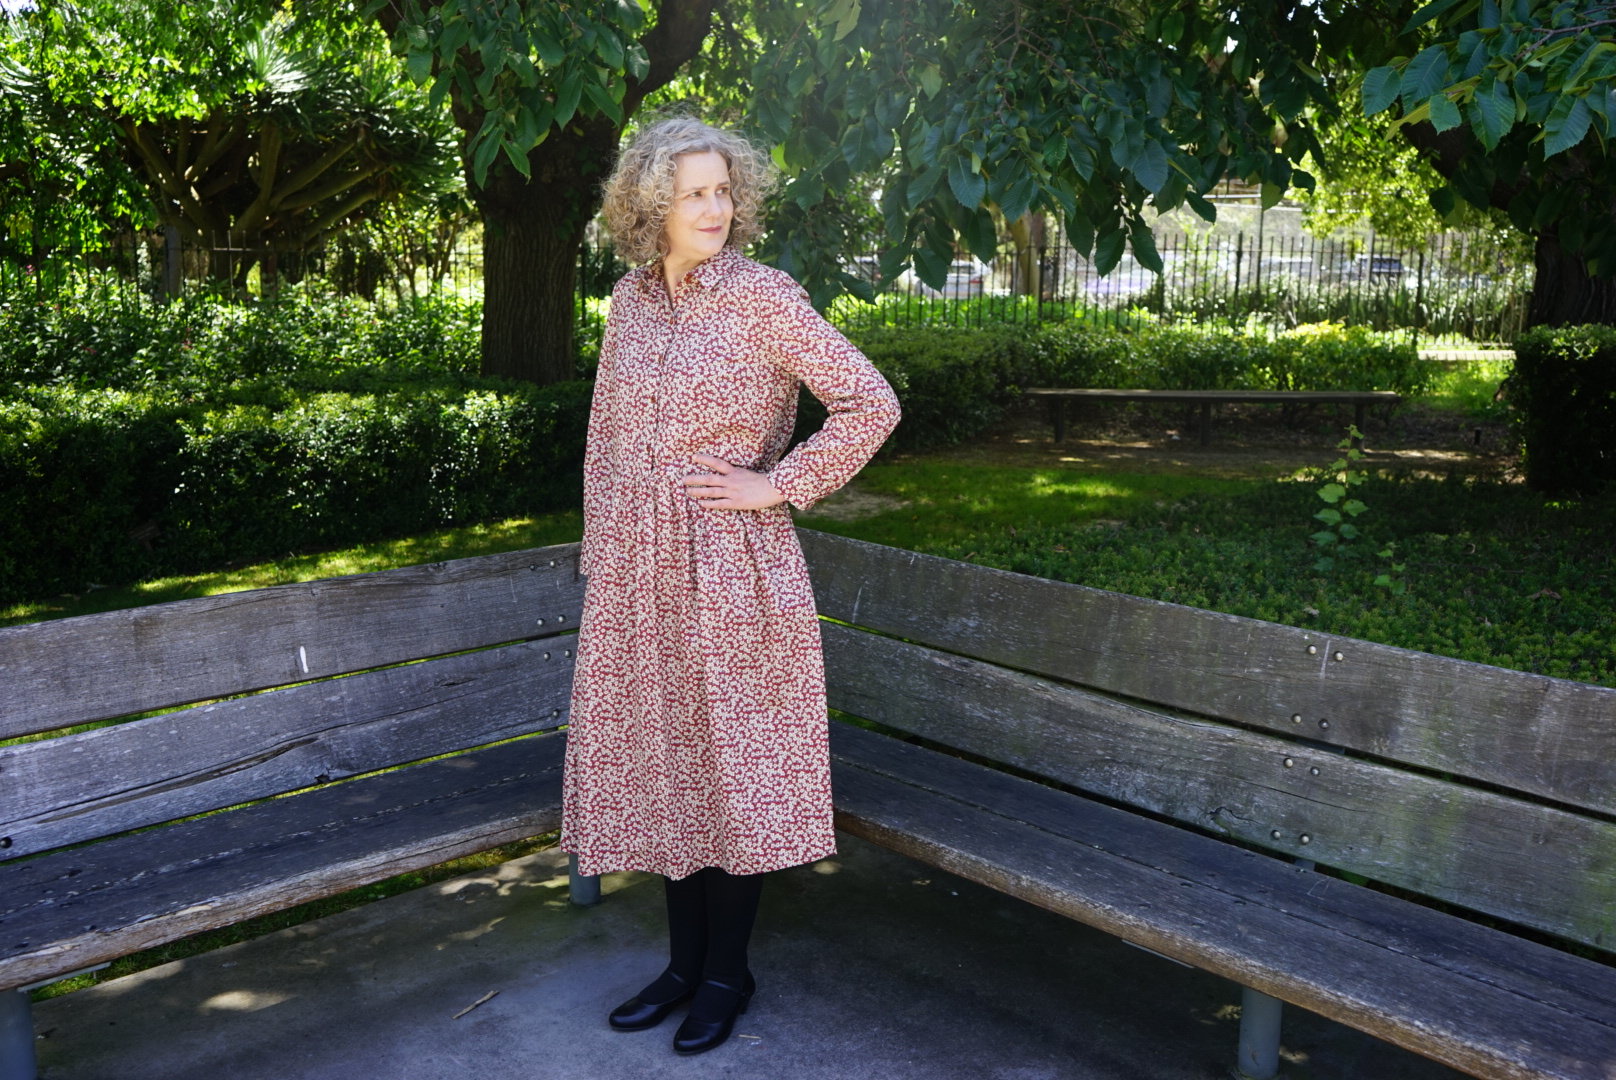
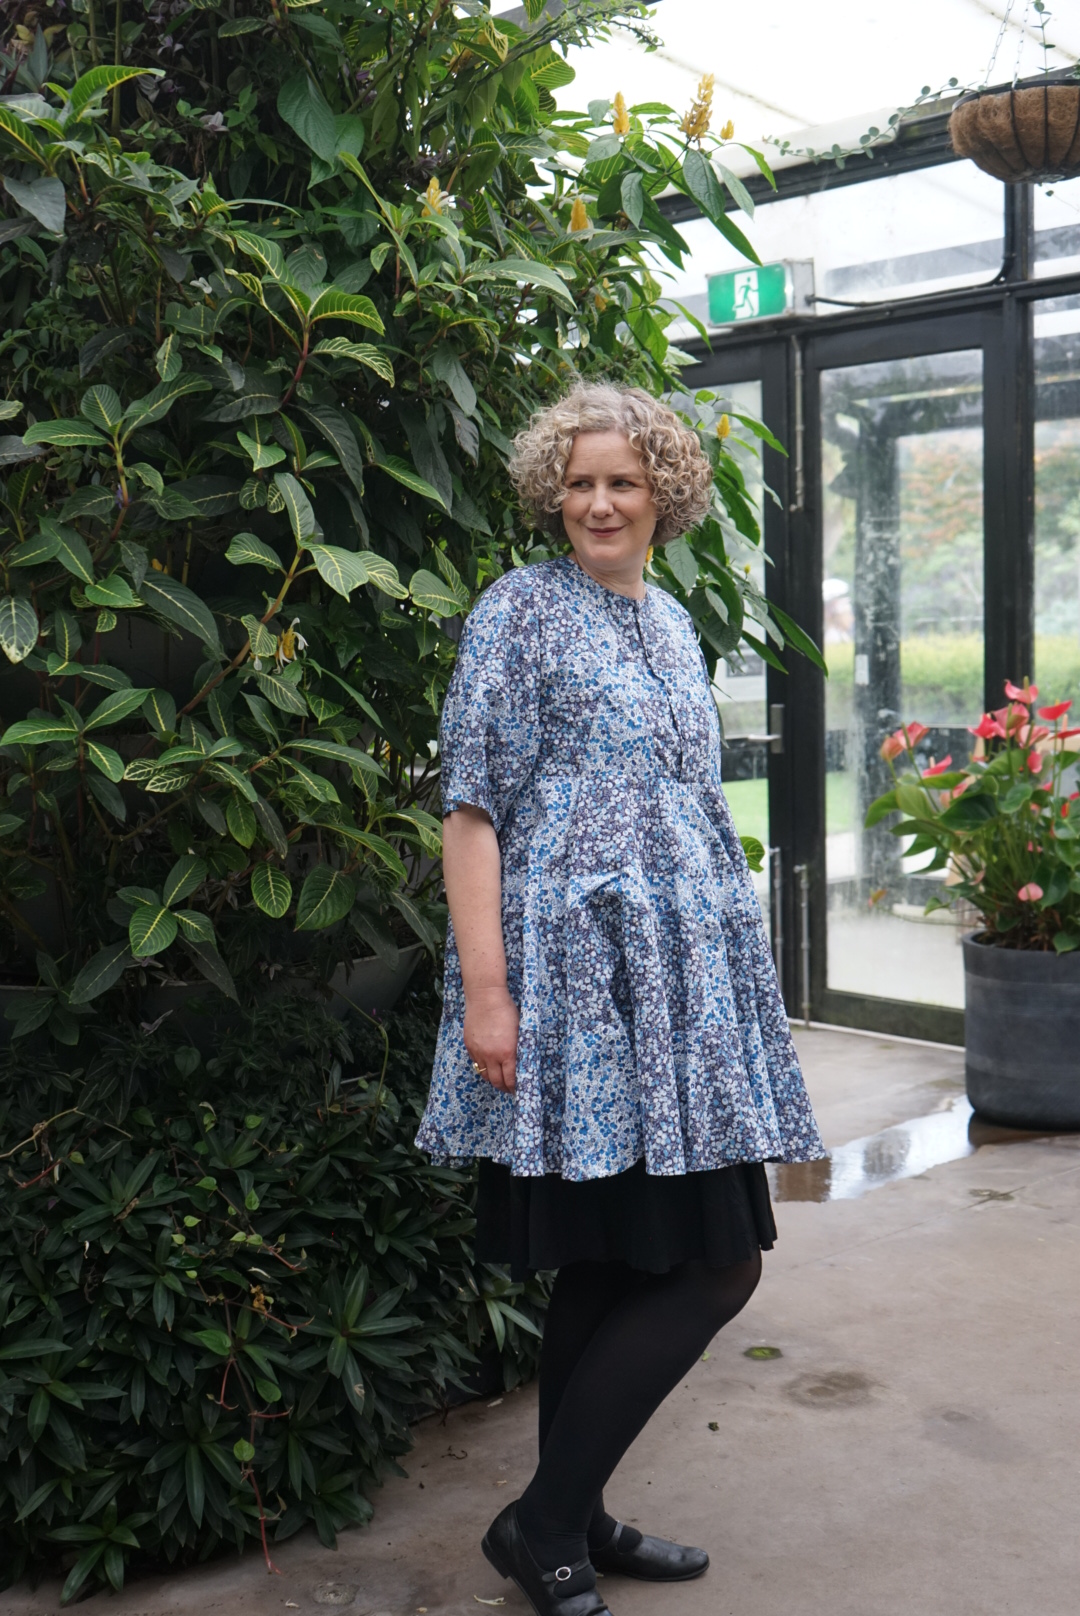
Who knew I was a fan of the shirt dress? Not I until I recently made a purchase from the mothership at Liberty of London. I purchased a long sleeve Tana Lawn shirt below knee shirt dress and fell so in love that I promptly purchased a second one. Interesting for a seamstress I know! So I set about the challenge of finding/making a pattern to replicate the dress.
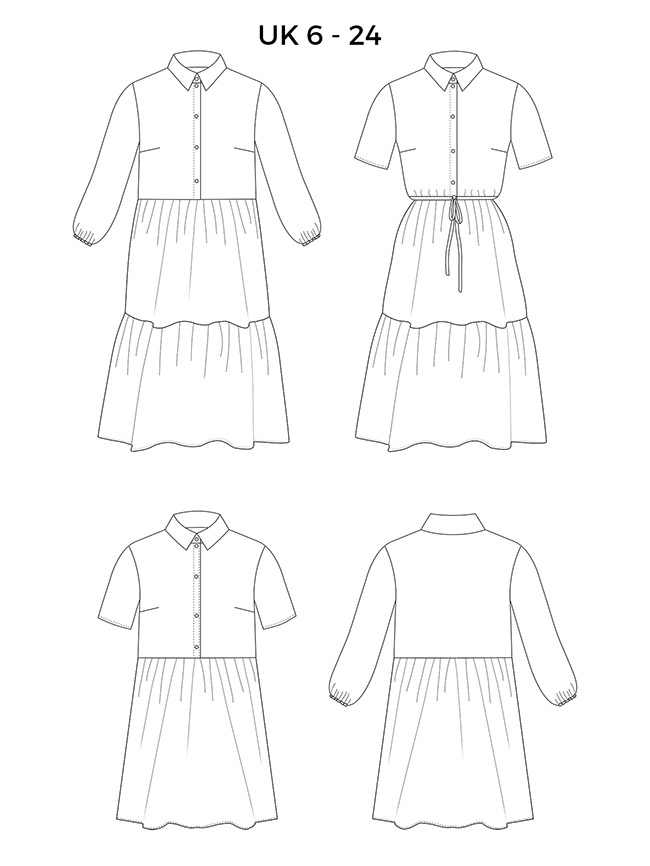
I put the call out to Instagram for patterns and got some great recommendations for shirt dresses but the closest one I felt to what I was wanting to achieve was Tilly and the Buttons Lyra dress as suggested by @sarahsewing. It had the collar and stand, button placket down the front and the skirt which could be lengthened. So it was a great starting block for my Liberty dress.
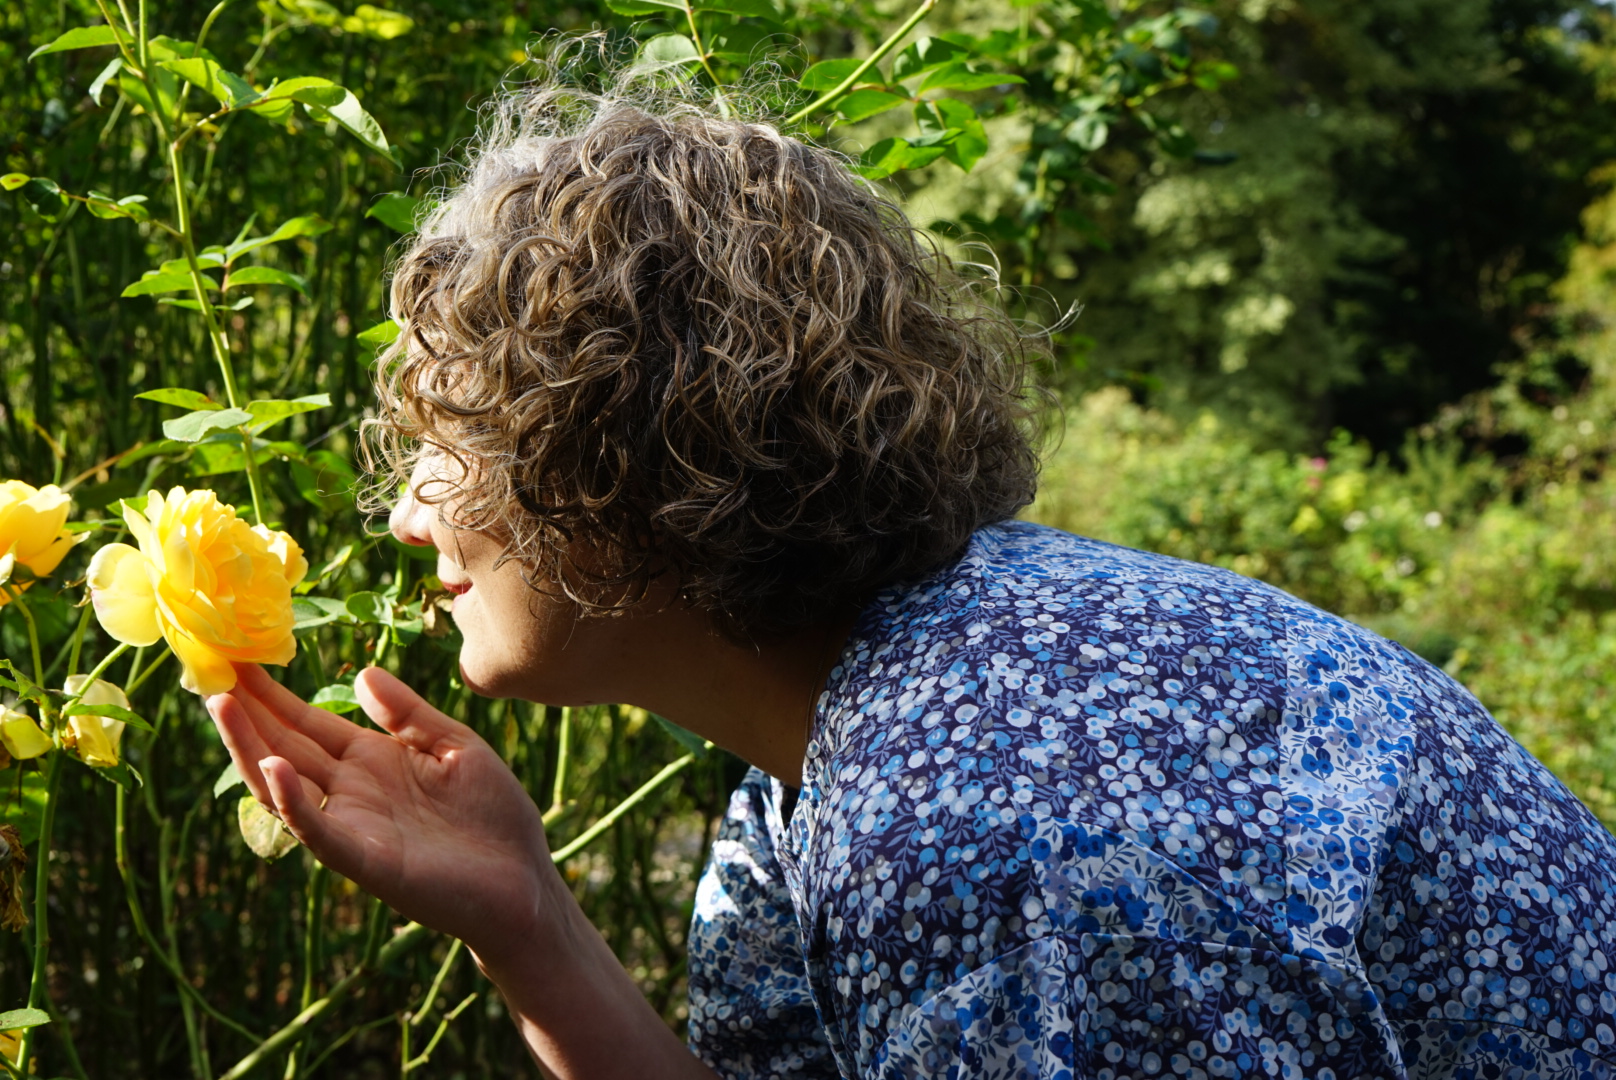
I started with a size 6 based on my body measurements and the finished measurements of the garment. This is a shirt dress that has a significant amount of ease which is exactly what I was looking for. And of course I used Mitsi Valeria Liberty Tana Lawn from the Strawberry Thief for my Toile. I used 5 meters and this included fabric for 1 pair of Charlotte Knickers by Measure Twice and a matching self drafted head scarf.
I knew I wanted a yoke on the back bodice so I created one by measuring 14cm down from the side shoulder seam and drawing a straight line across the bodice from side to centre back. I then added an inch to the lower back bodice fold line to create a pleat. When I traced these two pattern pieces off I added 1.5cm seam allowances to the new seam lines I had created.
For the the bodice I added 4cm to the length.
With the sleeves I knew I wanted cuffs so I used the Archer shirt sleeve to redraft the sleeve side seam and create the cuff keeping the original head of the Lyra sleeve. I used the size 16 sleeve and was able to draft a new sleeve with a cuff and placket. I added about 1-2cm of length (the Archer is already a very long sleeve) and whilst this is probably already just long enough I think next time I’ll add another couple of cm’s of length just because “sewing tall”.
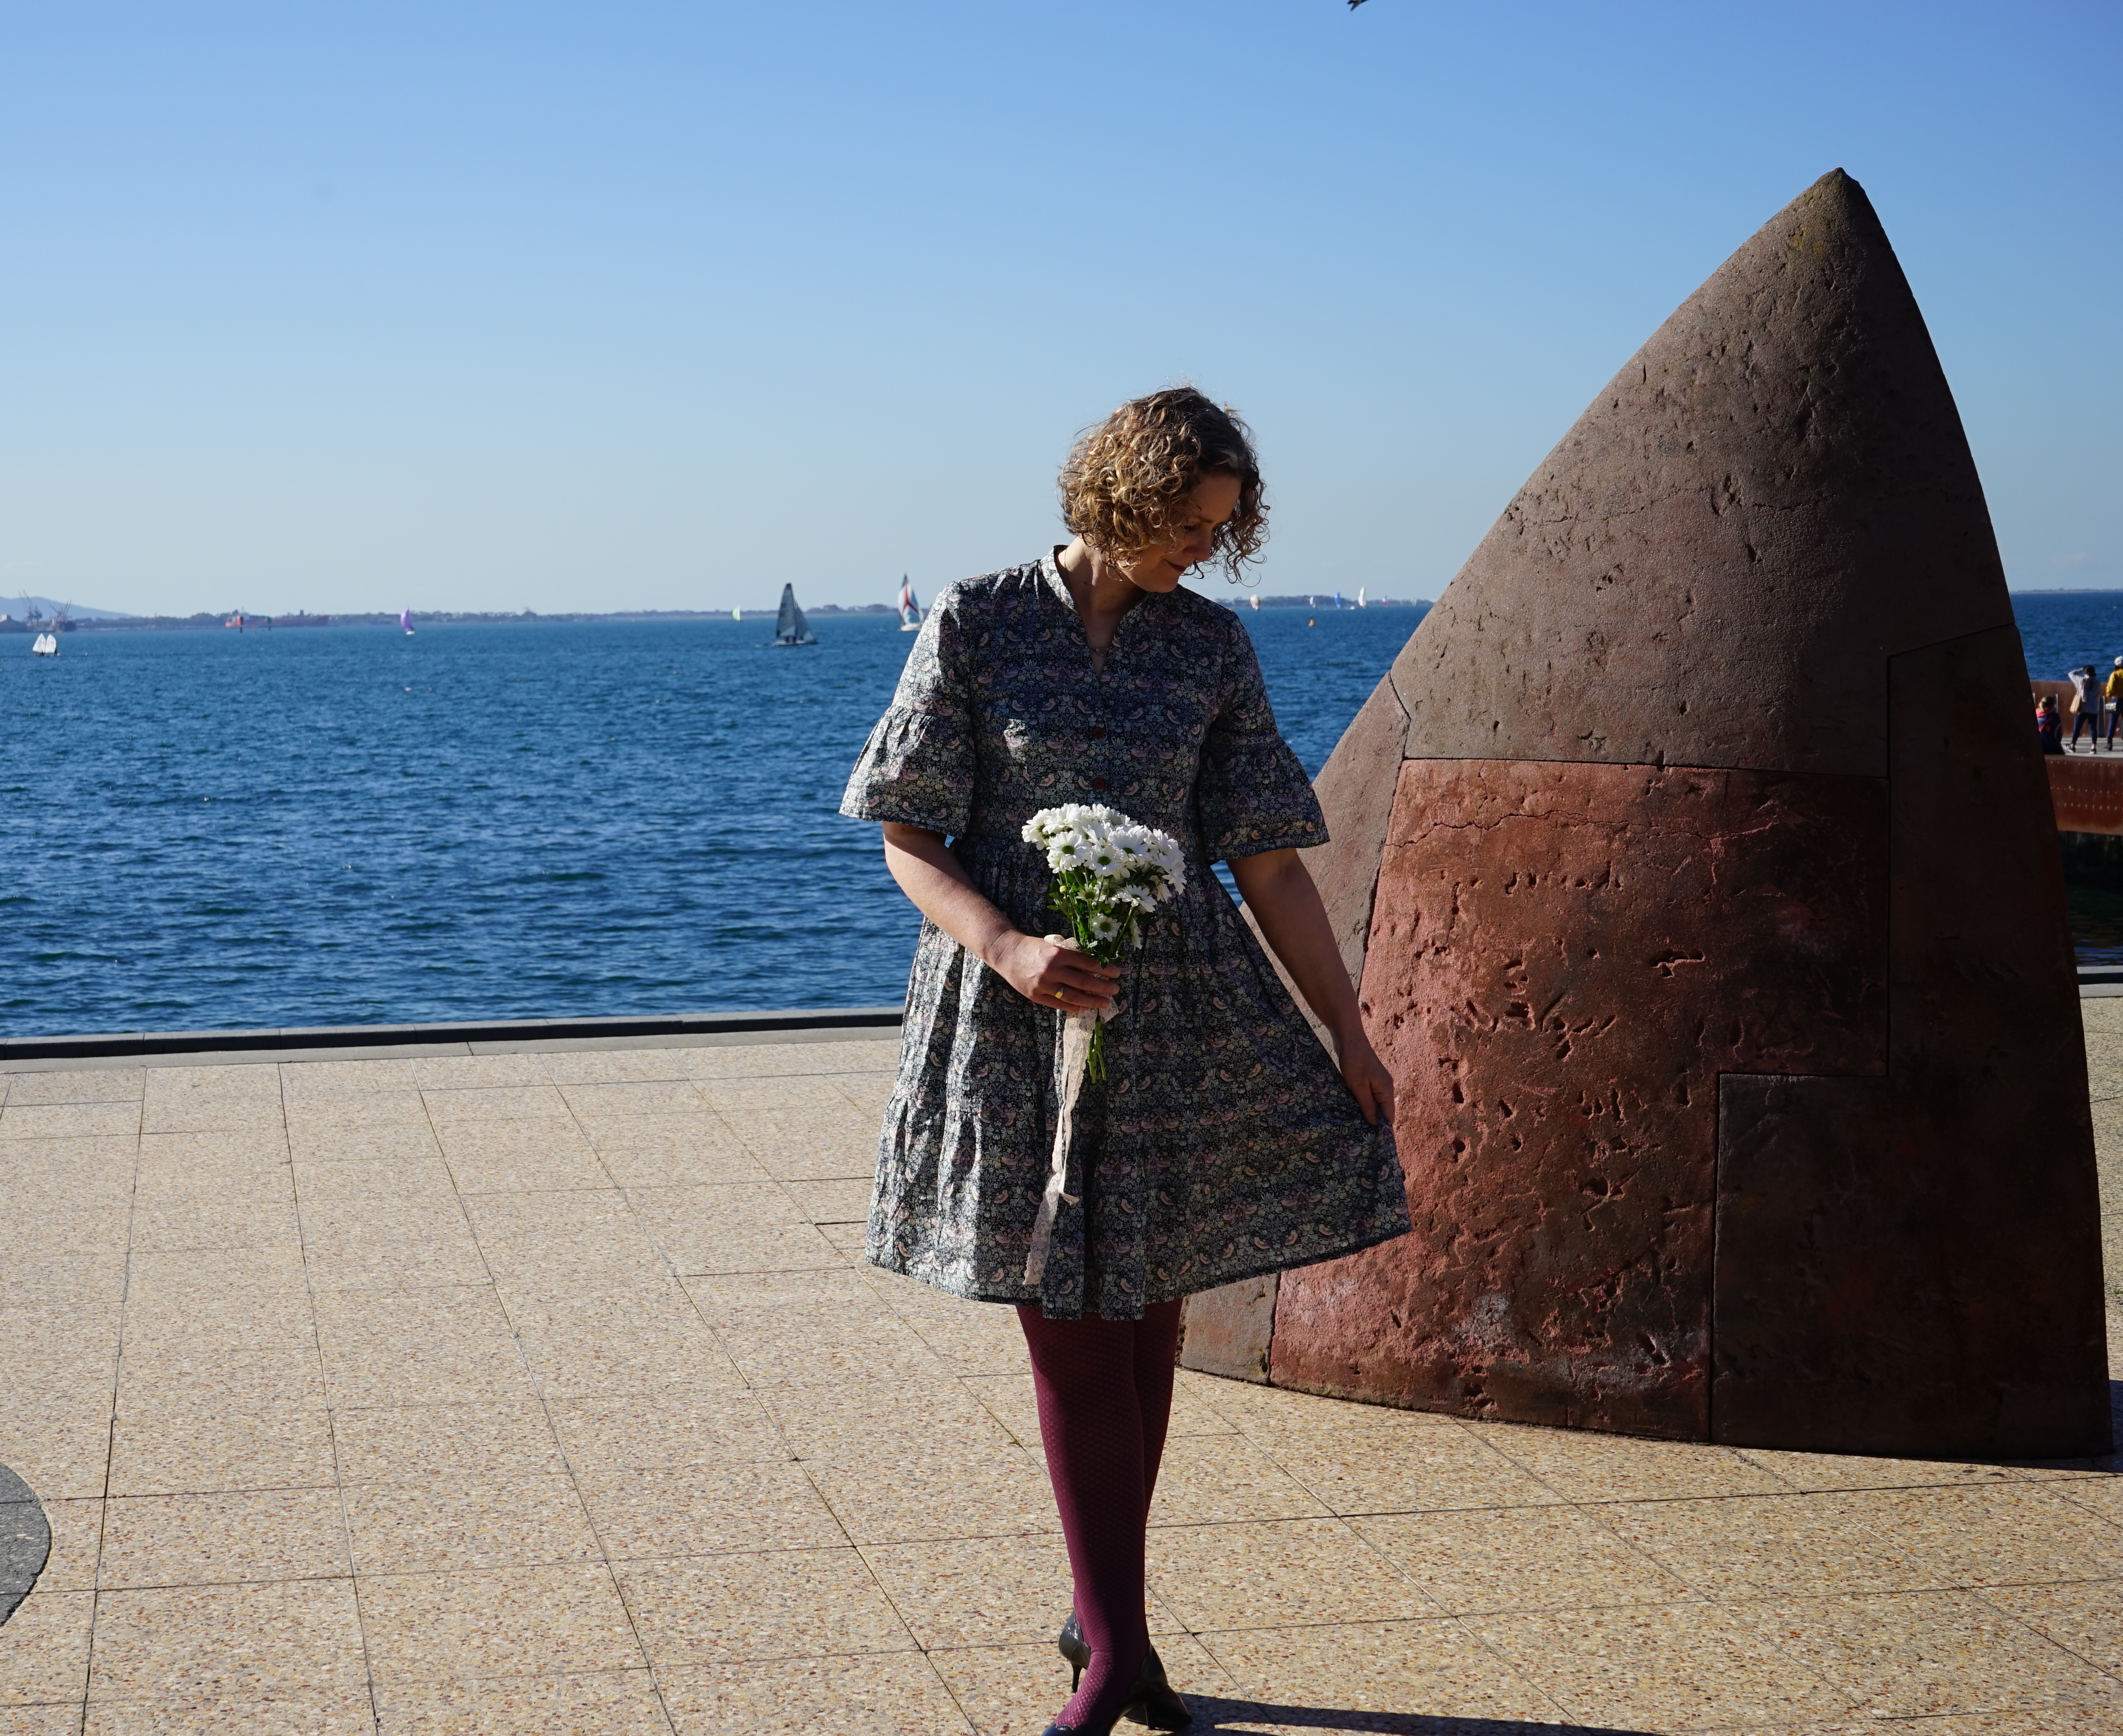
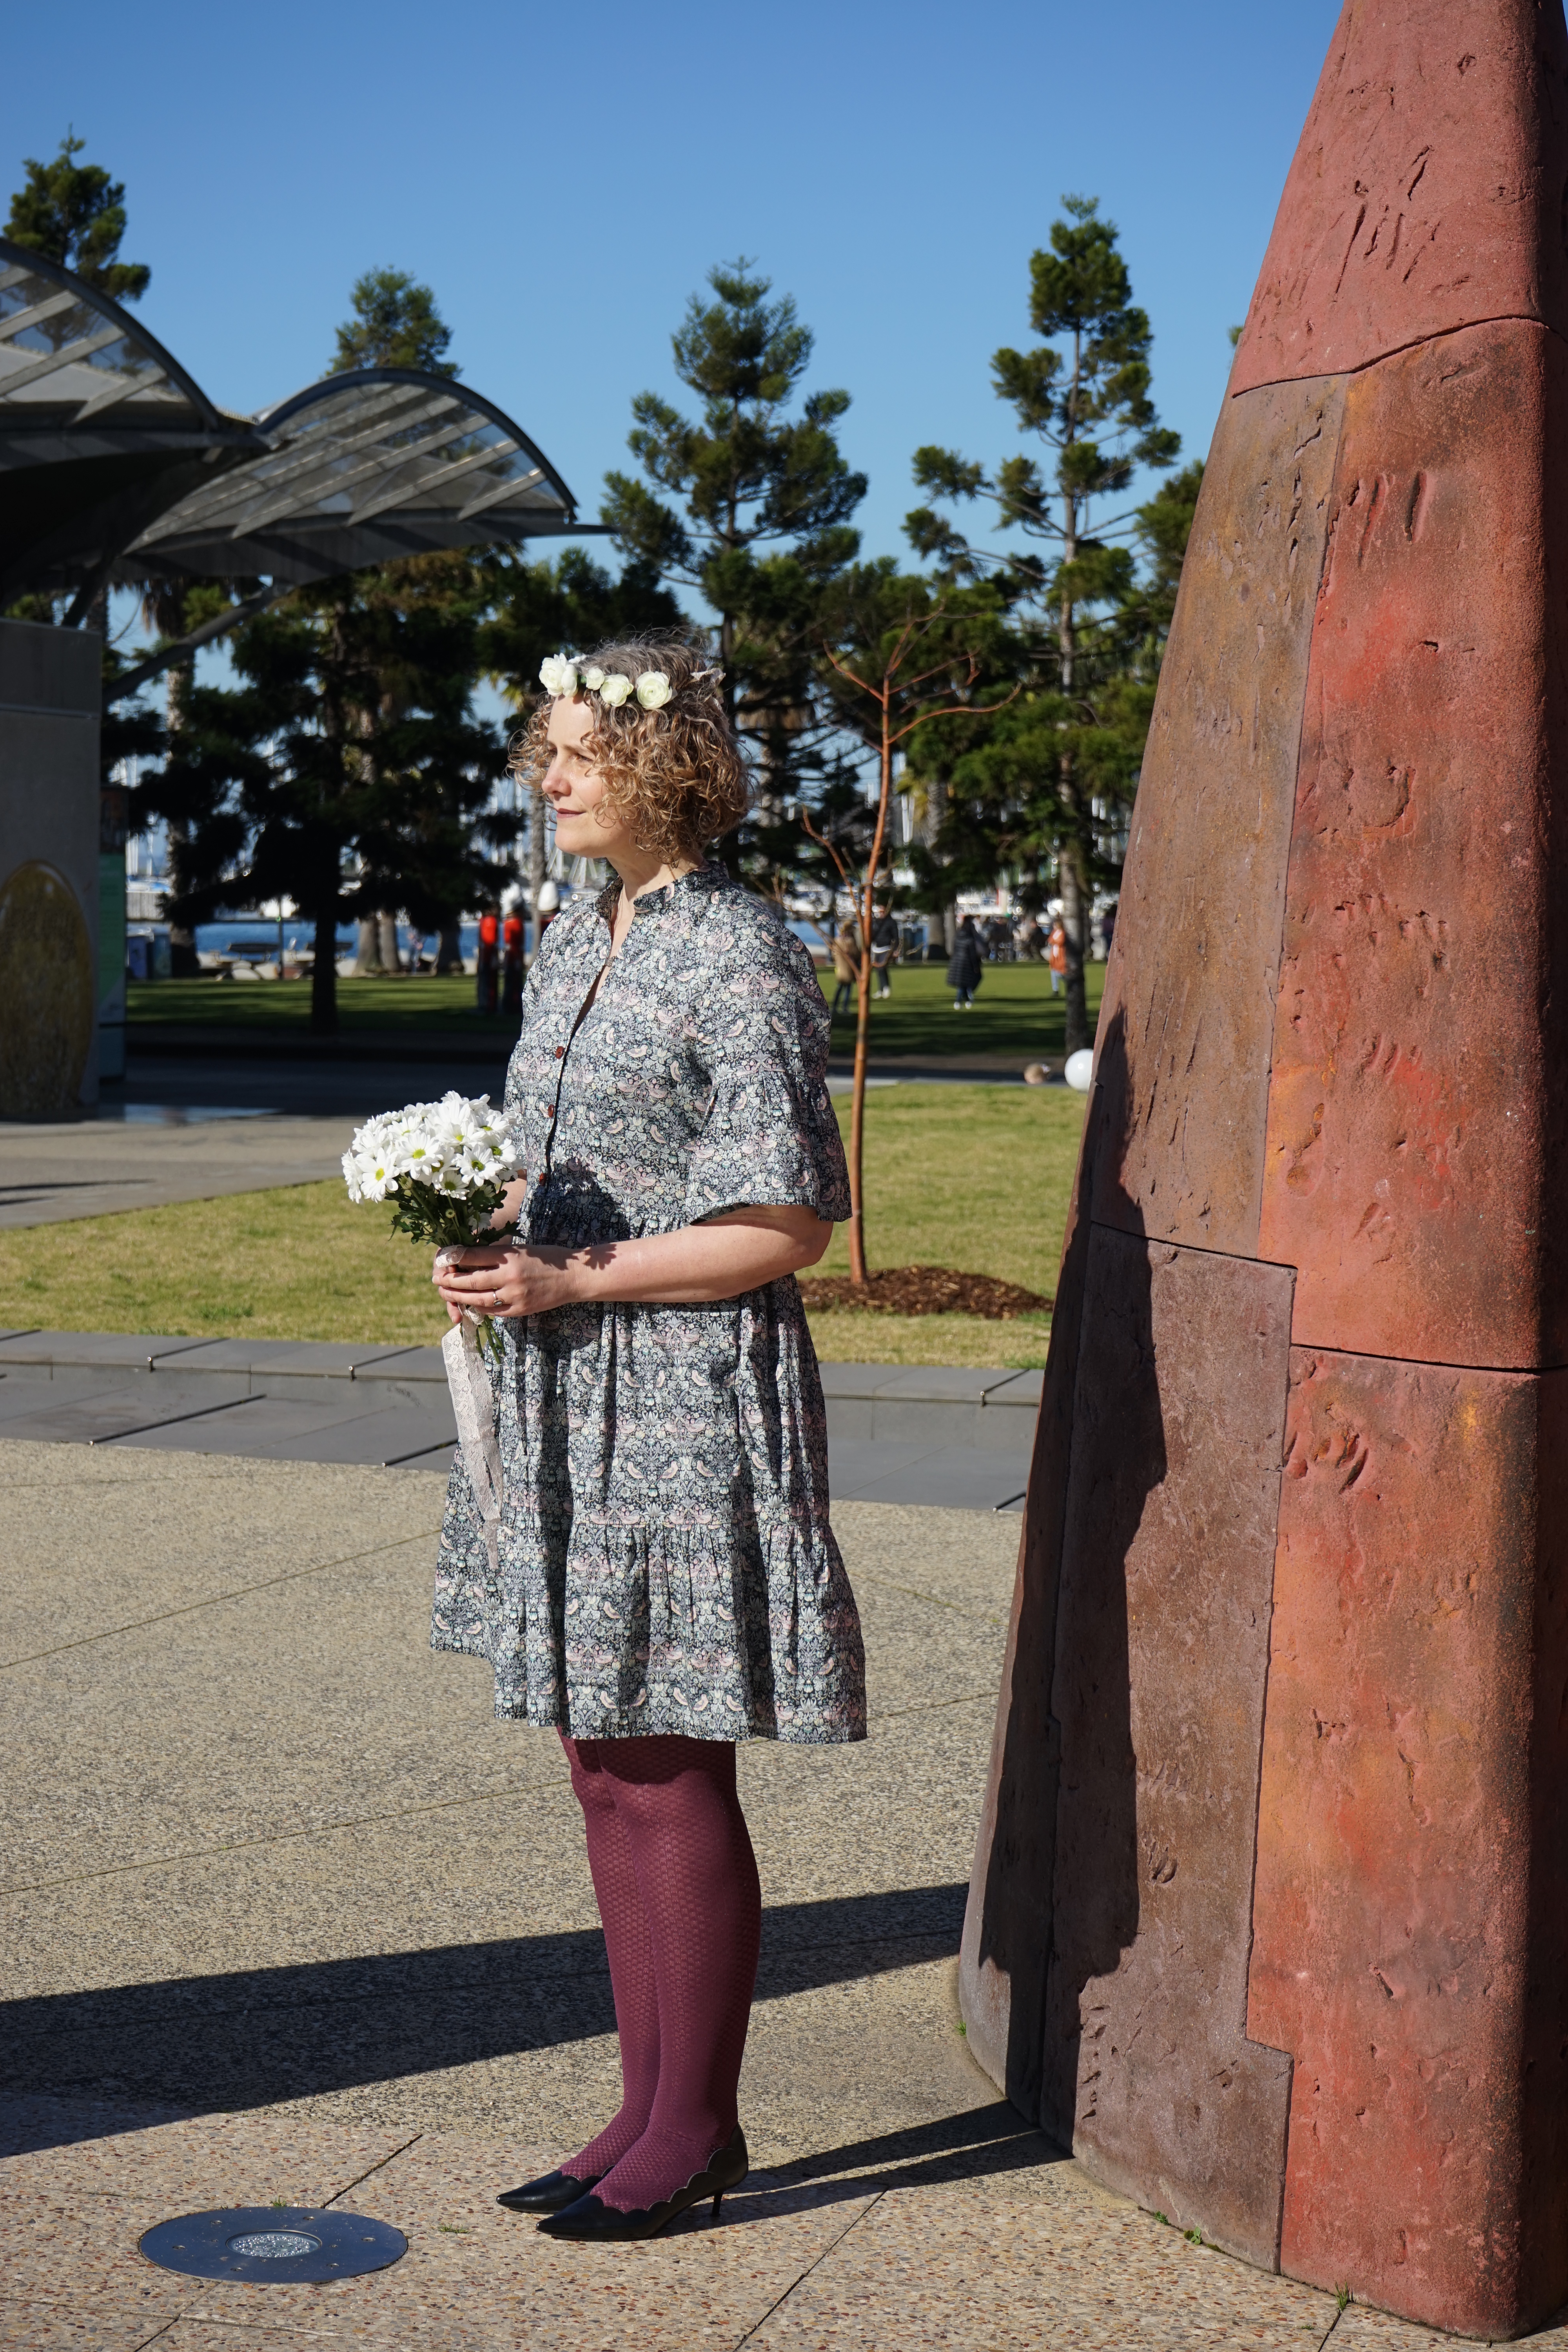
I added 22.5cm length to the skirt to give me the same length as the original Liberty dress and ensured I had enough to give it a really deep hem. Folded 1cm then 8cm. Such luxury! I also added extra width to the skirt to a size 10cm to give it more gathers although I am thinking of removing some of it for my next version.
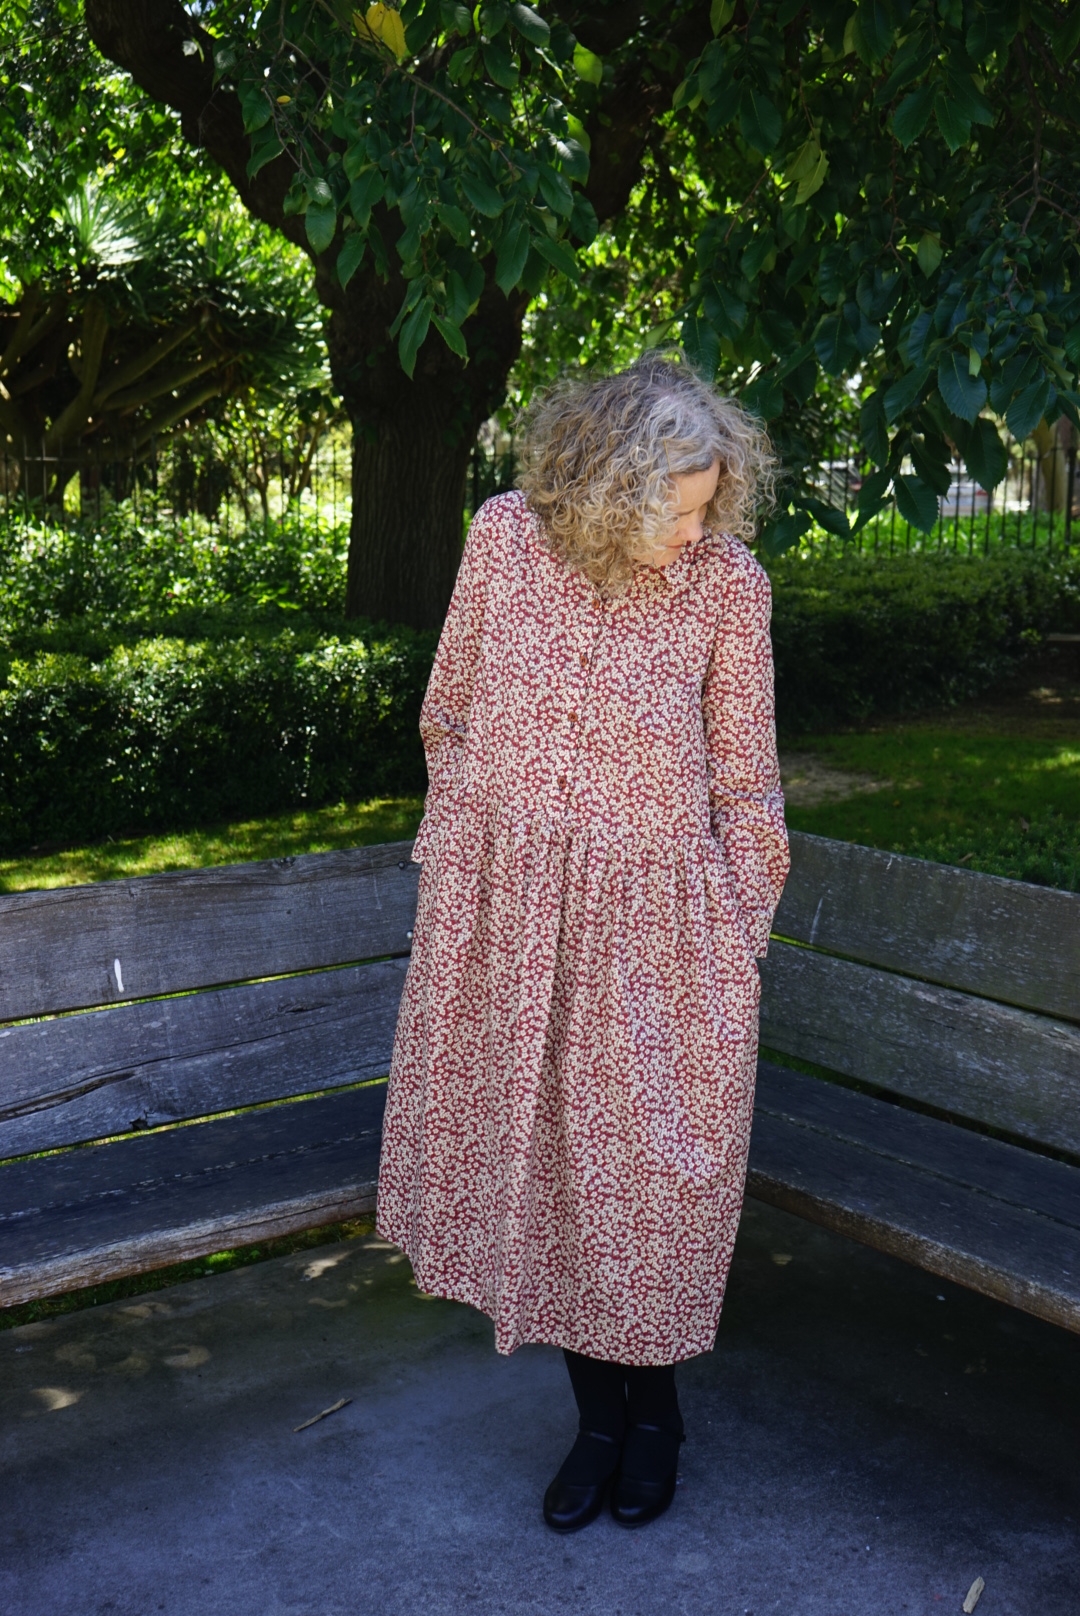
I ended up using 7 buttons, 5 for the front and 2 for the cuffs. I have some Arrow Mountain ones for my next version which I think I will be making for the Sew Melbourne Garden Party.
The thing that gave me the most grief was the collar and I have only myself to blame for not marking the notches. The collar stand didn’t come out evenly due to this so I’m not too happy with myself. Other than that, it looks fine if you are standing a couple of meters away!
So overall I’m really happy with this dress. The sleeves don’t have a tower placket but I can live with that. The cuff works and I think if I make the sleeve just a little bit longer I will be happy. The gathers on the skirt could be less but I can reduce that in my next version. My collar work is a bit shady but I can fix that with practice and by actually marking my notches and not going rogue. Plus, it has pockets! I see this as being an Autumn/Winter staple and having many more in my future!
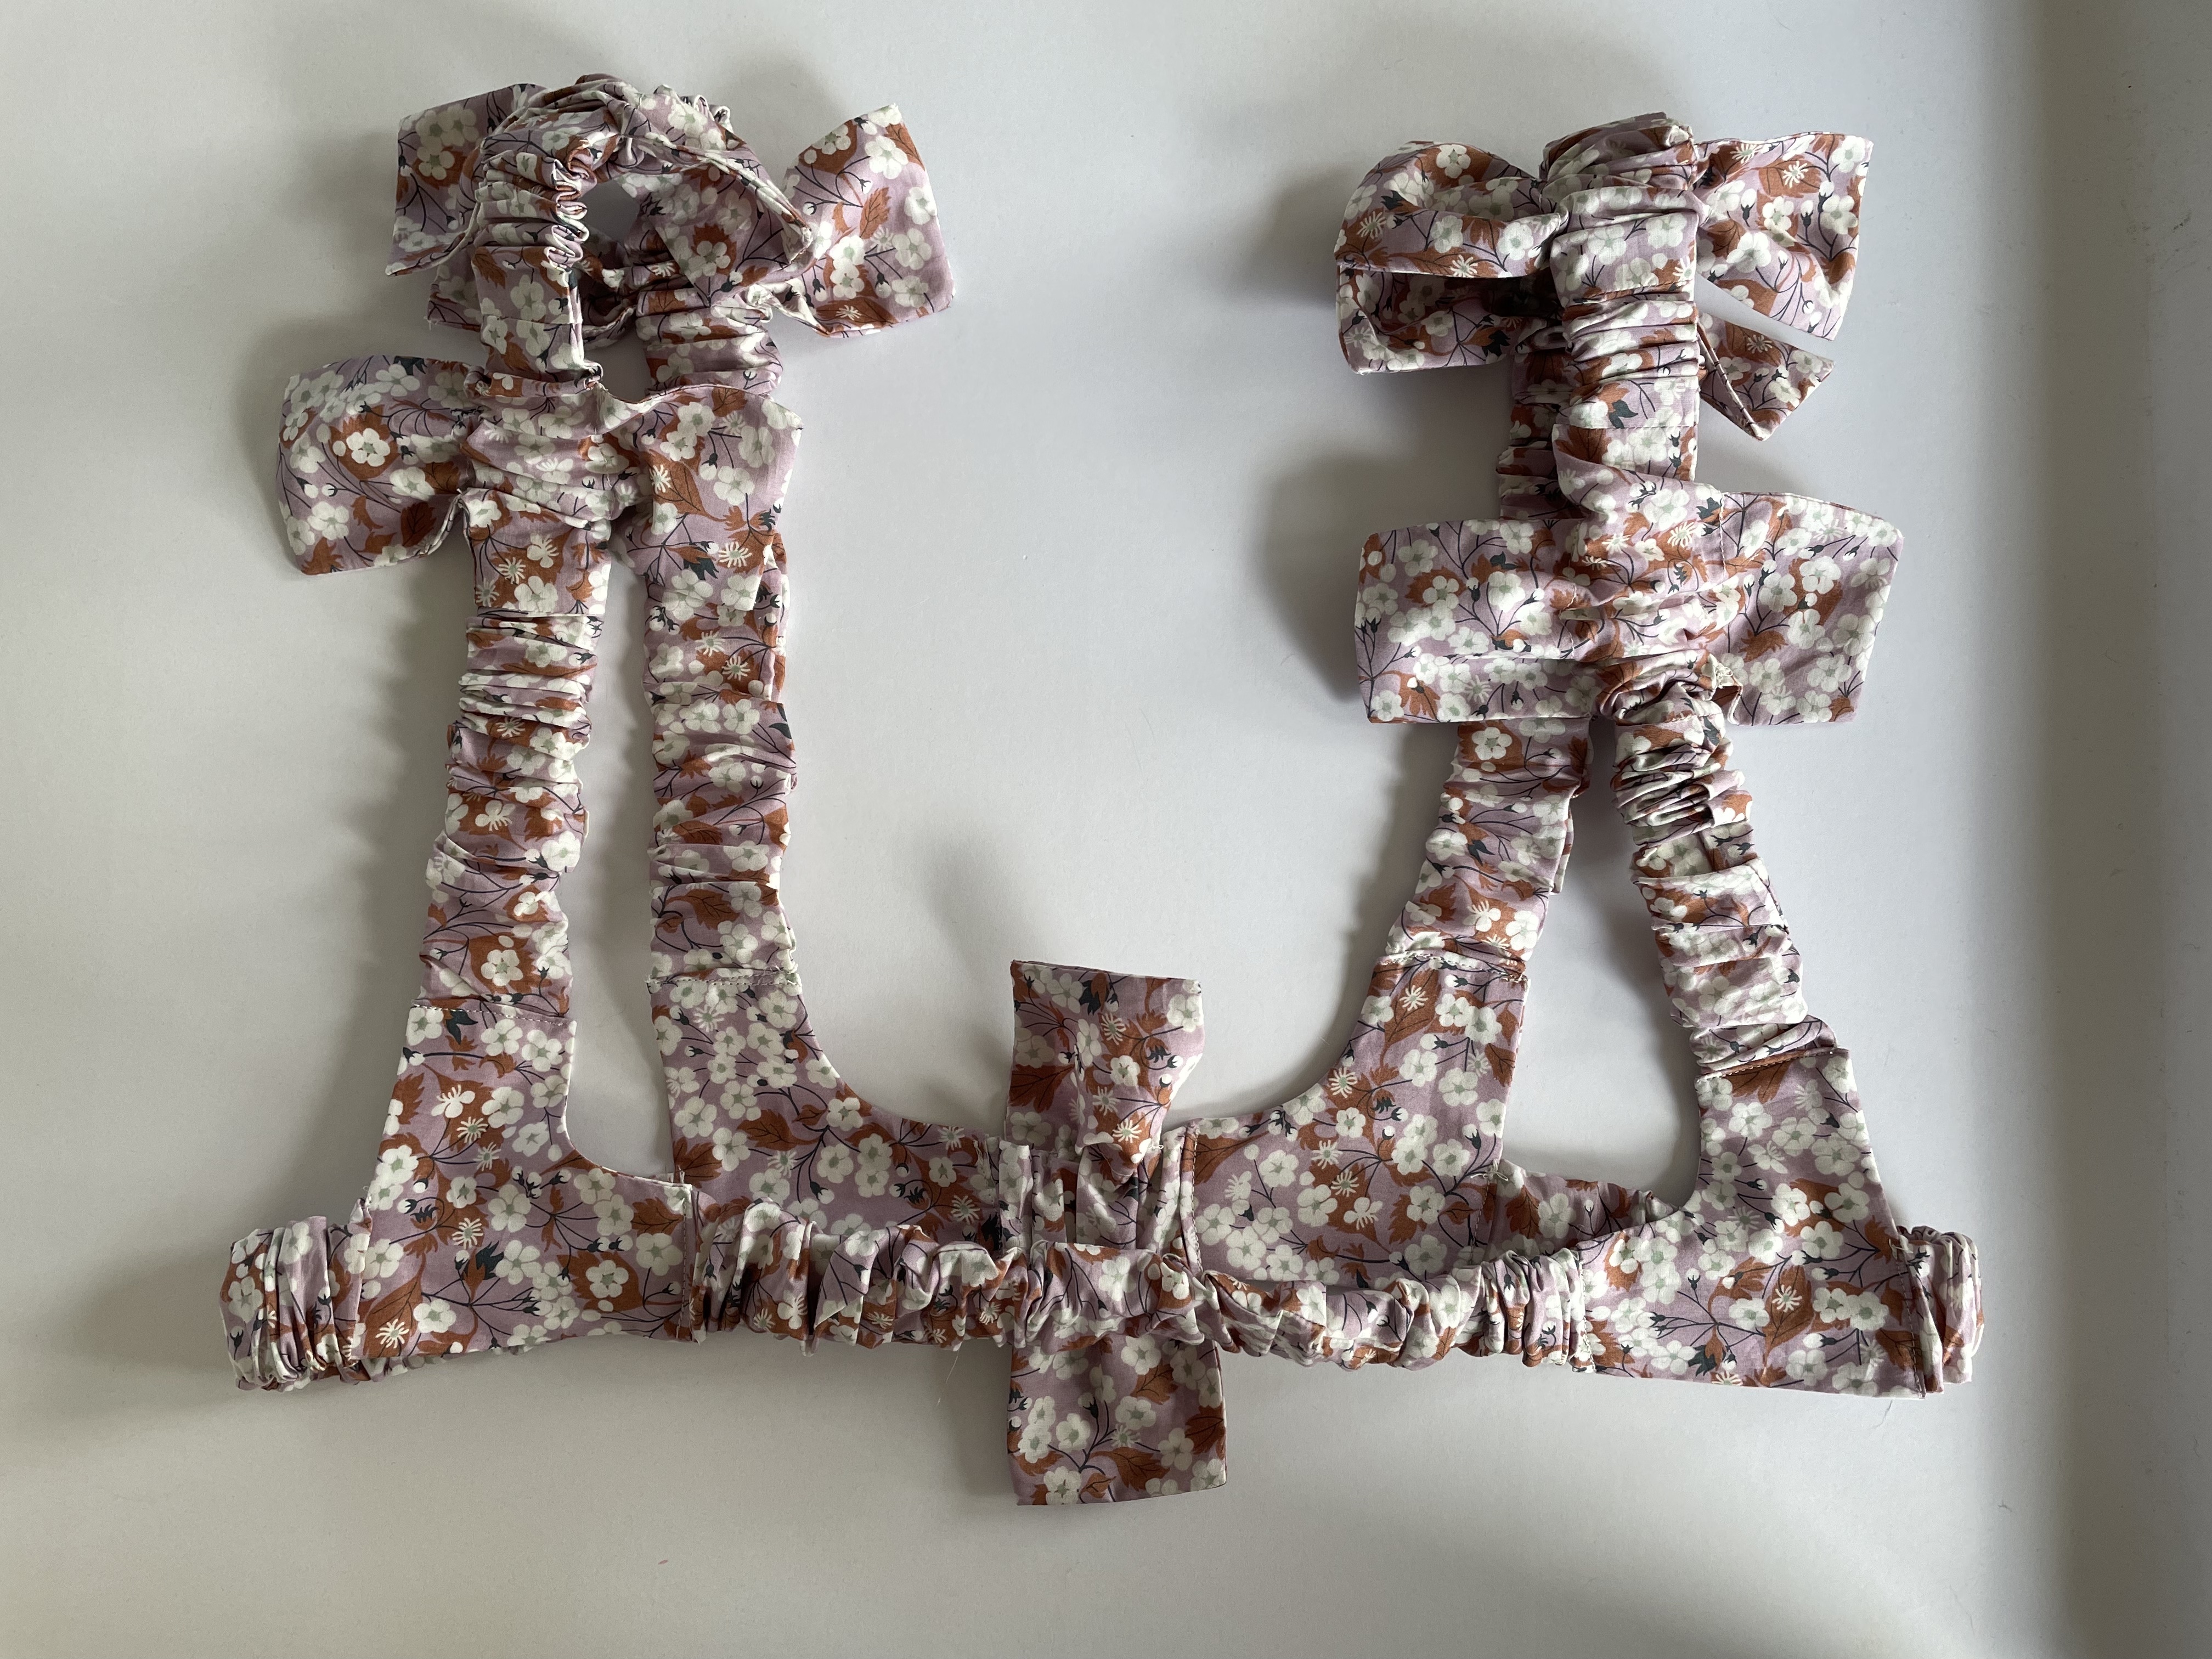
After the success of my Elysia Bow dress by Roberts Wood I wanted to add on the Bow Harness Accessory as an extra feature. I’ve been reluctant to show off my curves in recent years having gone from a size 10 to a size 16 due to menopause but am keen to try and explore that a little more this year. The Bow Harness is the perfect place to start.
I measured a size 2 based on my rib cage measurement of 87cm. The sizing was perfect.
I used 1 meter of Liberty with some scraps left over.
I used 50cm of elastic for the straps and the recommended lengths for the circumference.
Again the instructions were clear and well thought out and easy to follow.
I interfaced the connecter pieces as the Liberty was a little flimsy and needed some stability.
I love that this gives the dress a bit of an extra look with the bows whilst giving some definition around the waist.
I have to say I’m really proud of this outfit as it is definitely one of a kind not to be seen in any store and it is really well constructed and doesn’t have that homemade feel about it. The harness gives it a little bit of avant garde feel.
I love that I can sew my own clothes that not only look good but look like they could come out of a designer store. As a size 16 I’m very restricted in what I can buy from RTW that is good quality. The only places I really look these days are Scarlett Jones, Metta Melbourne and Lily Pond that all cater to a size 16.
Having the skills to sew my own clothes is very empowering and allows me to express myself artistically through fashion on my own terms. So sewing isn’t just for pleasure, it’s a necessity.
And having discovered the Roberts Wood collection (which goes up to a size 28) has given me designer wardrobe options that are not available to me through places like Net-A-Porter where a large is considered a size 12. I’ve got money and I’m willing to spend it. Designers are just not interested in larger bodies.
I’ll get off my soap box now and get to cutting the Bow Skirt by Roberts Wood which is next on my list.
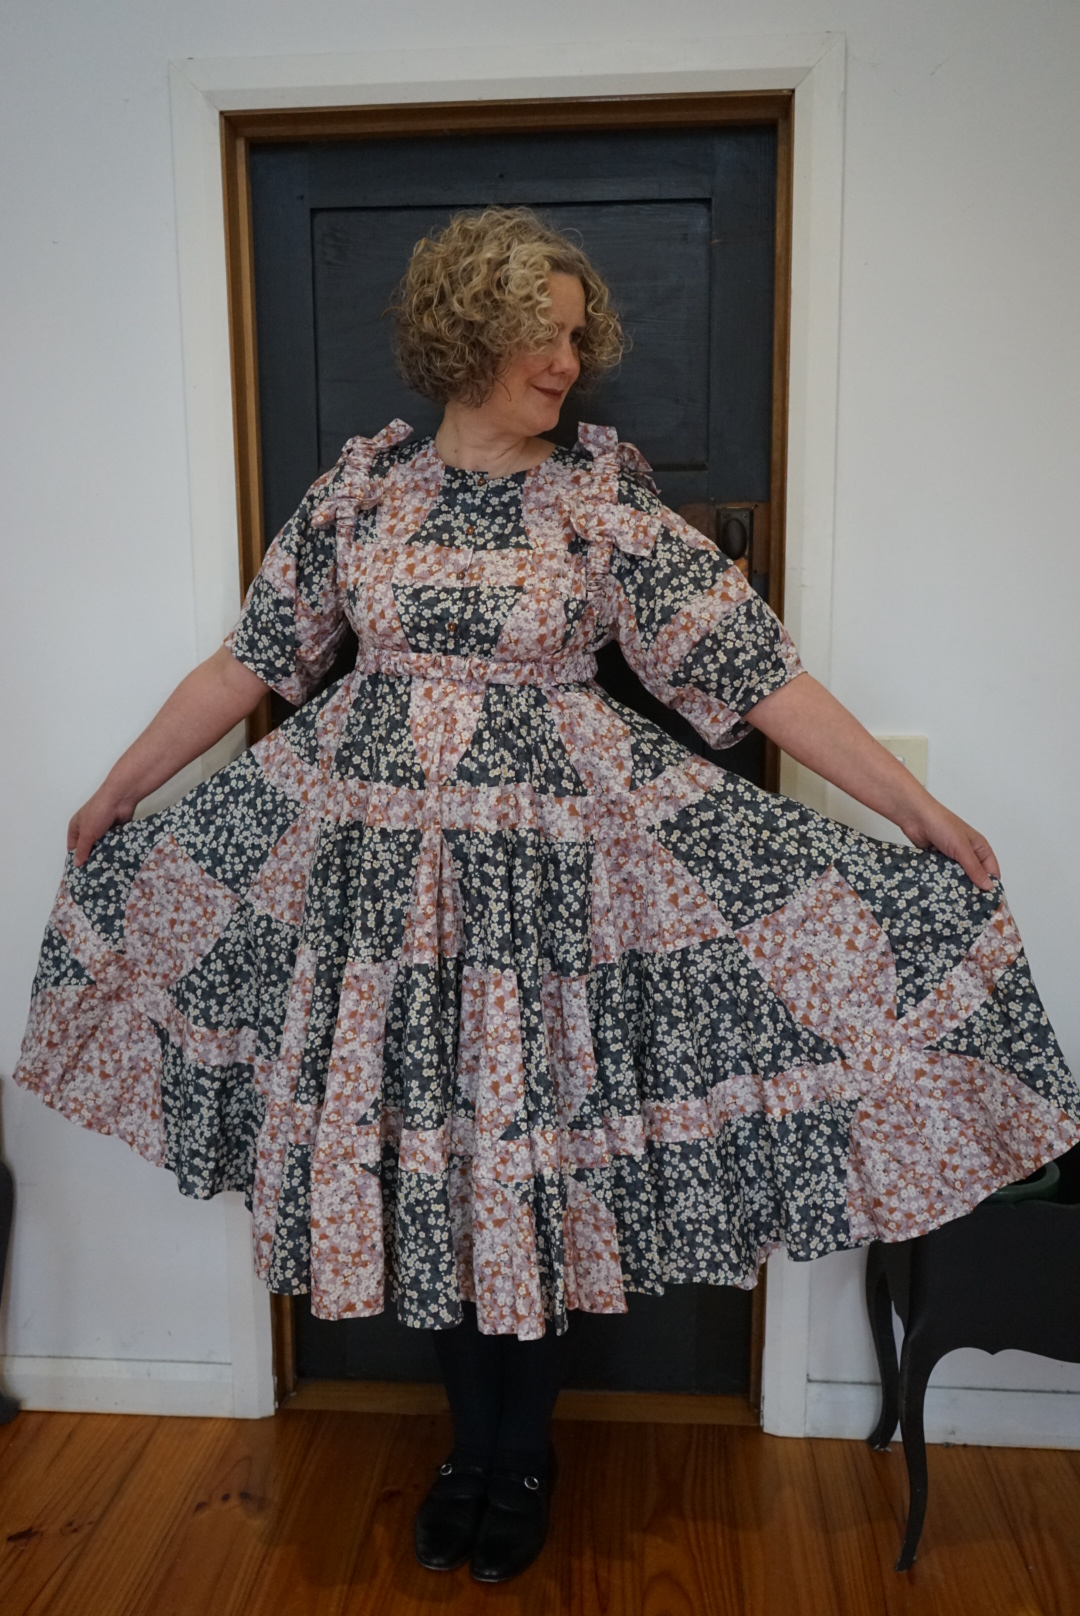
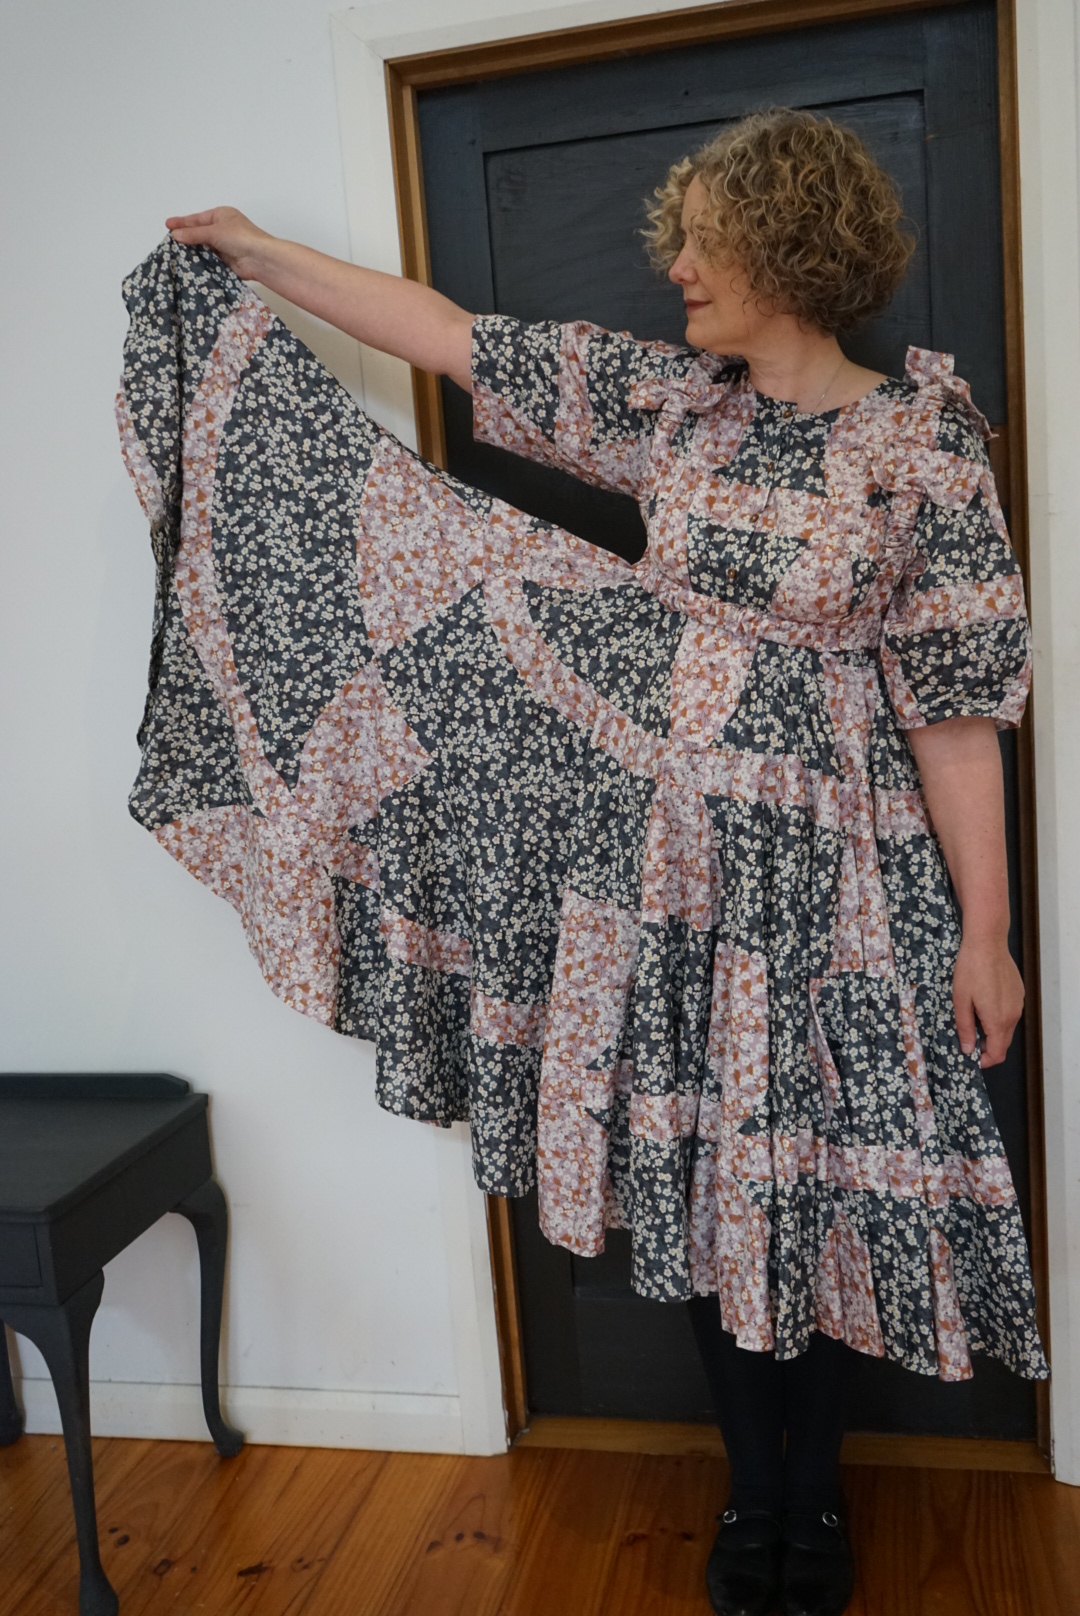
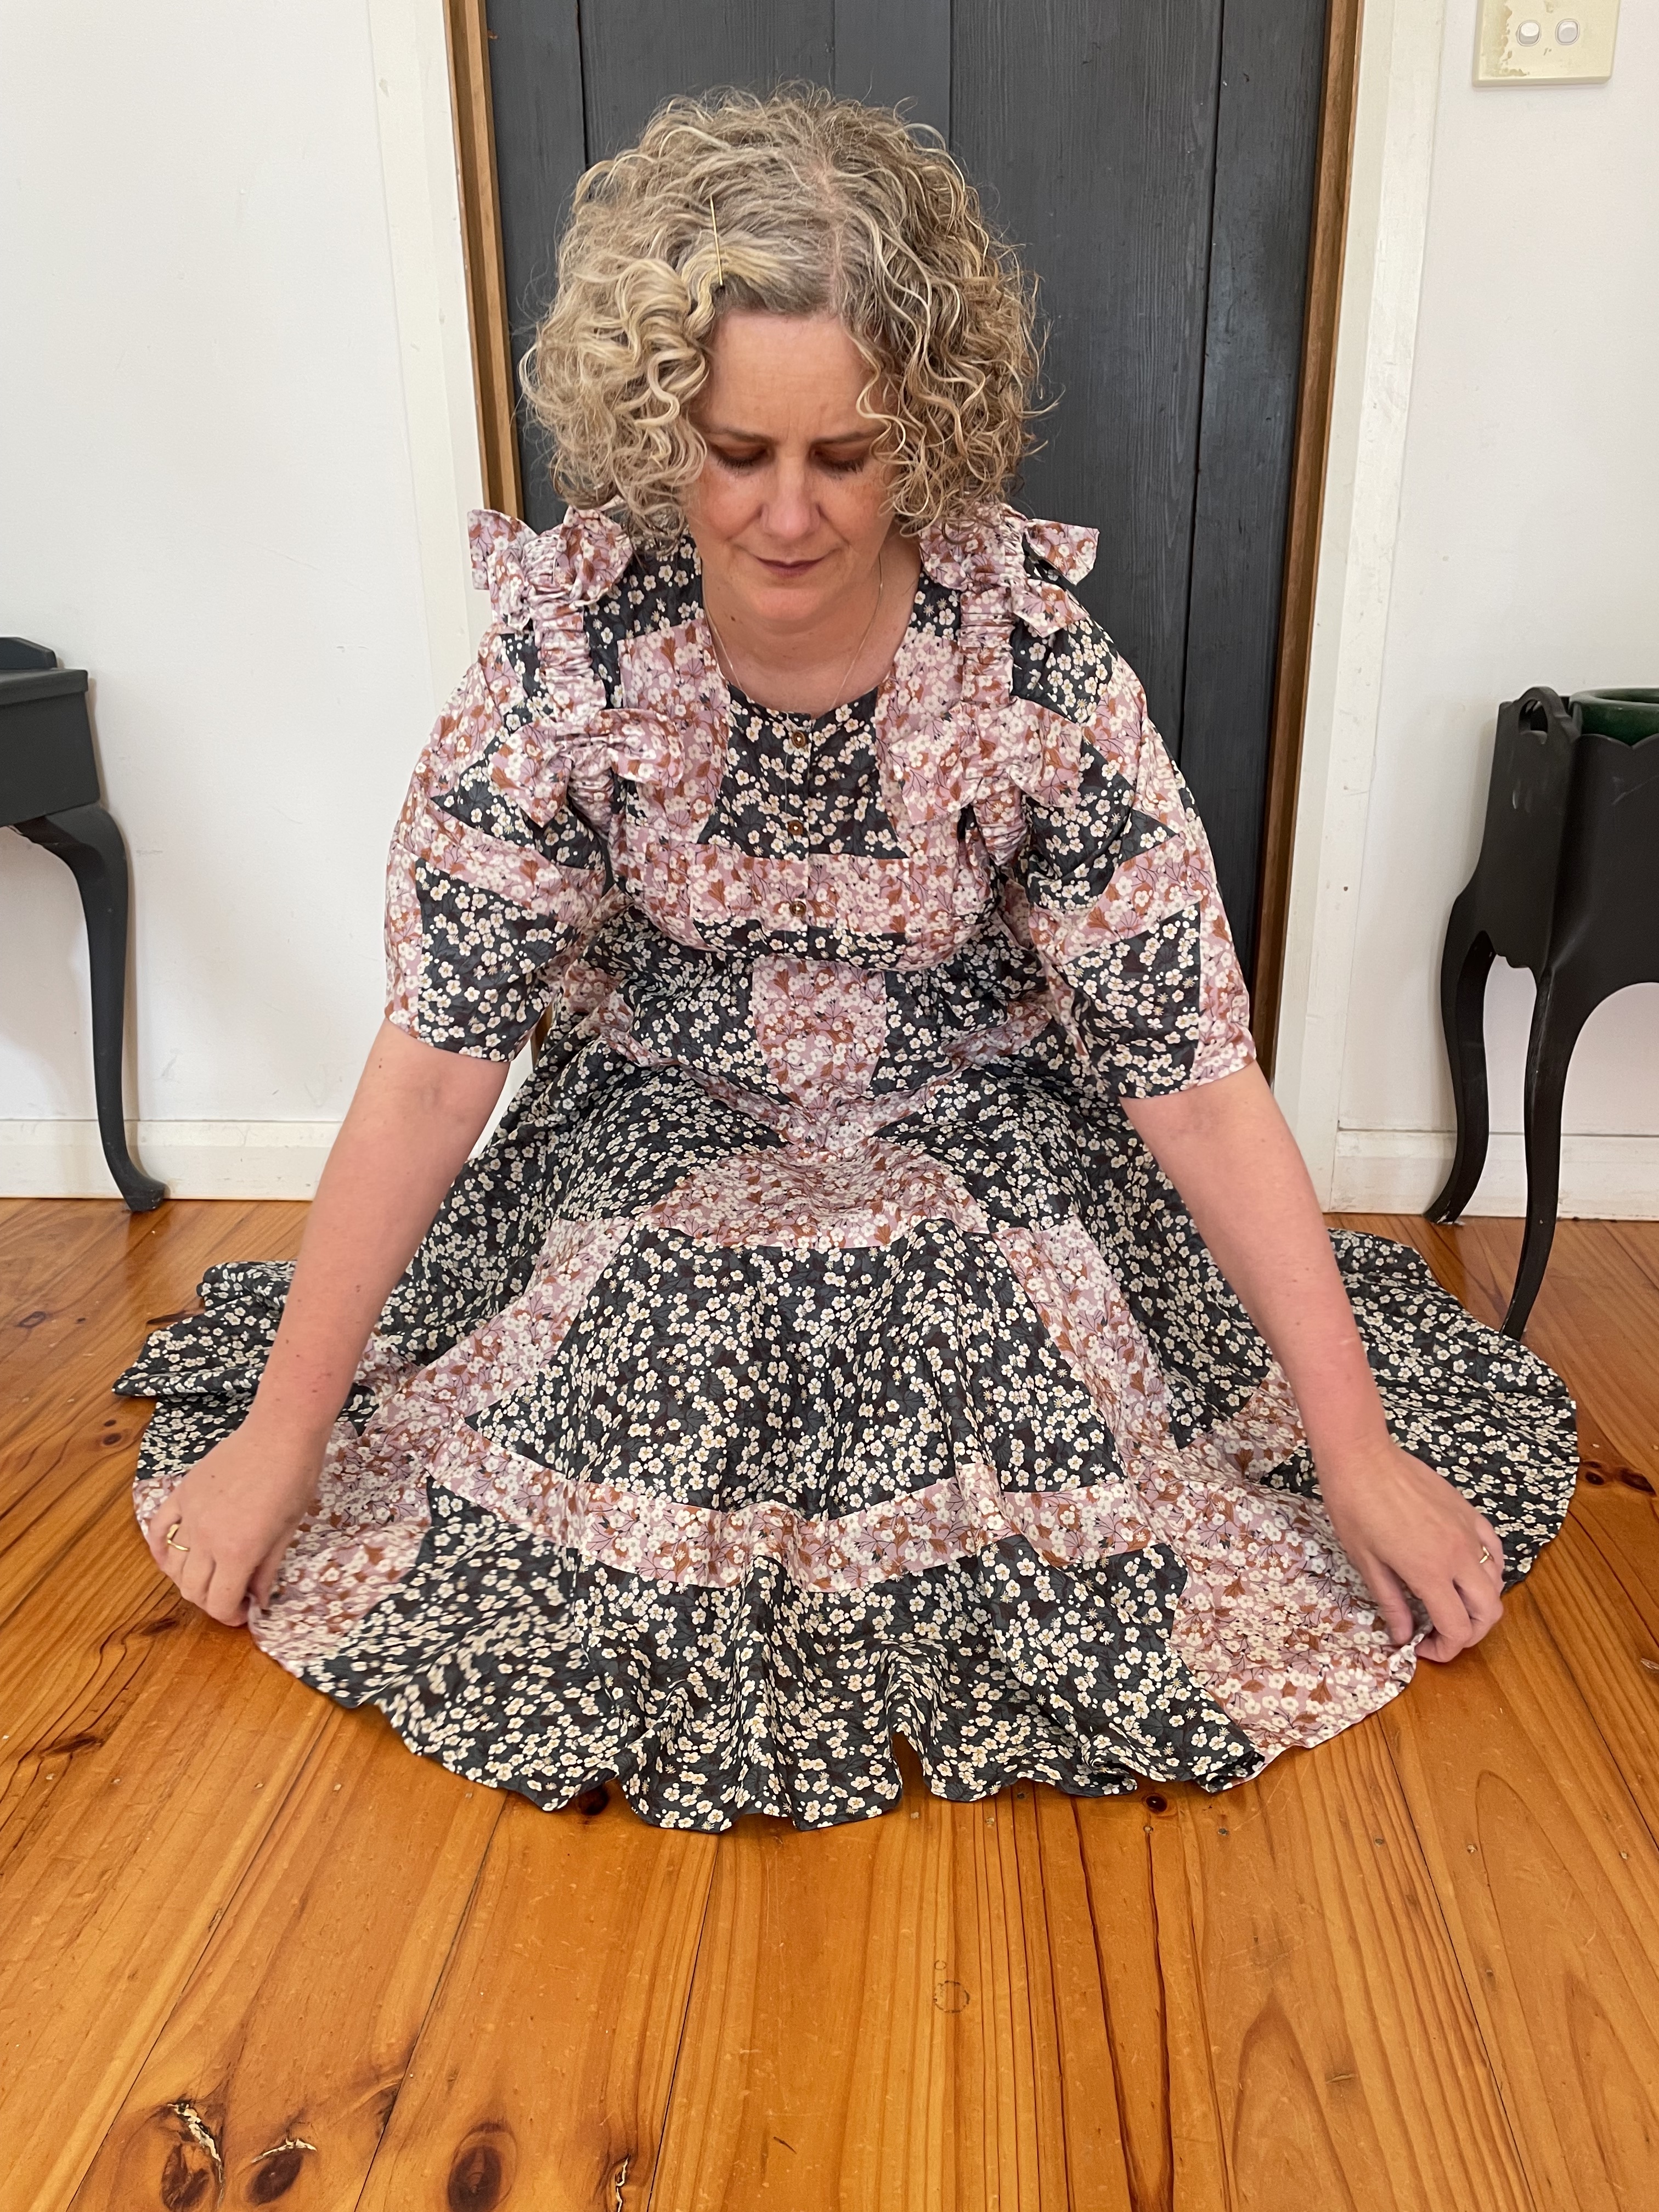
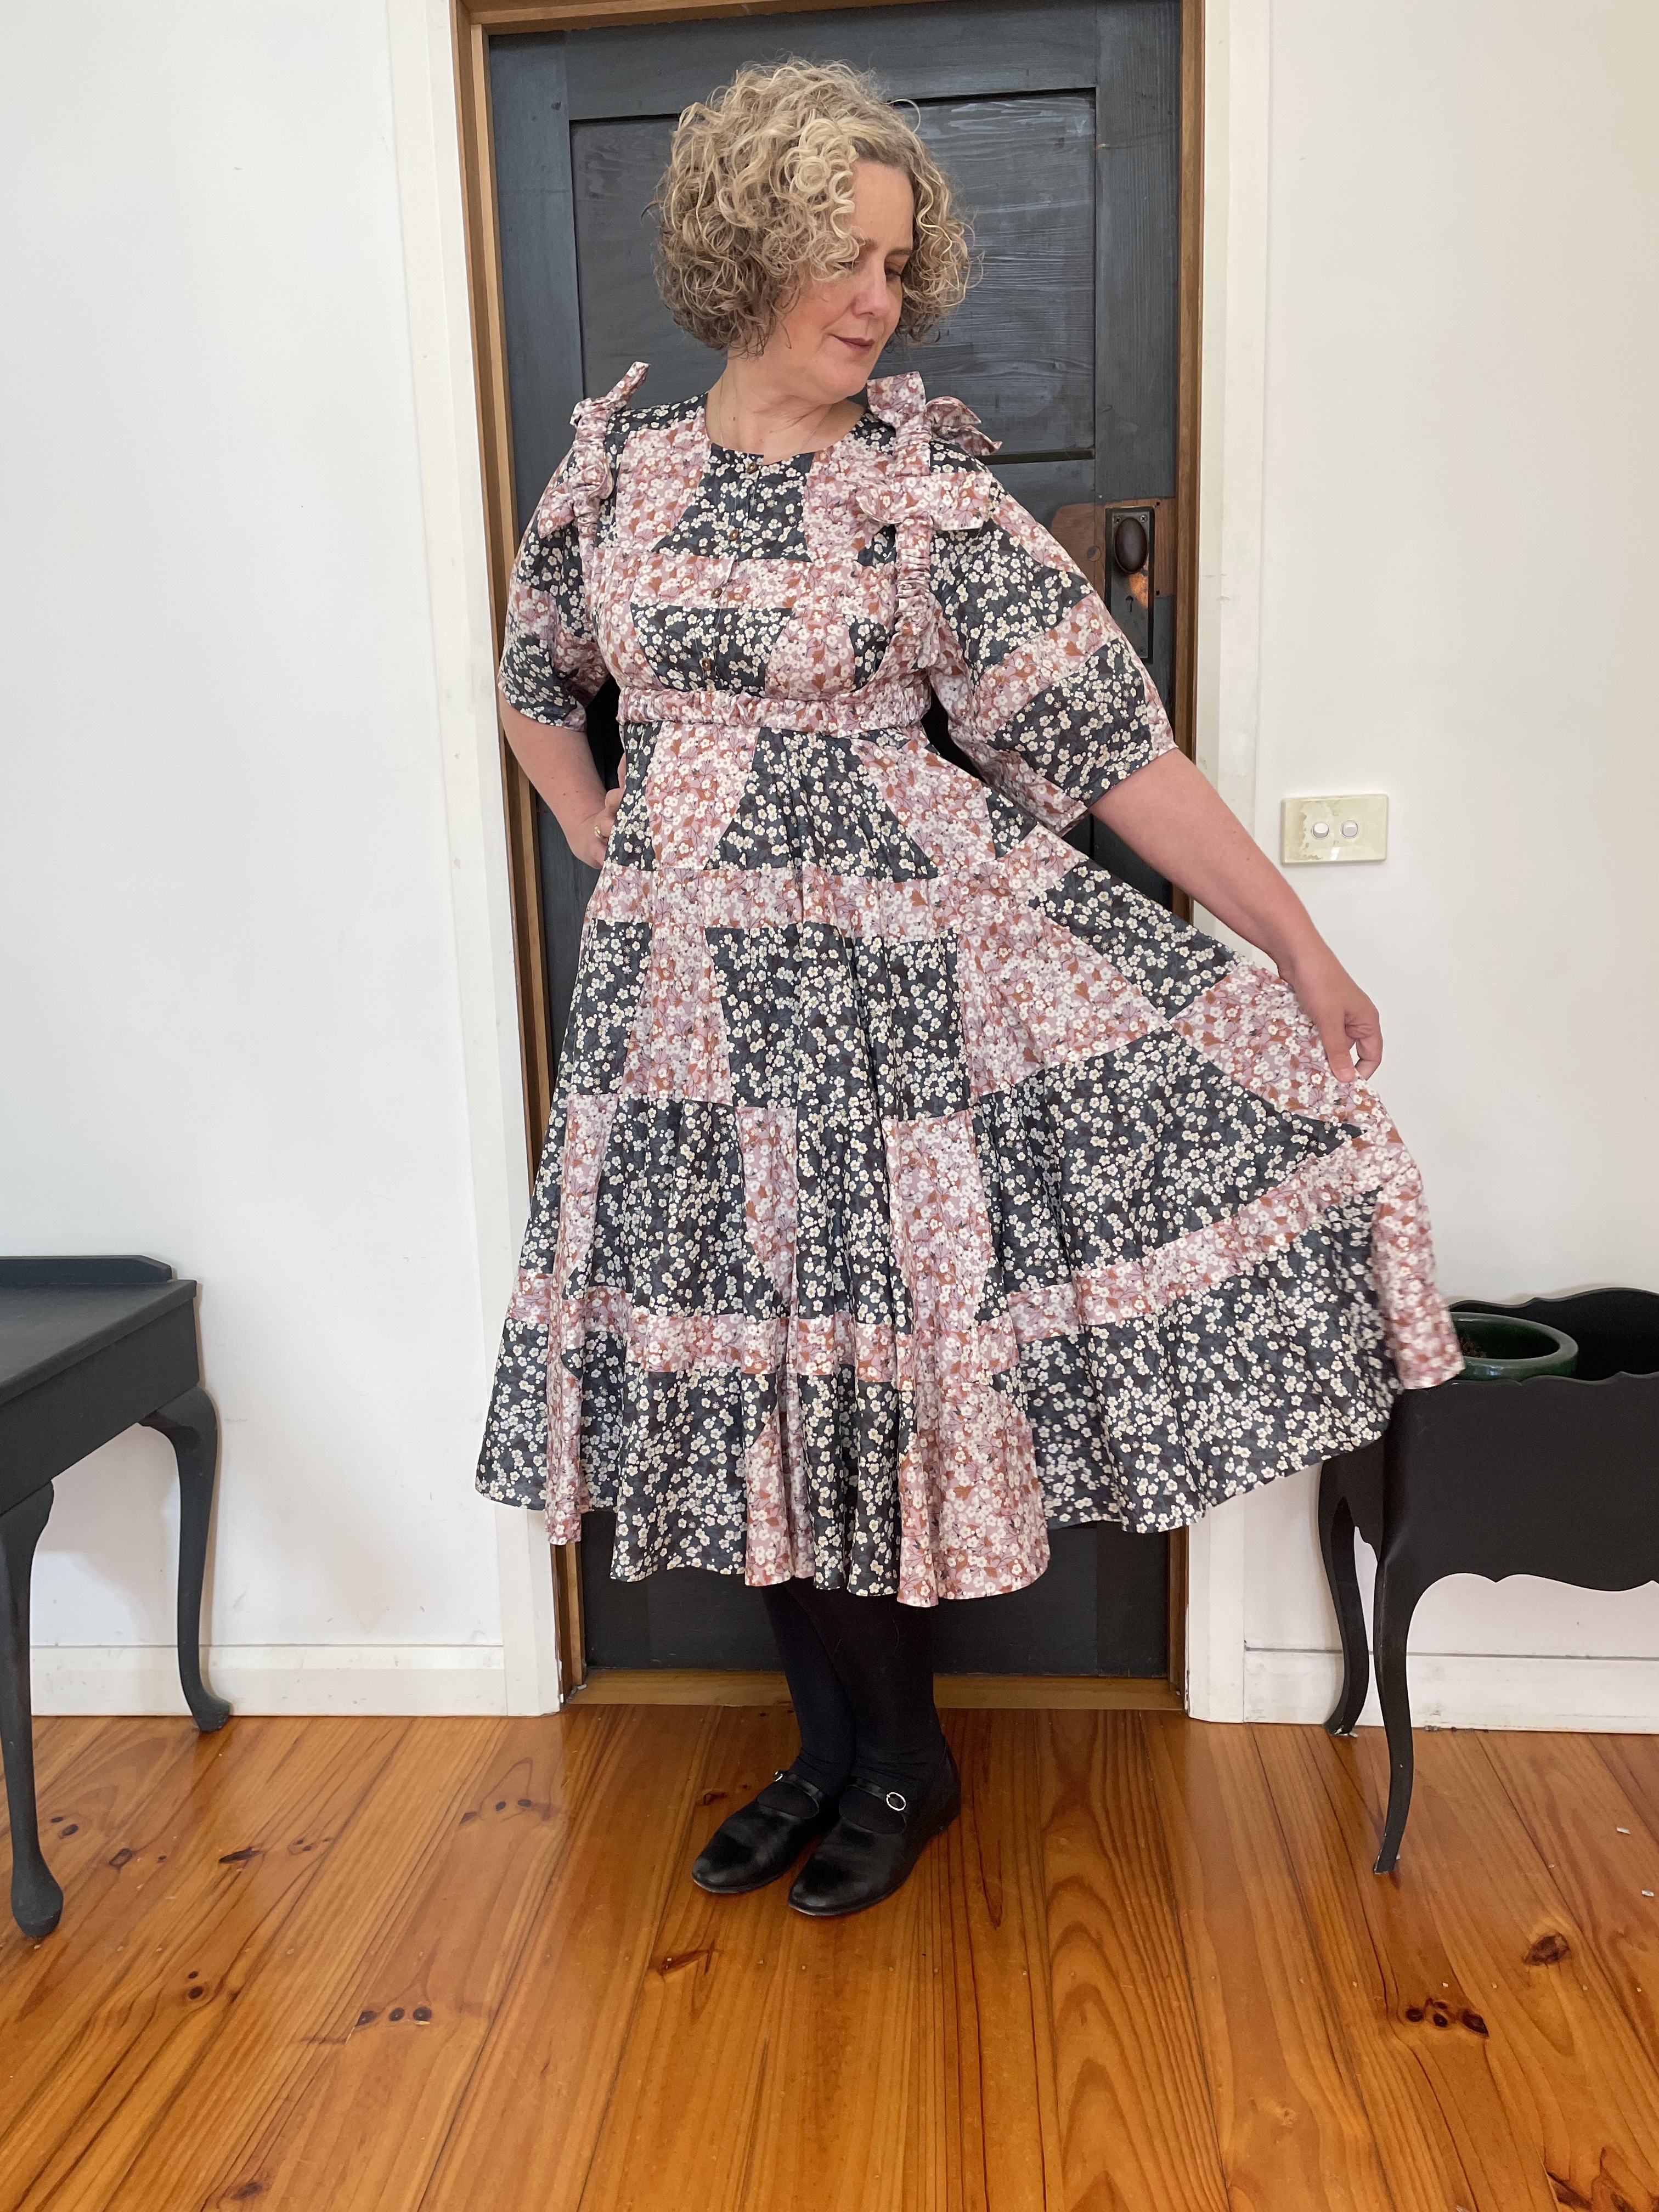
I was so in love with my first Elysia Bow Dress but it was a little bit on the short side so I decided to go ahead with the expansion pack and make the longer version. Verdict: I love it more than the first. It covers my knees and has extra swish which I am in love with. The hem line in 14.45 meters long! Sure, it took me 13 hours to sew by hand, but listening to my favourite podcast Bang On and Chat 10 Looks 3 definitely helped pass the time.
It was just as an enjoyable sew the second time around and I definitely felt more comfortable with my seams. I loved having the stronger contrasting colours and that made it a little bit easier to sew.
This time I still went with Liberty but chose Mitsi in two contrasting colours from The Strawberry Thief.
The swish of this skirt is undeniable. There is so much fabric in this dress. For fabric 1 I used 6 meters and fabric 2 and 3, 4 meters. So that is a whole lot of Liberty in that skirt. I used a bit more that was recommended as my fabric was 136cm wide (fabric recommended was 140cm wide) and I also bought an extra 50cm of fabric 2 and 3 to make the bias binding. But honestly, I love Liberty, so I’m not complaining.
I’d like to have a go at making this in silk organza with a slip underneath maybe for frocktails. But for now I think my sewing machine needs a little rest from all the Bow dress mayhem. There is a Bow skirt and a Flower Patchwork top that I’m interested in having a go at. Let’s face it the Roberts Wood patterns are AMAZING!. They are on the expensive side of the for PDF’s. Mine came in at $51 when they had a 15% off promo but I think the cost is definitely worth it given the expertise in the drafting and the work put into the instructions. It usually retails for 34 pounds. The only problem is they don’t come in multi sizes, you have to pick the one size and hope for the best. The way the pattern is drafted you couldn’t go multi size anyway.
For now, I think both Bow dresses will be in high rotation in my wardrobe. I think the harness will be a good choice to highlight my curves. A little more Liberty never hurt anyone.
I was captivated when I saw the Elysia Bow dress by Robert Woods from Katiemakesadress on Instagram and knew I had to made one up in Liberty. I choose two different shades of blue in Wiltshire and only used two fabrics instead of the recommended three as I had a vision of what I wanted. As it turns out the effect is subtle but I kind of like that. My next version would have more contrast.
Now this dress is not for the faint of heart. The short version has 108 pieces and a 8.5 mt hem whilst the extension has 148 pieces and an amazing 14.45 mt hem all by which I did by hand. I find it very meditative. Pop on a good pod cast (several years of Bang On) and I’m good to go for 10 hours or so.
I chose to sew the 14/16 based on my bust measurements. The pattern gives you the finished measurements for the garment and I went for the size that gave me about 10 cm of positive ease. I did have a bit of a freak out moment when sewing the front bodice and it looked tiny and I thought there was no way it was going to fit me and that all the sewing was going to be a waste of time but I trusted the measurements and I’m glad I did because it came up perfectly. Next I want to try the harness to pull it in a little and give it a bit more shaping.
The dress itself isn’t complex but requires precision cutting and sewing. I won’t say that all my seam lines match up perfectly, there are a few that are a couple of mm out, but it’s hard to obtain perfection when there are so many pattern pieces to line up over four seams. I tried basting the seam but found that just using a pin and sewing over it was just as effective.
For the dress I broke the cutting out of the pattern and the fabric and sewing down over a number of days as there is much work involved and overall it took me 7 days from start to finish.
I was in no rush to make this project so I took my time. Just for interests sake I thought I would keep a track of my time spent on the varying aspects.
Day one: 1 hour cutting out the pattern, 3 hours cutting out the fabric
Day two: 3 hours sewing front bodice and yoke
Day three 5.5 hours sewing back bodice, bias for neck, left sleeve sewn and attached to bodice
Day four: 5.5 hours right sleeve sewn and attached to bodice, sleeve bindings, first skirt tier (about an hour unpicking after sewing one of the pieces upside down!)
Day five: 6 hours tiers 2 and three attached to tier 1, tier 4 stitched together. Lots of unpicking on the 4th tier.
Day six: 2 hours 15 min sewing stitched on bottom tier of hem, attached skirt to bodice, button holes and buttons. 1 hour 15 min to pin hem 3 hours and 15 min to hand stitch hem.
Day 7: 3 hours 45 minutes to finish hand stitching hem.
So overall the sewing time was 22 hours 15 minutes to sew the dress and 8 hours to hem it. Not an insignificant amount of time. It was such an enjoyable sew though! The pattern was beautifully drafted and went together perfectly. It was like putting together a simple jigsaw puzzle that required attention but not so much that you couldn’t listen to a pod cast to keep yourself company. The instructions were really clear and when I had a question about the bias binding Roberts Wood got back to me really quickly.
My only comment is that this dress comes up quite short on this 6 foot tall lass so I need to wear a layer underneath to maintain modesty. I’m really glad they put out the extension pack that lengthens the dress by a decent amount and takes the dress to knee length for me. The volume of the skirt is not insignificant and makes for wonderful twirling of which I am a big fan.
I would say that although you could likely sew it faster than I did, having ME/CFS I pushed myself too hard when sewing this and had to spend several days on the couch resting to gain back my strength before cutting into my next one. I just found myself lost in the moment sewing the rows of patchwork. It was almost addictive seeing the rows come together. Such an enjoyable sew.
So much so that I immediately cut out my second Bow dress again in Liberty using the extension pack and love this one even more. See the next blog post for more details. I’d highly recommend this dress if you are looking for something a little different and that will hold your attention whilst you sew.