 I made my first Ute dress by Schnittchen Patterns some time ago (circa 2016) and was asked by several people for a how to. The pattern is drafted beautifully however the instructions are a little lost in translation. I’ve written up a sketchy step-by-step tutorial for those of the English speaking persuasion with some pictures of a toile I made last week.
Be sure to read through first as the photo’s don’t exactly match the text. It was a bit of test and learn along the way.
And for more of the original pictures see here.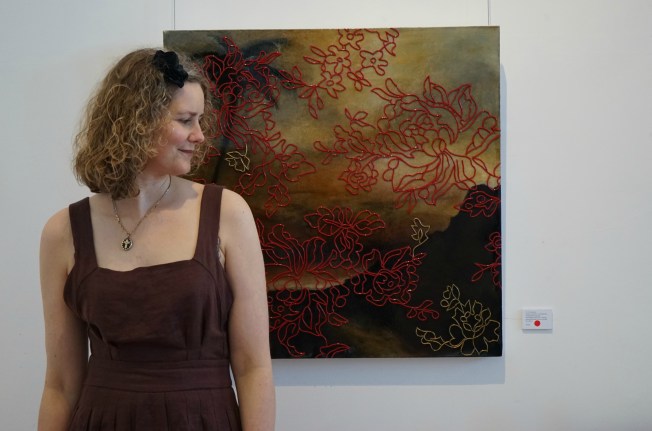
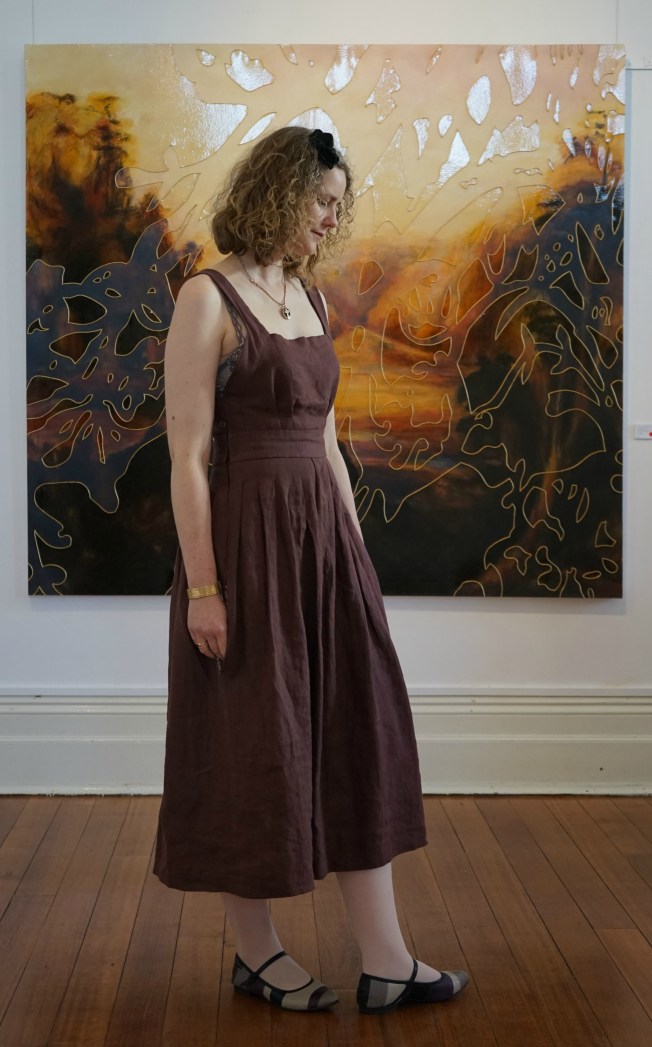
First, prep your pattern pieces and cut your fabric. I went with a straight 40 without any adjustments and cut straight into the PDF. For reference I’m an Australian 12 – 14 but was more of a 12 when the above pictures were taken. If working directly from the PDF I highly recommend highlighting the markings for your darts and pleats. I used Merchant and Mills linen for in OxBlood for my first Ute. The toile is made up in a combination of linen (cut terribly off grain to my eternal shame) and cotton. Iron on fusible interfacing onto one set of the shoulder straps (front and back), and one of the front and back waistband in a light to medium interfacing.
Transfer all markings for the pleats/darts and their direction onto your fabric. I used a frixon pen which comes off using heat to show the pleat marks, direction and length. Make sure you test on a scrap first because it disappears of some fabrics better than others. On a side note the frixon pen marks can also come back should you choose to put your fabric in the freezer or be exposed to cold weather.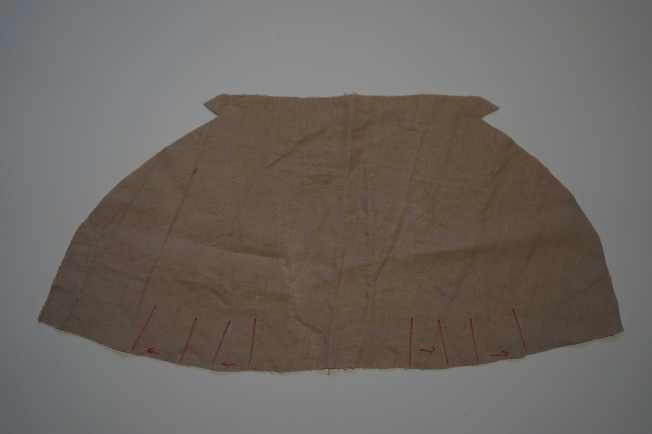 Fold the top edge of the front bodice over 1cm and press. Fold it over a second time at 1cm and press again. Top stitch just shy (close to the fold line) of the 1cm to catch the fabric. Repeat for the back bodice piece.

Pin the front outer shoulder straps (those that are interfaced) to the front bodice piece, right sides facing. Make sure you leave 1cm at the top as shown as this will be caught later when enclosing the facing. Sew at 1cm seam allowance and press the seam allowance into the shoulder strap, leaving left side open at zip mark.
 Pin the back outer shoulder straps (those that are interfaced) to the back bodice piece, right sides facing. Make sure you leave 1cm SA at the top as this will be caught later when enclosing the facing. Sew at 1cm seam allowance and press the seam allowance into the shoulder strap.
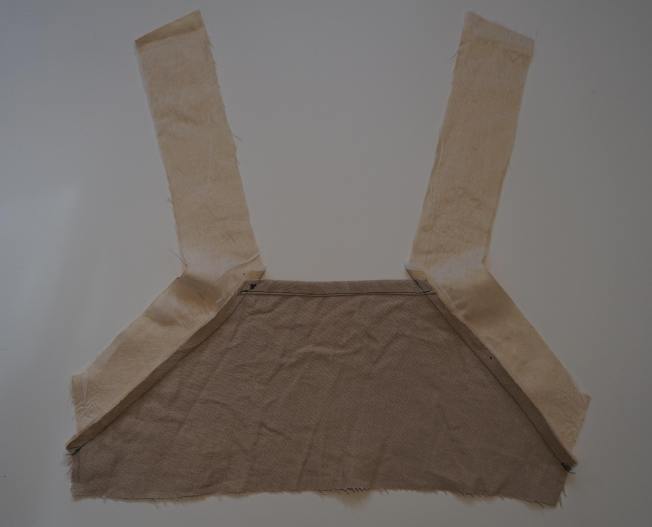

Sew the a front shoulder strap to the back shoulder strap on both shoulders so that the front and back bodice pieces form one piece.
 Sew the (seperate) inner front shoulder strap to the back shoulder strap and press open shoulder seam.
Pin the inner facing to the outside seam of the front bodice/shoulder straps/back bodice and stitch at 1cm SA. Trim back 2/3 and under-stitch.
 Press a 1cm SA for the inside front bodice/shoulder strap/back bodice and pin. Slip stitch the inner seam from front bodice, across the shoulder seam and down the back bodice. I’ve forgotten to leave the side seam open on the LHS for the zip here, so just imagine. You can see where I’ve unpicked in a later pic.
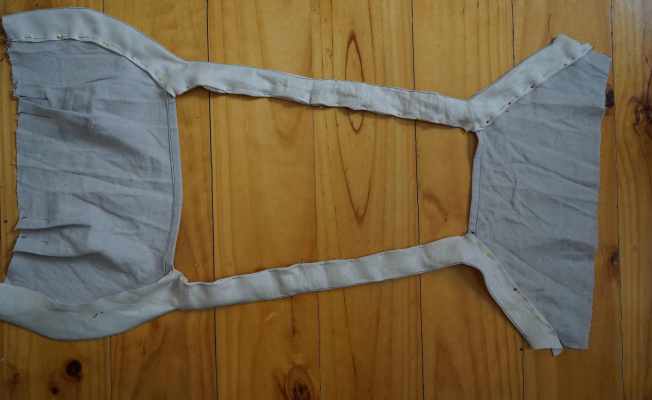
You should now have a lovely bodice piece that looks something like this (with some SA on the LHS for the zip on the front bodice piece):

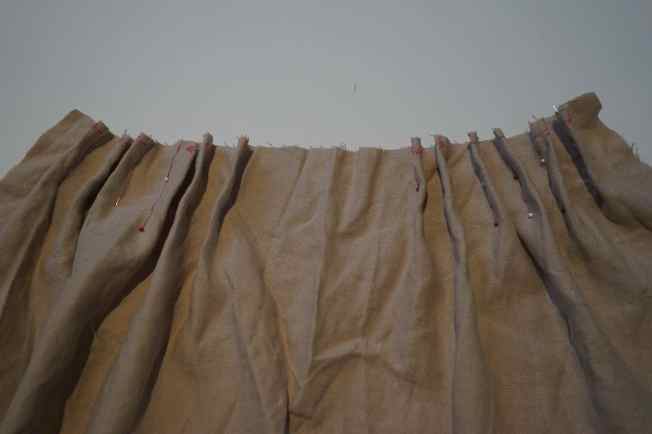
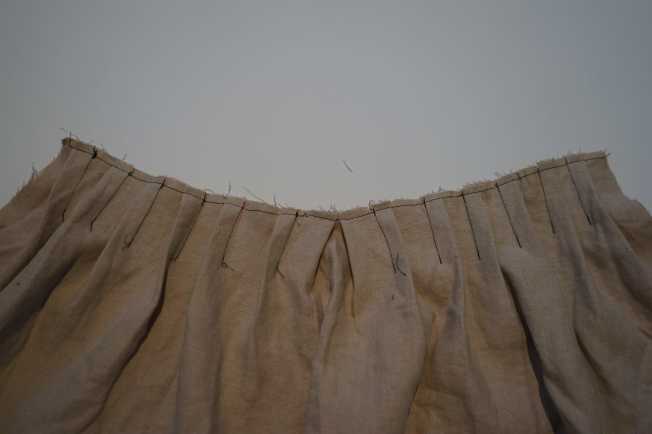
Mark the pleats and directions on both the front and back skirt pieces. Stitch down the length indicated on each knife pleat, and then make box pleat using fabric available at the centre front and centre back. You should end up with 6 knife pleats on either side of the box pleat (front and back). Press and baste pleats into place. Overlock side seams of skirt.
Attach the lower waistband edge to the upper skirt edge for both front and back. Stitch at 1cm SA.
Sandwich the lower edge front bodice between the upper waistband (attached to the skirt) and inner upper waistband. Stitch at 1cm, leaving 1cm at edge. This will be caught when sewing the side seam. Complete the same for back bodice.
Stitch the RHS of the dress from the hem line up to the top edge of the waistband. Hand stitch inner side seam of waistband. Fold over and hand stitch down back bodice side as pinned. Note that I had to unpick 1cm SA to allow me to fold the fabric down neatly. 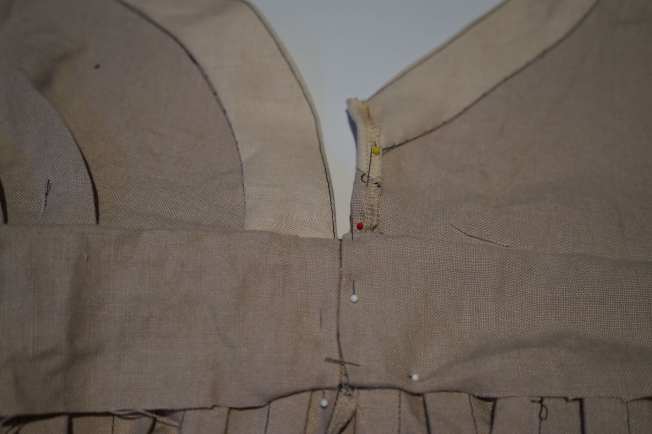 On LHS of dress, stitch from the hem line up to the zipper marker. I inserted the zipper by hand using the tutorial from Sewaholic. I found this the easiest way to get the side seams to match. Otherwise baste your zip in before setting it in permanently. (Note on the finished dress my zip is on the RHS….)
Finish the inside of the dress by pressing the lower waist seam allowance up 1 cm and slip stitching it to the upper skirt.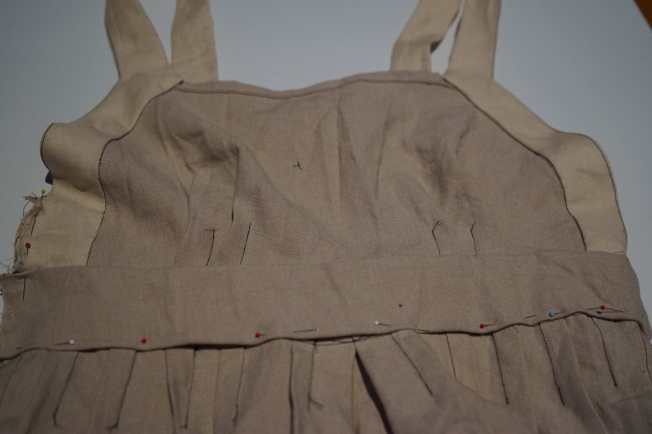 Make 2 button loops on RHS front bodice. I used the tutorial by Tessuti to create these. Stitch on two buttons in corresponding markings on back RHS bodice piece.
I added 2 buttons to match on the LHS.
Turn the hem up and stitch.


Find you most lovely lingerie to provide side bewb coverage and you are ready to discover the streets of Berlin.
I hope you find this somewhat useful. If you have any questions, pop over to my instagram feed @magdalenesmuse and send me a message.
Hopefully this will give some guidance into making the Ute dress. After making a toile again, I think I’m ready to make another linen Ute for summer.
Curtsy

Photos by Pips and Bruce
Pattern by Schnittchen Patterns
Fabric is Oxblood linen from Merchant and Mills

Dear Pips, thank you so much for the tutorial! This is so wonderful… Since one year all schnittchen patterns come with illustrations but the Ute Dress still was released without and I know it’s kind of confusing assembling all the pattern pieces. Thank you so much! Best, Silke
Dear Pips, thank you so much for the tutorial! This is so wonderful… Since one year all schnittchen patterns come with illustrations but the Ute Dress still was released without and I know it’s kind of confusing assembling all the pattern pieces. Thank you so much! Best, Silke
Silke, it’s such a beautiful pattern. I love my Ute dress and plan to bring her over to Germany in a few weeks time. Pips xx
Thank you for this tutorial. The instructions on the pattern with no pictures are so hard to follow! Your Ute dress looks lovely.
I hope you find it helpful : )